Thank you for purchasing our extension. If you have any questions that are beyond the scope of this document, please feel free to contact us via [email protected]
Updated: 10/09/2020 | By: Magenest | Support Portal: http://servicedesk.izysync.com/servicedesk/customer/portal/7
...
| Table of Contents | ||||||
|---|---|---|---|---|---|---|
| ||||||
| Table of Contents | ||||||
|
...
Introduction
Features
For admin
...
On the Admin sidebar, go to Stores > Configuration > Magenest > Event Ticket.
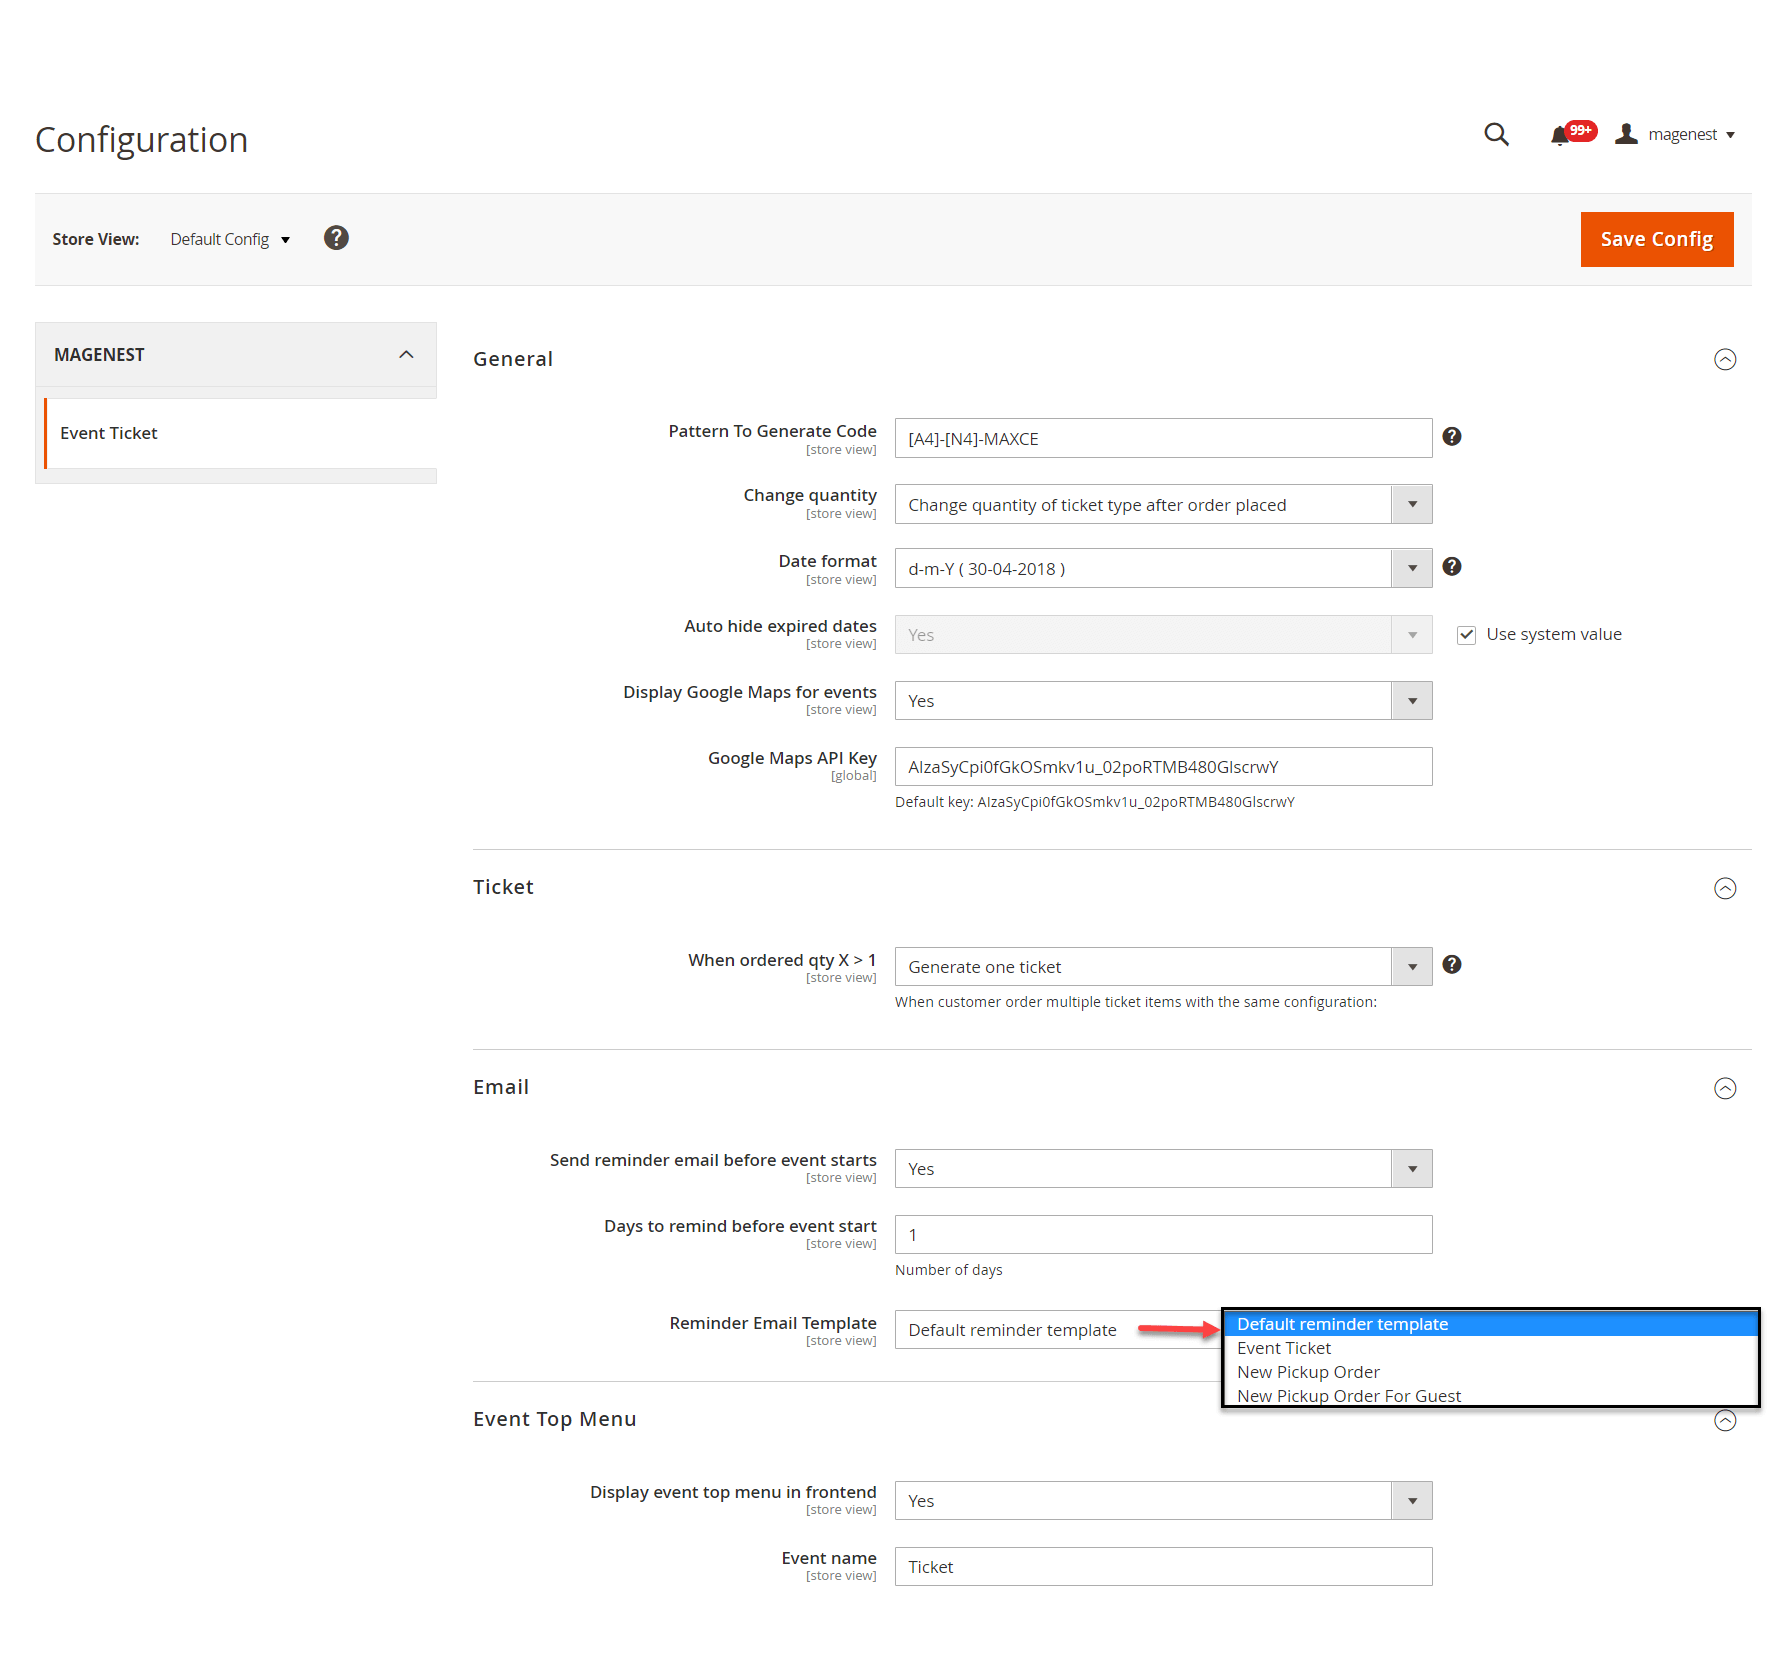
![]() General:
General:
- Pattern to generate code: The ticket code format. [A2] is to generate 2 random characters, [N4] is to generate 4 random numbers while "Magenest" is the hard code
- Change quantity: You can choose to deduct the ticket stock after the order is placed or is invoiced
- Date format: You can choose from 16 available date formats for the event
- Auto-hide expired dates: Select Yes to hide the expired date from the calendar
- Display Google Maps for events: Choose Yes to display Google map for each event location
- Google Map API Keys: Fill in your Google API Keys to integrate Google map. Learn more
...
- Send reminder email before event starts: Choose Yes to send reminder email of the events to customers
- Days to remind before event starts: Enter the number days before the event in order to send reminder emails
- Reminder Email Templates: Assign the email template to send a reminder email. You can create an email template in Marketing > Email Templates

Below is the default email template:
Email Template
1 |
|
![]() Event Top Menu
Event Top Menu
- Display event top menu in frontend: Select Yes to enable the event page in the menu bar on the front end
- Menu name: Enter the event name to display in the Menu bar
...
You can select between 2 default ticket template designs.
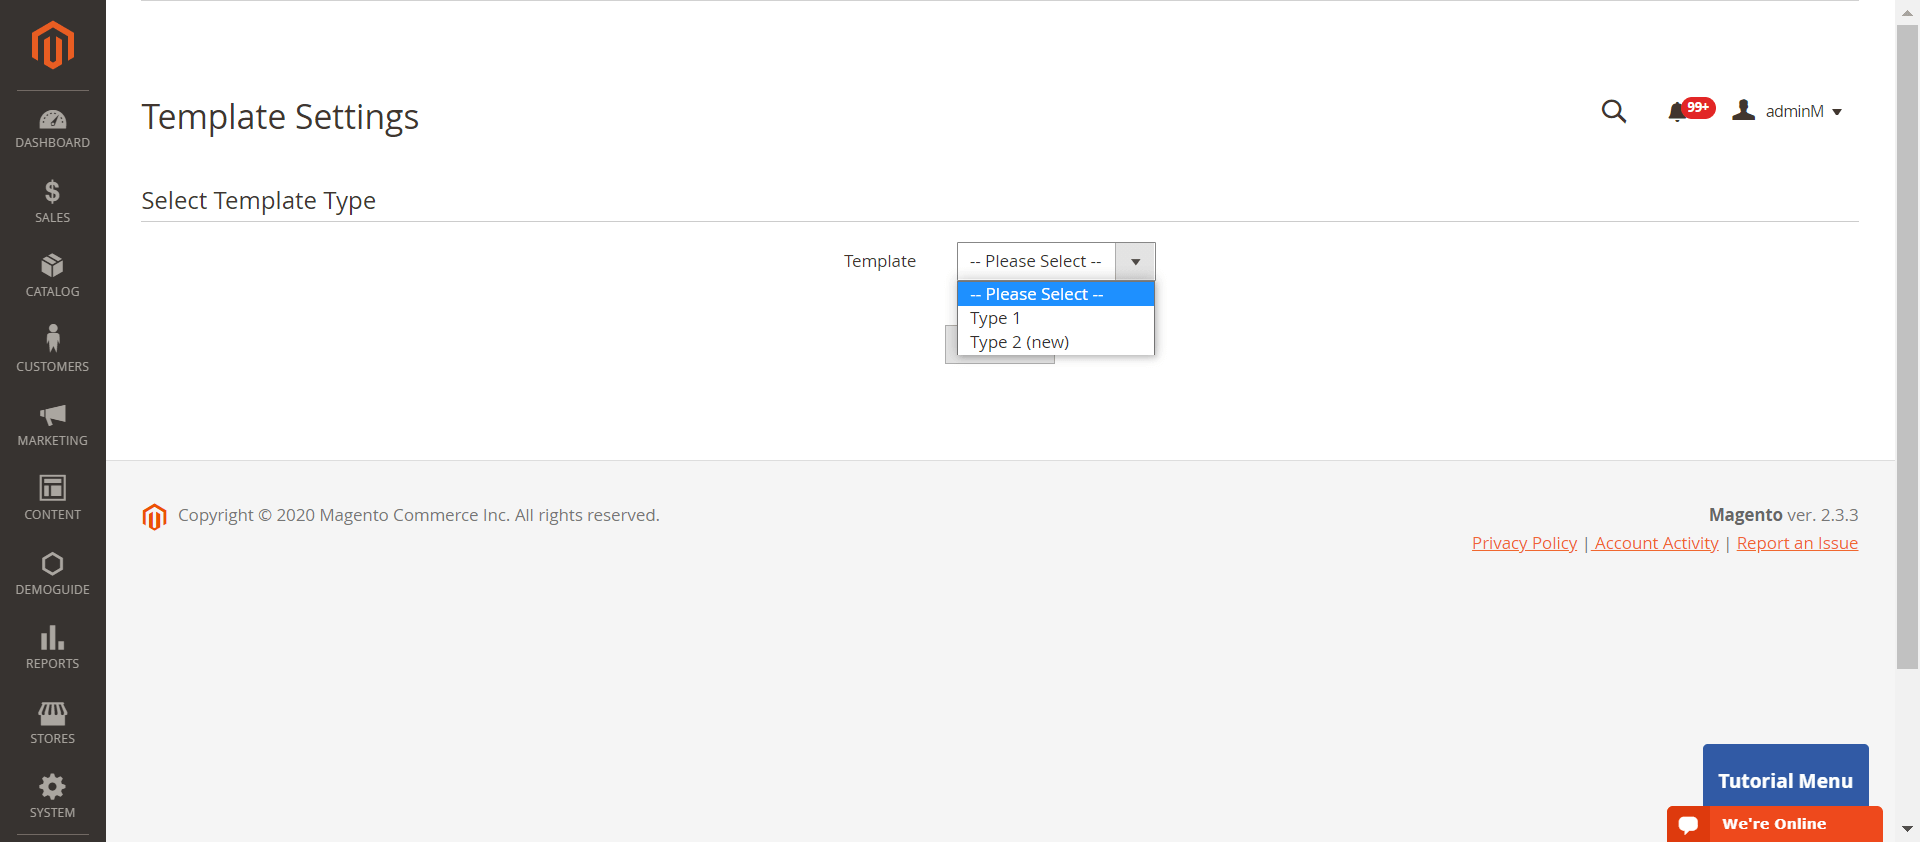
Template Type 1:
Template Type 2:
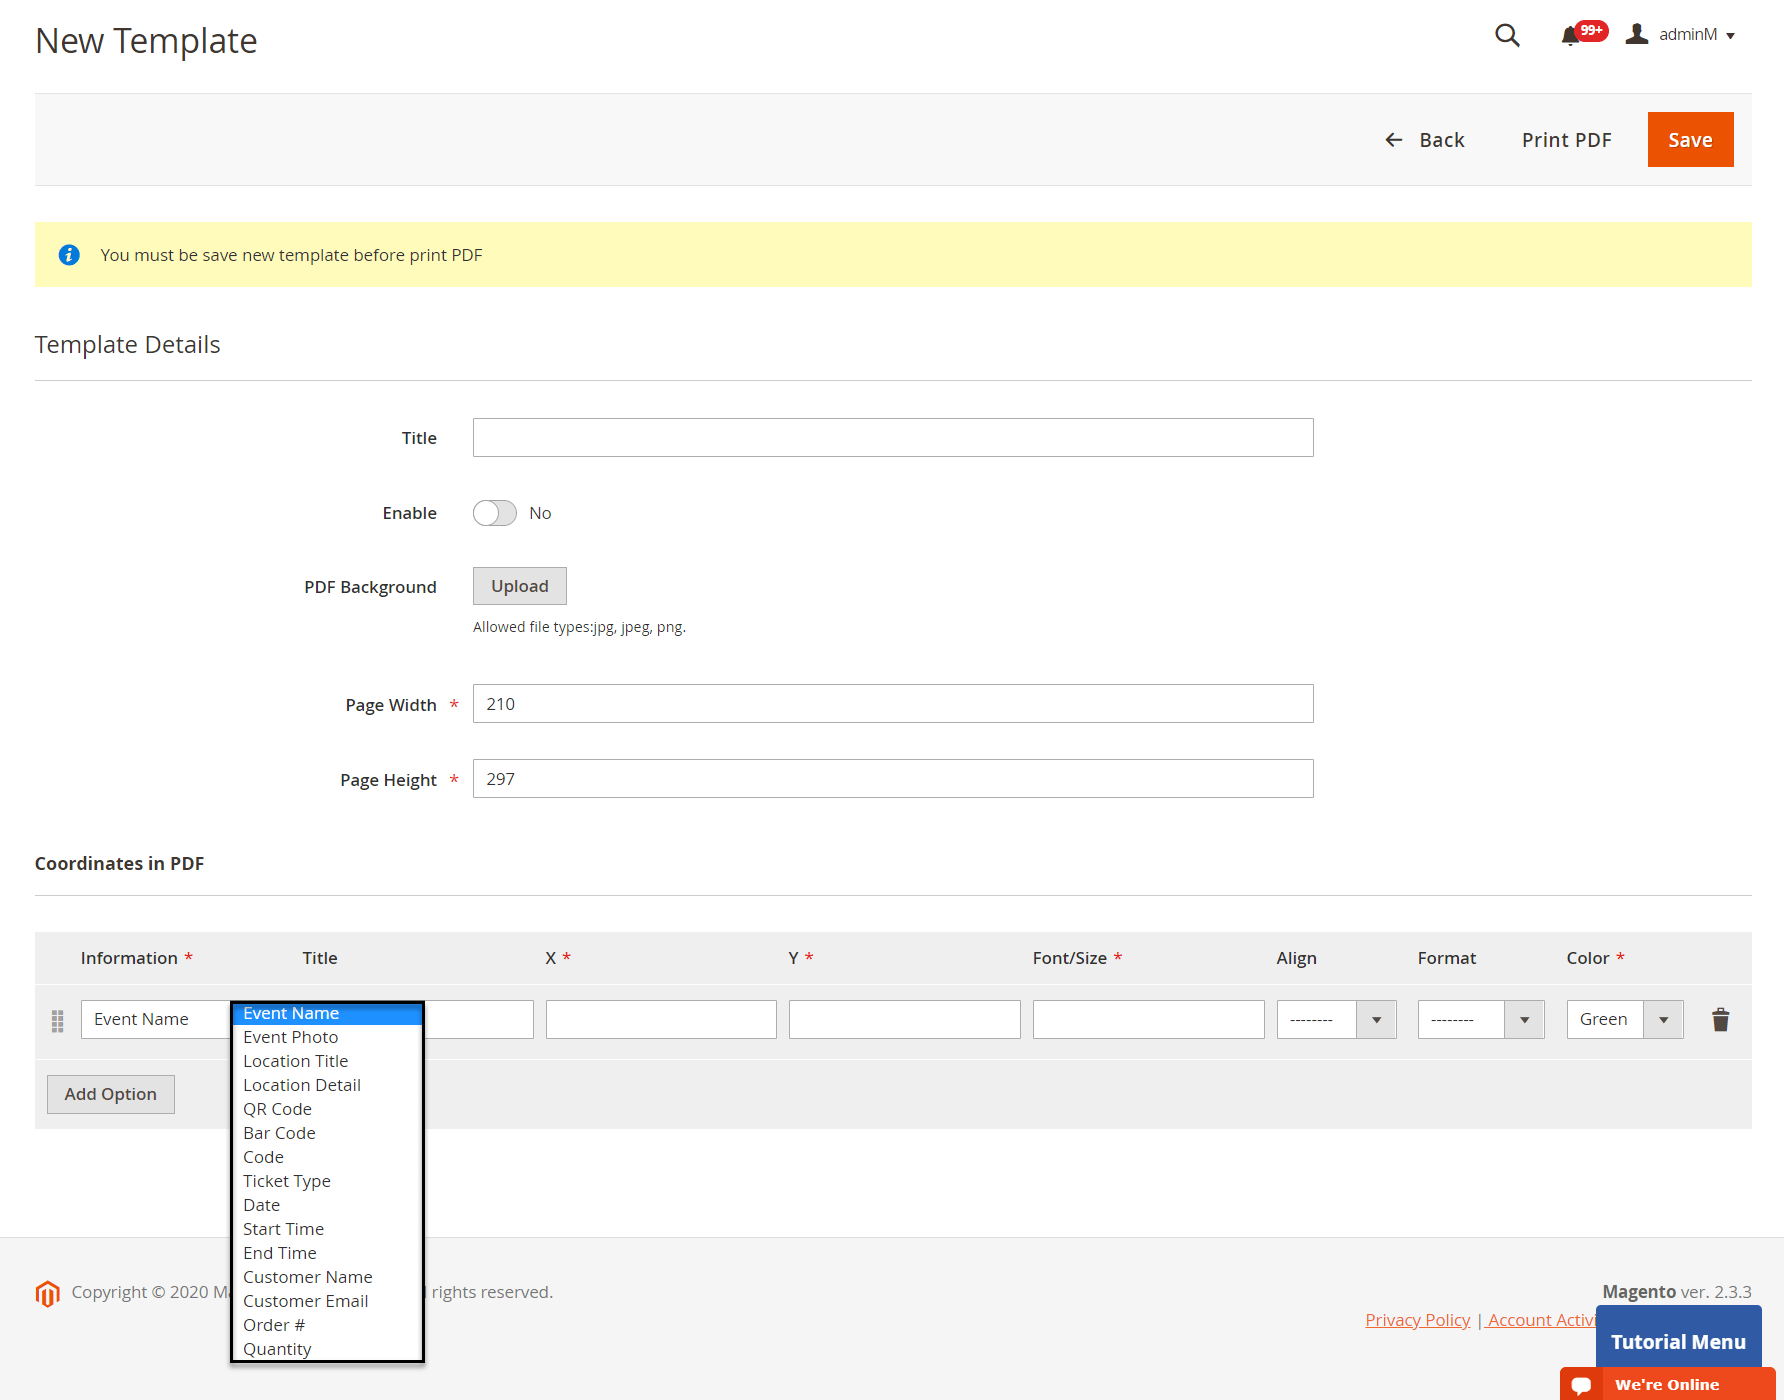
One thing with our new PDF template (Type 2) is that you can click on PDF Content > HTML Content > Show Editor, you'll be able to use Drag and Drop action to design the template,
...
You can use the Default Email Template or you can customize your own email template in Marketing > Email Template. Any template created in there will be listed in the email template drop-down for you to select.

Below is the default email template:
| Code Block | ||||||||
|---|---|---|---|---|---|---|---|---|
| ||||||||
{{template config_path="design/email/header_template"}}
<p>{{trans "Welcome to %store_name." store_name=$store.getFrontendName()}}</p>
<ul>
 <li><strong>{{trans "Event Name: "}}</strong> <em> {{var title}}</em></li>
 <li><strong>{{trans "Customer Name: "}}</strong> {{var customer_name}}</li>
 <li><strong>{{trans "My Code: "}}</strong> {{var ticket_code}}</li>
 <li><strong>{{trans "Location Title: "}}</strong> {{var location_title}}</li>
 <li><strong>{{trans "Location Detail: "}}</strong> {{var location_detail}}</li>
 <li><strong>{{trans "Date: "}}</strong> {{var date}}</li>
 <li><strong>{{trans "Time: "}}</strong> {{var time}}</li>
 <li><strong>{{trans "Quantity: "}}</strong> {{var qty}}</li>
 <li><strong>{{trans "Option: "}}</strong> {{var option_type}}</li>
</ul>
{{template config_path="design/email/footer_template"}} |
...
Assign the email template to send a reminder email. You can create an email template in Marketing > Email Templates
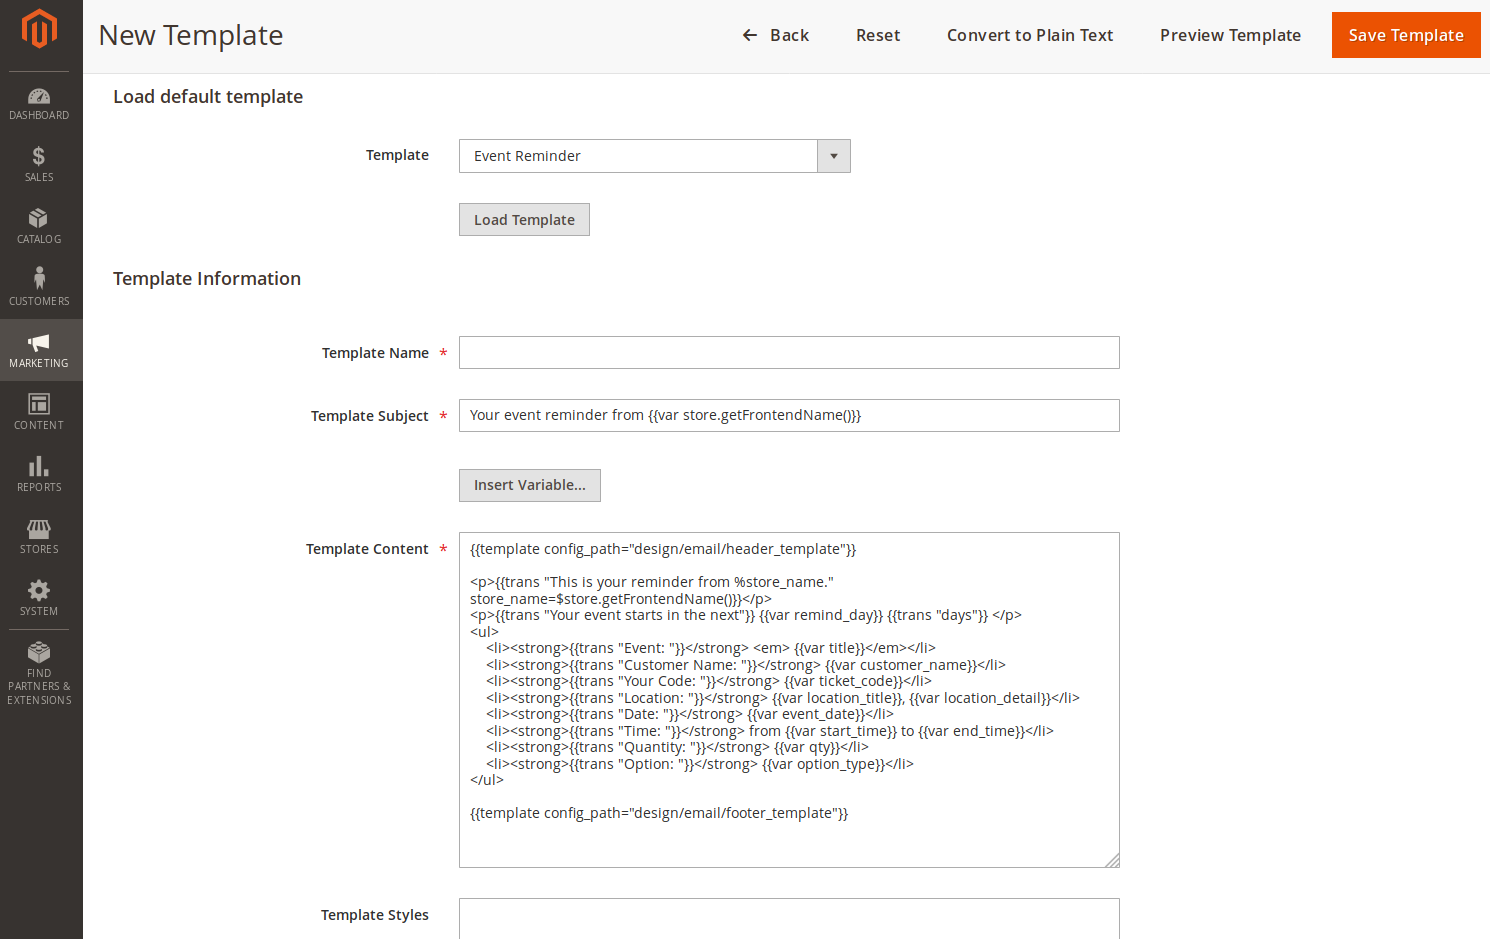
Below is the default email template:
| Code Block | ||||||||
|---|---|---|---|---|---|---|---|---|
| ||||||||
{{template config_path="design/email/header_template"}}

<p>{{trans "This is your reminder from %store_name." store_name=$store.getFrontendName()}}</p>
<p>{{trans "Your event starts in the next"}} {{var remind_day}} {{trans "days"}} </p>
<ul>
	<li><strong>{{trans "Event: "}}</strong> <em> {{var title}}</em></li>
	<li><strong>{{trans "Customer Name: "}}</strong> {{var customer_name}}</li>
	<li><strong>{{trans "Your Code: "}}</strong> {{var ticket_code}}</li>
	<li><strong>{{trans "Location: "}}</strong> {{var location_title}}, {{var location_detail}}</li>
	<li><strong>{{trans "Date: "}}</strong> {{var event_date}}</li>
	<li><strong>{{trans "Time: "}}</strong> from {{var start_time}} to {{var end_time}}</li>
	<li><strong>{{trans "Quantity: "}}</strong> {{var qty}}</li>
	<li><strong>{{trans "Option: "}}</strong> {{var option_type}}</li>
</ul>

{{template config_path="design/email/footer_template"}} |
...