Thank you for purchasing our extension. If you have any question that is beyond the scope of this document, do not hesitate to leave us an email.
Created: 20/09/2016 | By: Magenest | Support Portal: http://servicedesk.izysync.com/servicedesk/customer/portal/40
| Table of Contents |
|---|
Introduction
Appointment Booking extension by Magenest is a solution for service providers, travel agency,... to efficiently manage bookings and reservations on Magento 2 store.
For more information, please visit: http://store.magenest.com/magento-2-appointment-booking.html
Features
- The booking system is implemented, it will automatically send an email to customers according to the status.
- The booking system supports multiple currencies.
- Admin can easily create special date price rule, recurring price rule, and staff price rule for products.
- Admin can also create schedule for individual product assigned to a staff.
- Admin can define a staff's category and assign a plus of price when the staff is chosen.
- Admin can define special dates to better evaluate products during unique occasions.
- Admin can view booked appointments in Grid mode, Full Calendar mode or sync to their Google Calendar.
- Admin can define default booking status for newly ordered products.
- Admin can assign a template email for a booking status on Configuration.
- Customer can send a cancel request to their booked appointments within a click.
- Customer can easily choose available time range within their chosen day and a available staff.
- Customer now can add many staffs in many time intervals in front end.
Customer can steal booking product from the other customer cart.
System Requirements
Your store should be running on Magento Community Edition version 2.1.x., 2.2.x
Initial Configuration
Order Configuration
Go to Store > Configuration > Appointment Booking > Order Configuration, you can choose email sender as well as email template for emails sent to customers and staffs whenever the booking order status is changed.
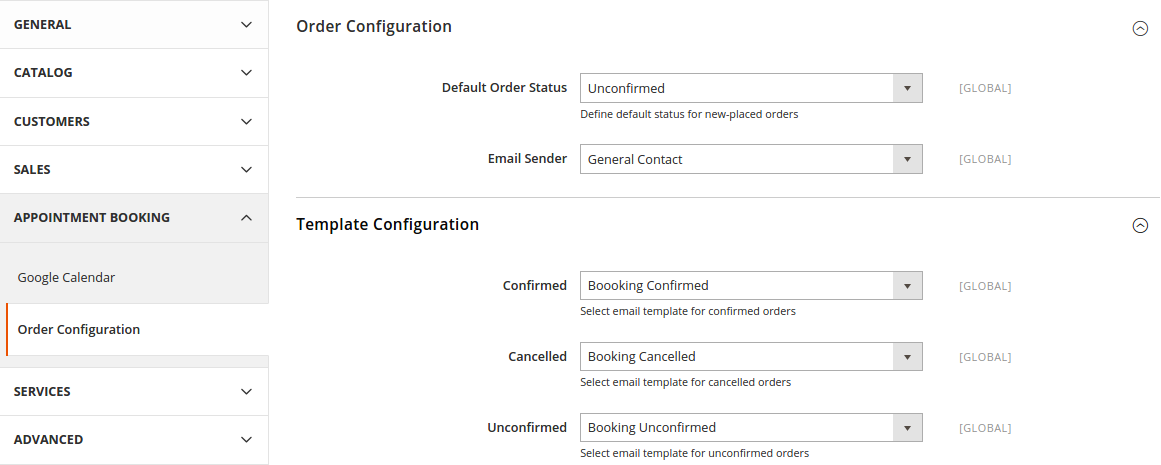
- Default Order Status: specify the default status of newly placed booking orders.
- Email Sender: specify the identification of the sender.
- Template Configuration: email templates for each booking status of an order. You can create email templates using HTML in Marketing > Email Templates

Here are some template variables that you can embed in your template:
- customer: customer email
- customerName: customer name
- store: store name
- itemName: name of the ordered item
- bookingStatus: new booking status of the item
- specialDate: will be available if there is any special date
- bookedDate: booked date
- start: start time
- end: end time
- staffName: staff name
Google Calendar
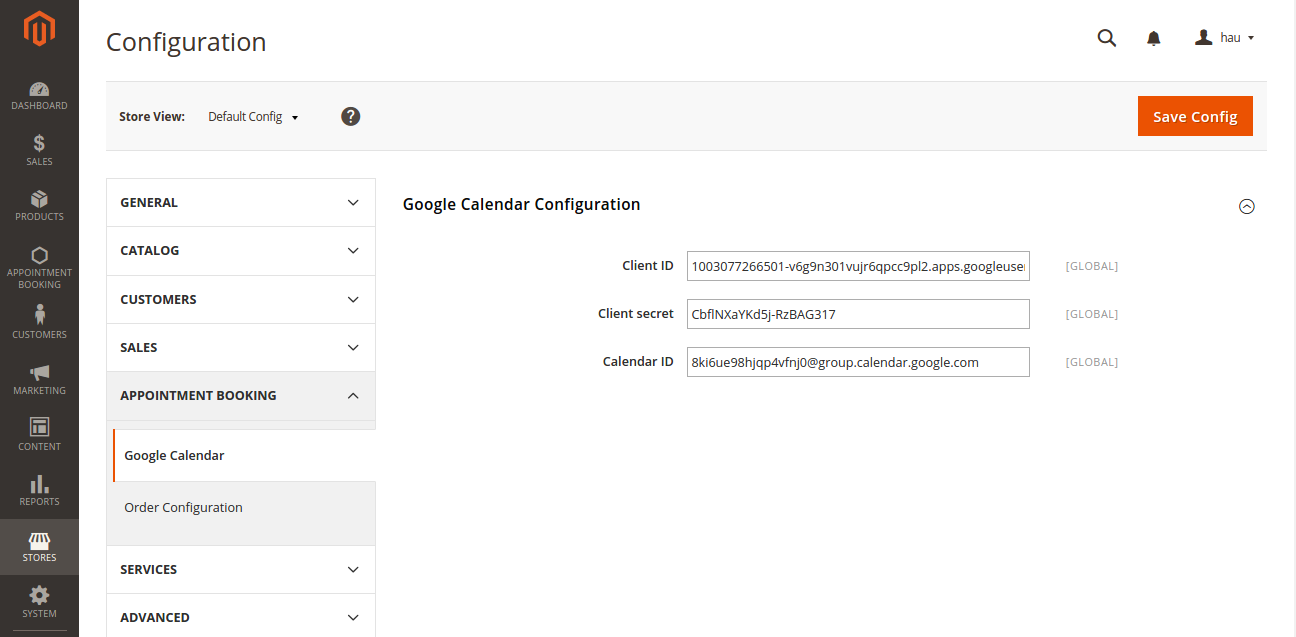
If you want to synchronize booking orders from Magento 2 to your Google Calendar account, you must have 3 keys (client_id, client_secret, calendar_id). These three keys must be created from only one google account. On the left menu bar, go to Stores> Configuration > Appointment Booking > Google Calendar.
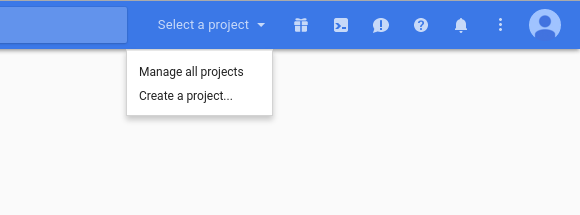
When it comes to getting these parameters, things get a bit tricky. First off, in order to get Client ID and Client Secret, go to Google Developer Console and create a new project by clicking on Select a project > Create a project
Enter your project title and click on Create

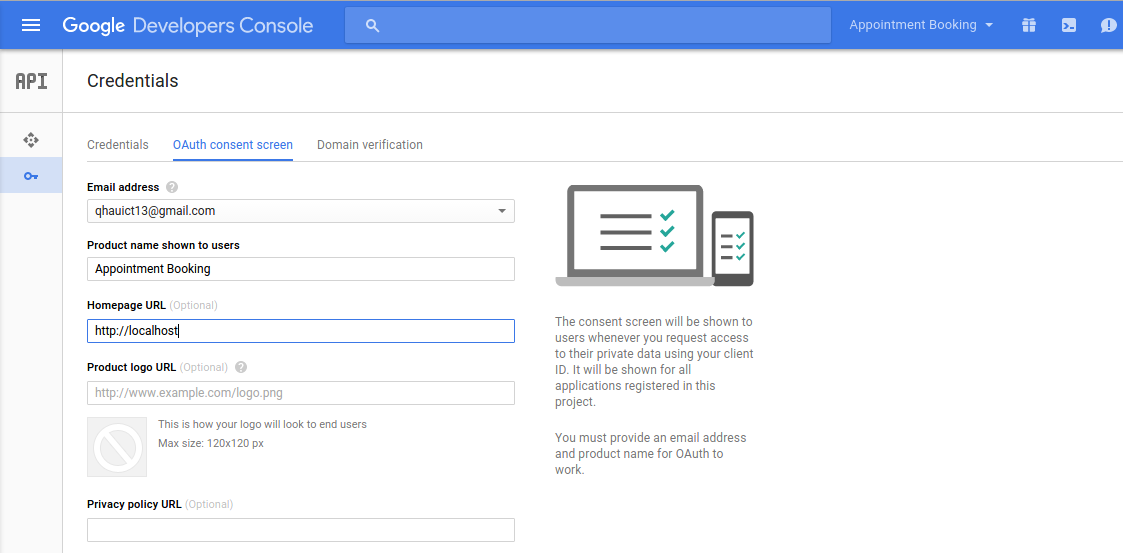
Next, click on Enable and Manage APIs, you will be taken to the API Manager page. Click on Credential tab of the page and select OAuth Consent Screen and enter Product Name.
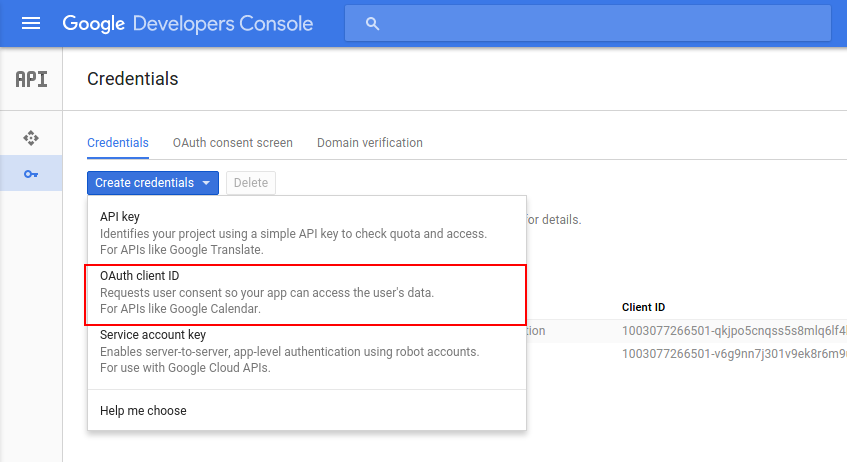
Click on Save, now you will be able to create Credentials for your project. Select Credentials, click on Create credentials > OAuth client ID
Remember to tick the Other box in Application type and enter the name of your project, then click Create. You will be immediately informed of your Client ID and Client secret keys.
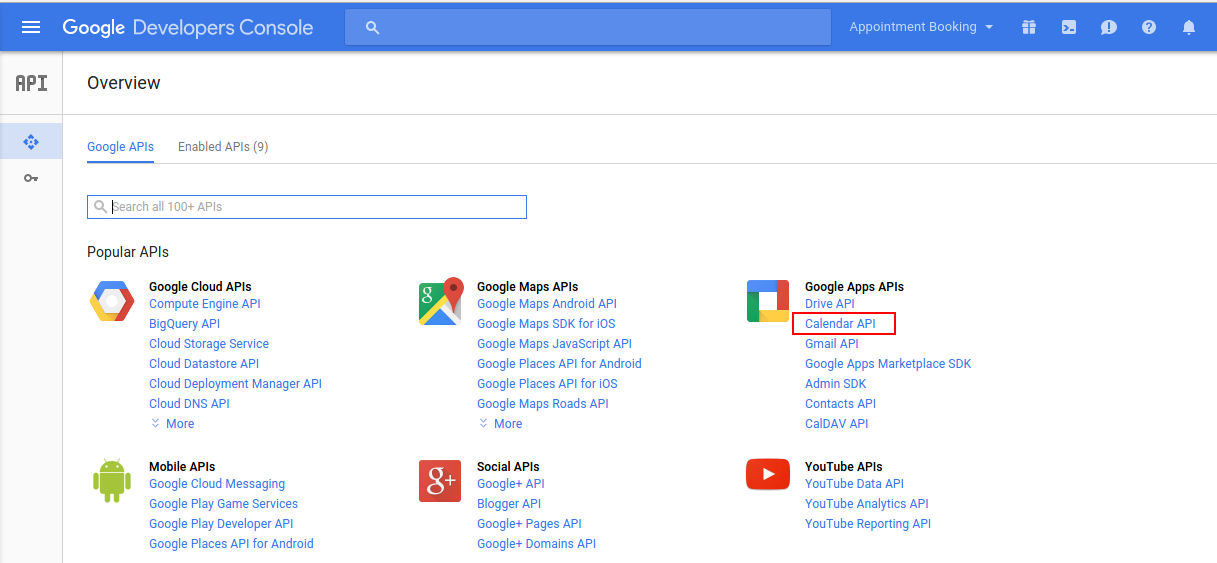
Now go to Overview tab, select Calendar API and enable the API.
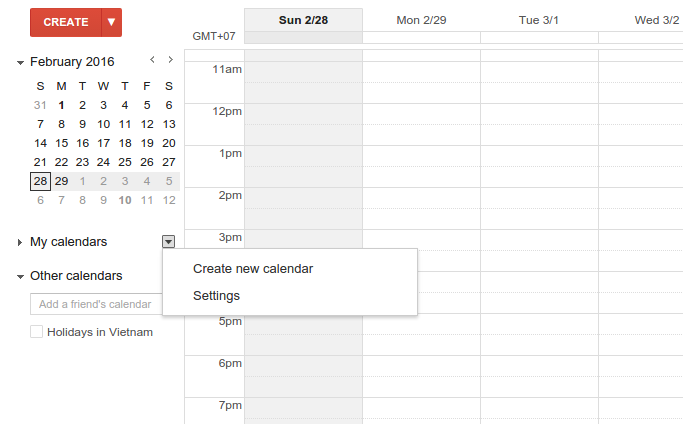
Go to your Google Calendar and create a new calendar.
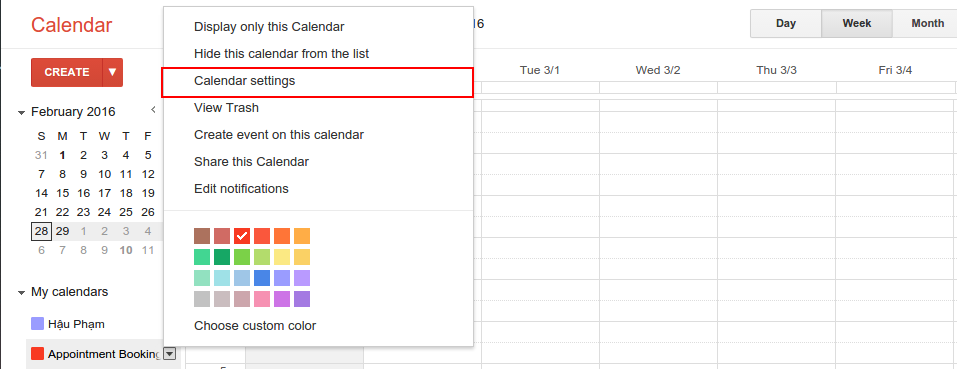
Fill in the inputs with your desired information for the calendar and click on Save Calendar. Then go to the settings page of your calendar.
Scroll to the bottom of the page, you should be able to see the Calendar Address section and get the Calendar ID.
Price Rules
We have implemented 3 kinds of price rules: Staff Price Rules, Special Date Price Rules and Recurring Price Rules. These rules will add versatility to the effort of better evaluating price of bookings.
With Staff Price Rules, go to Staff Price Rules tab in Appointment Booking menu.
In the table, you can see all price rules that have been set. Add a new one by clicking on Add New Staff Rule button.
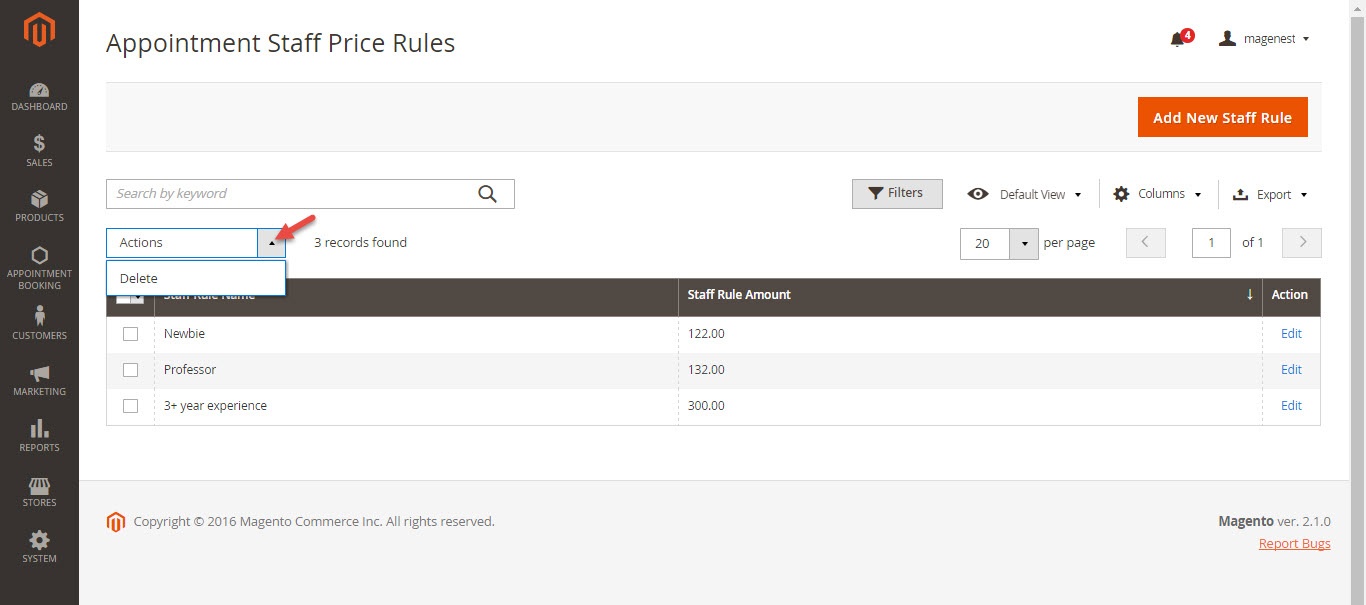
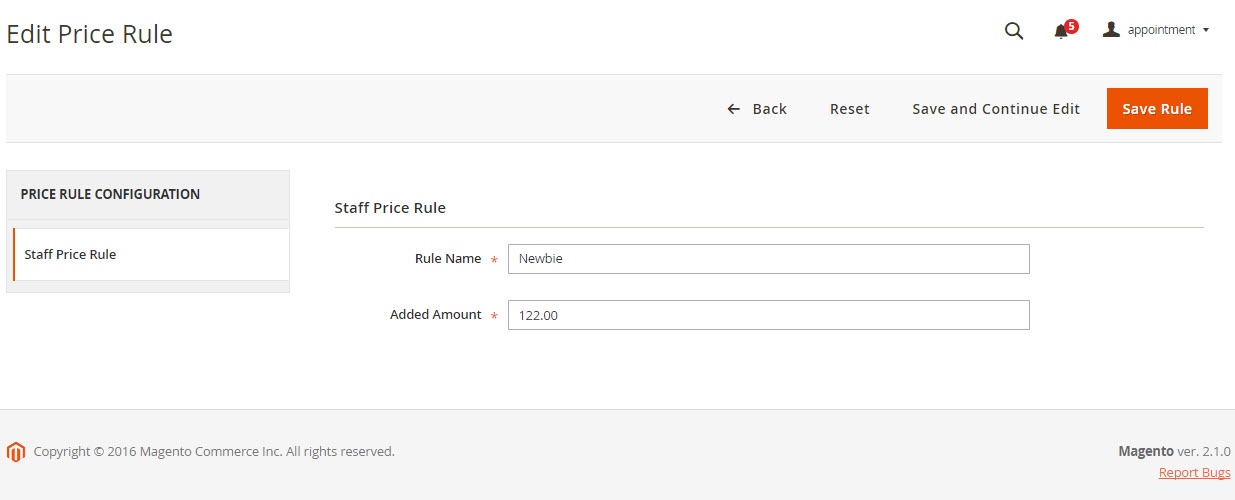
Added Amount : When the staff with the expertise is chosen, a corresponding amount will be added to the basic total price (we will illustrate this in a later section). We recommend you to add a default type with Rule Amount set to 0 to prevent any abnormal functionality of the extension. Normally, the more experienced the staff, the higher payment he gets.
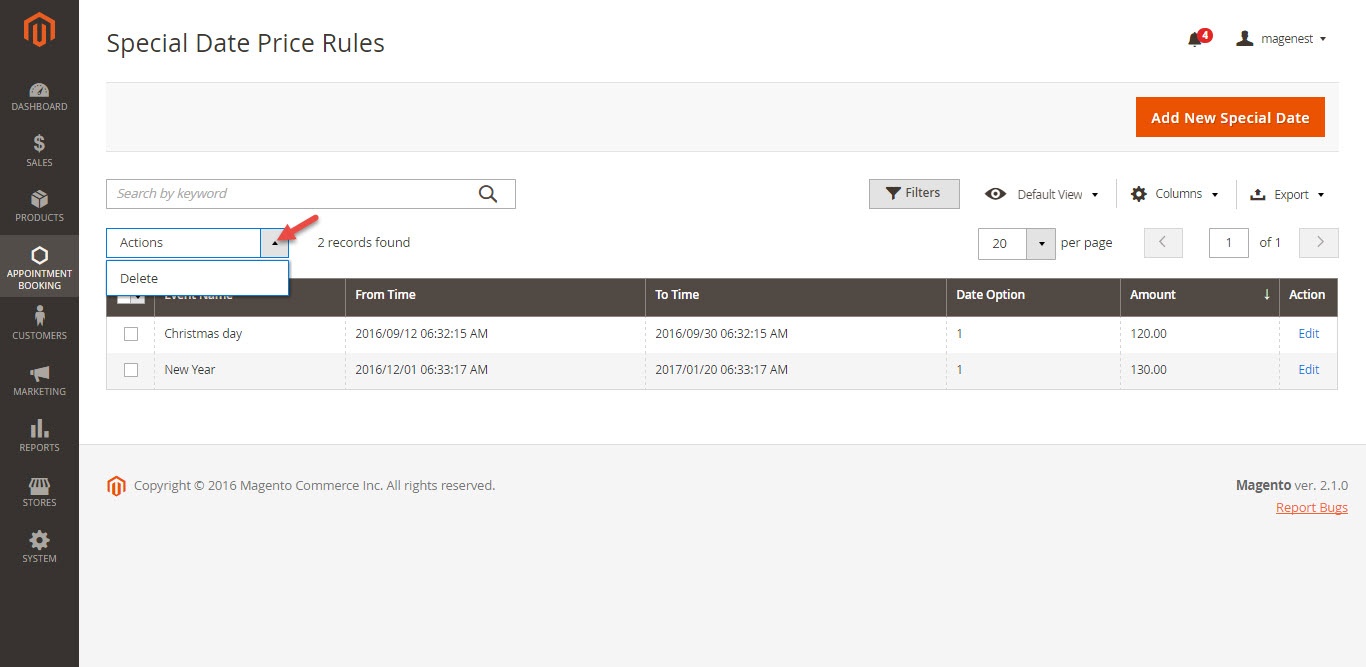
Then we have Special Date Amount, which will add or subtract a certain amount of money when a certain date is selected.

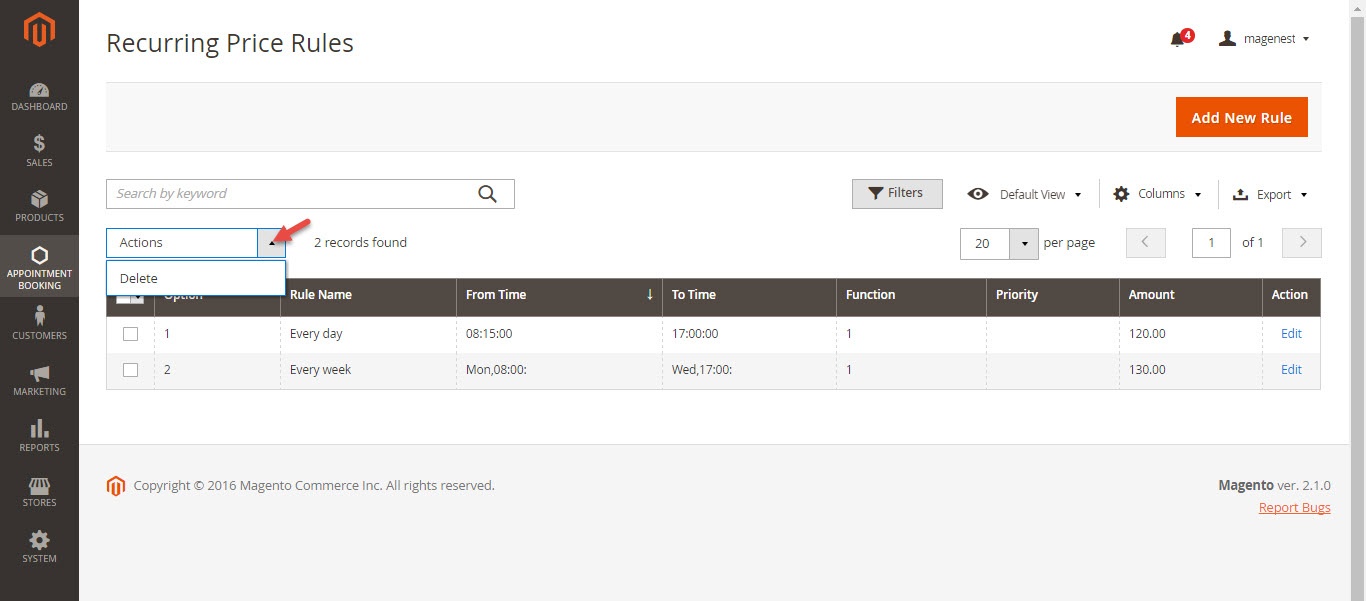
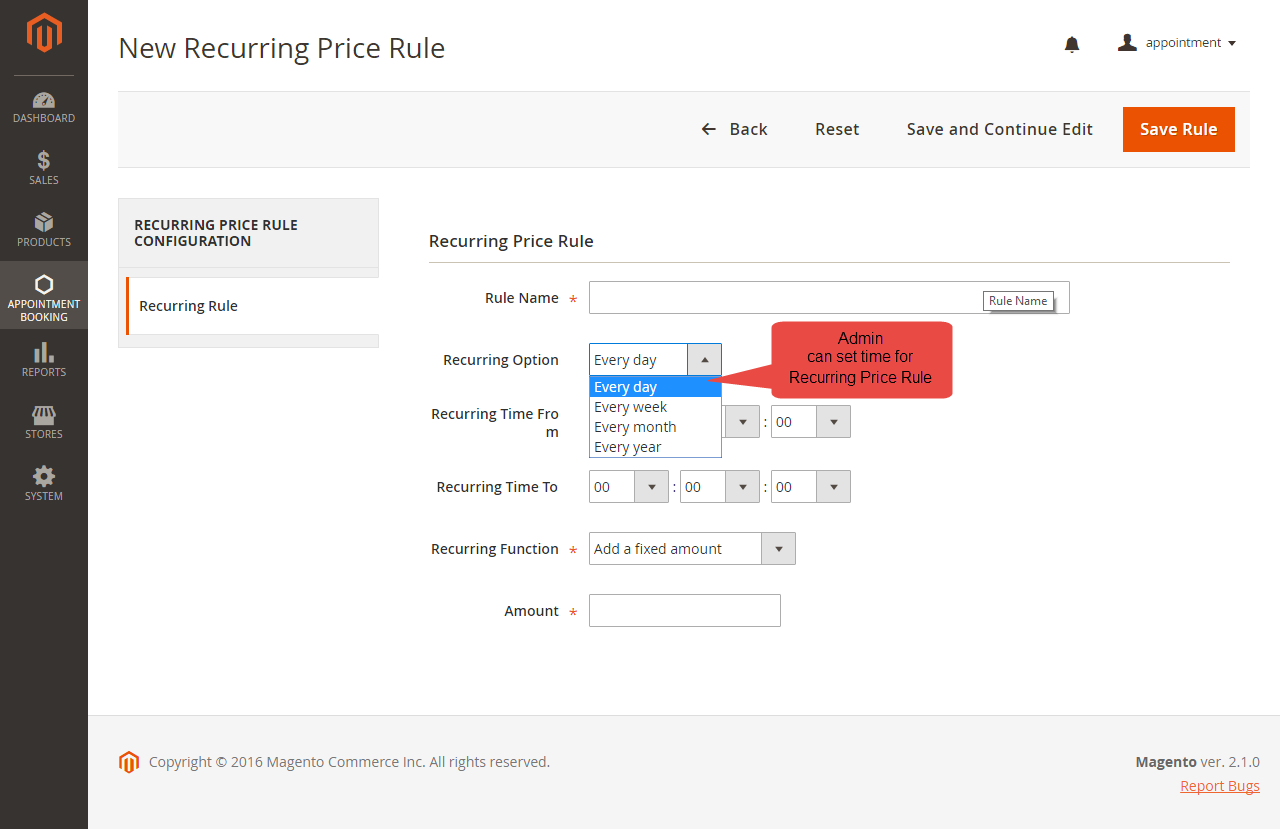
Another price rules - Recurring Price Rules allows you to create recurring price rules for Time Activity such as every day, every week, every month, every year.
Main Features
Product Schedule
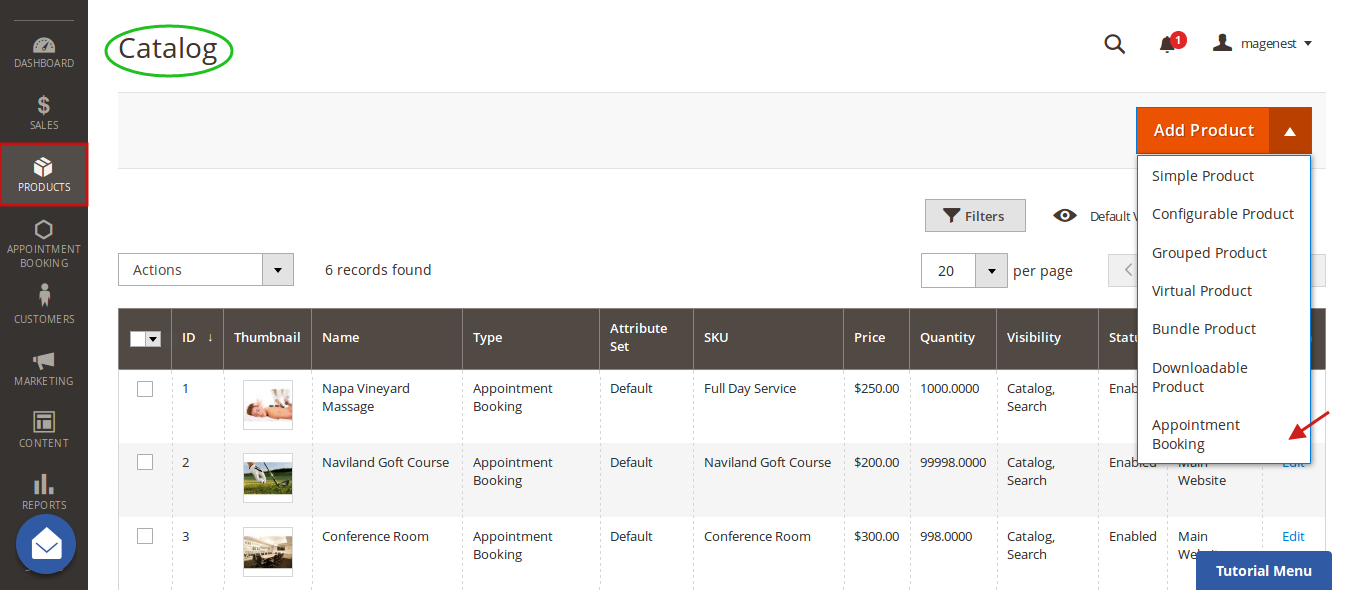
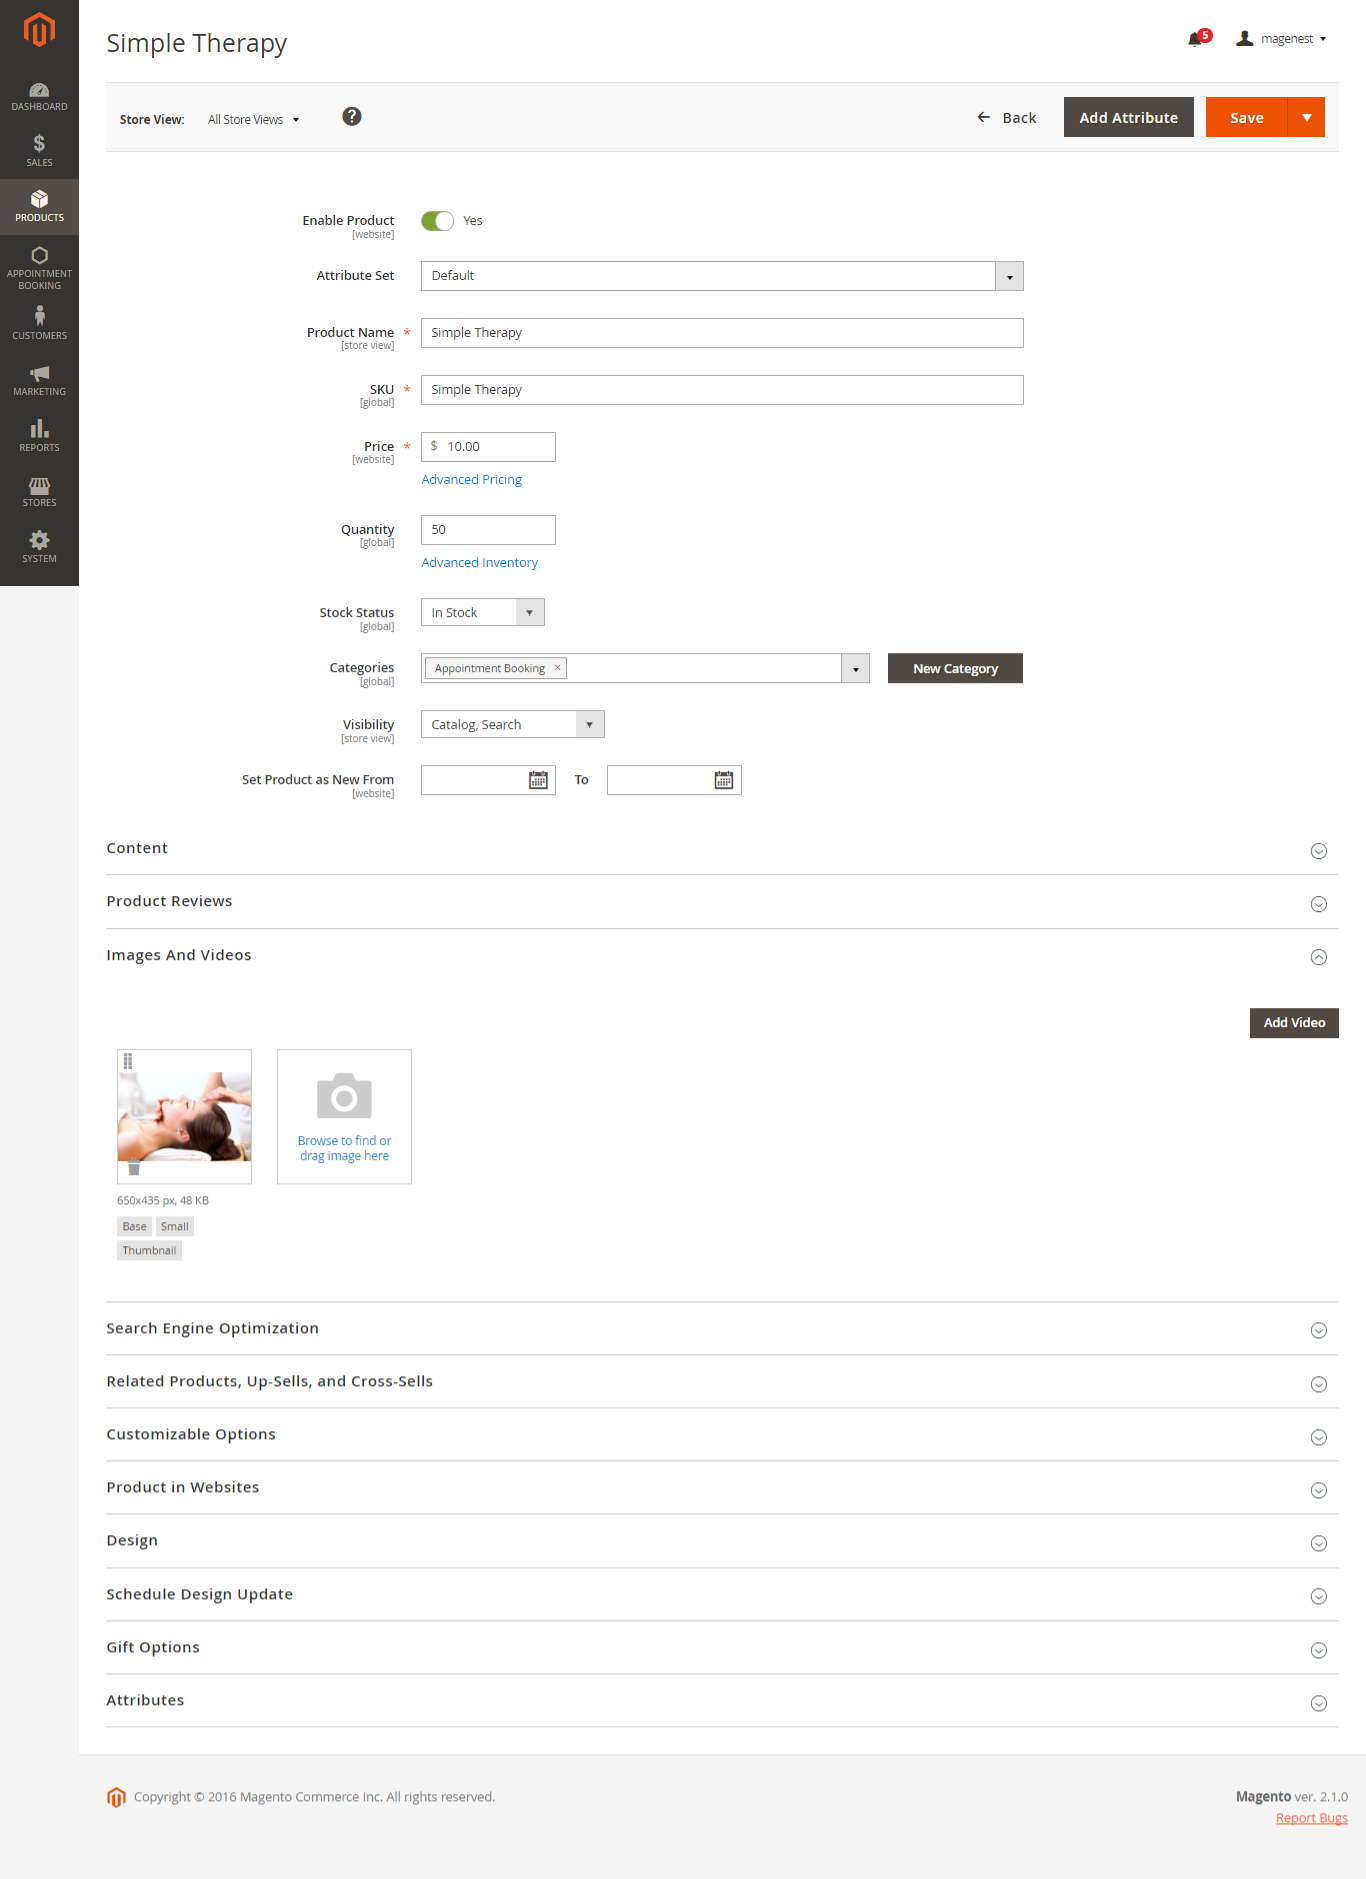
The extension added a new product type called Appointment Booking into the system, so you can add a new product of type Appointment Booking from scratch.
In the product detail page, Appointment Booking products display as follows.
Staff Information
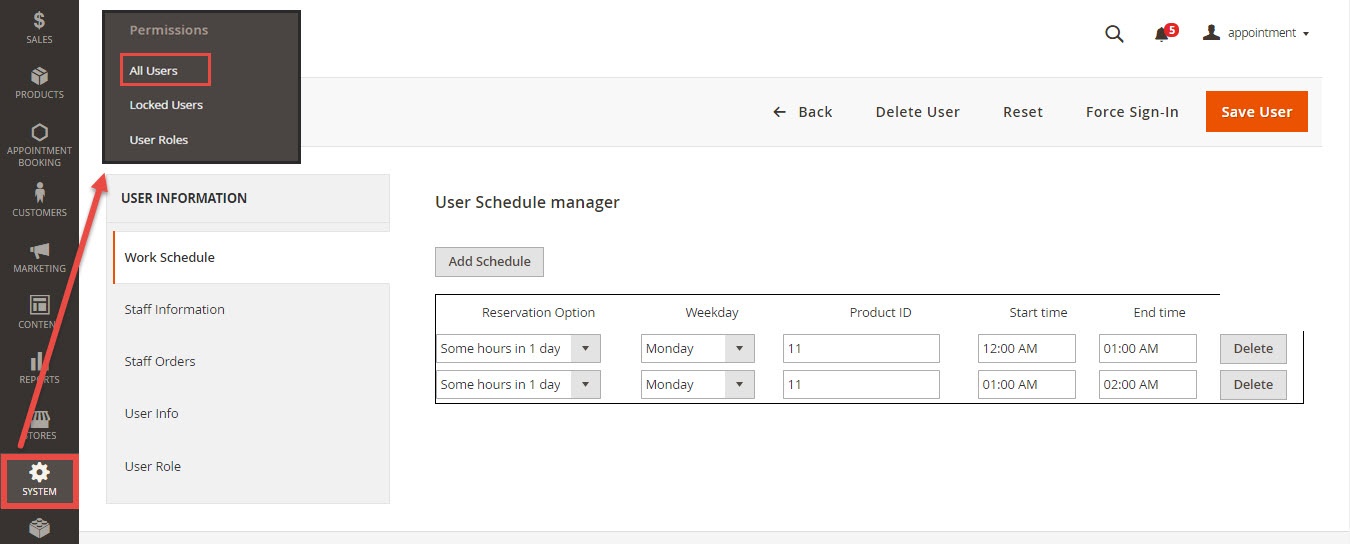
In the backend, go to System > All Users > Add New User button to add new staffs into store.
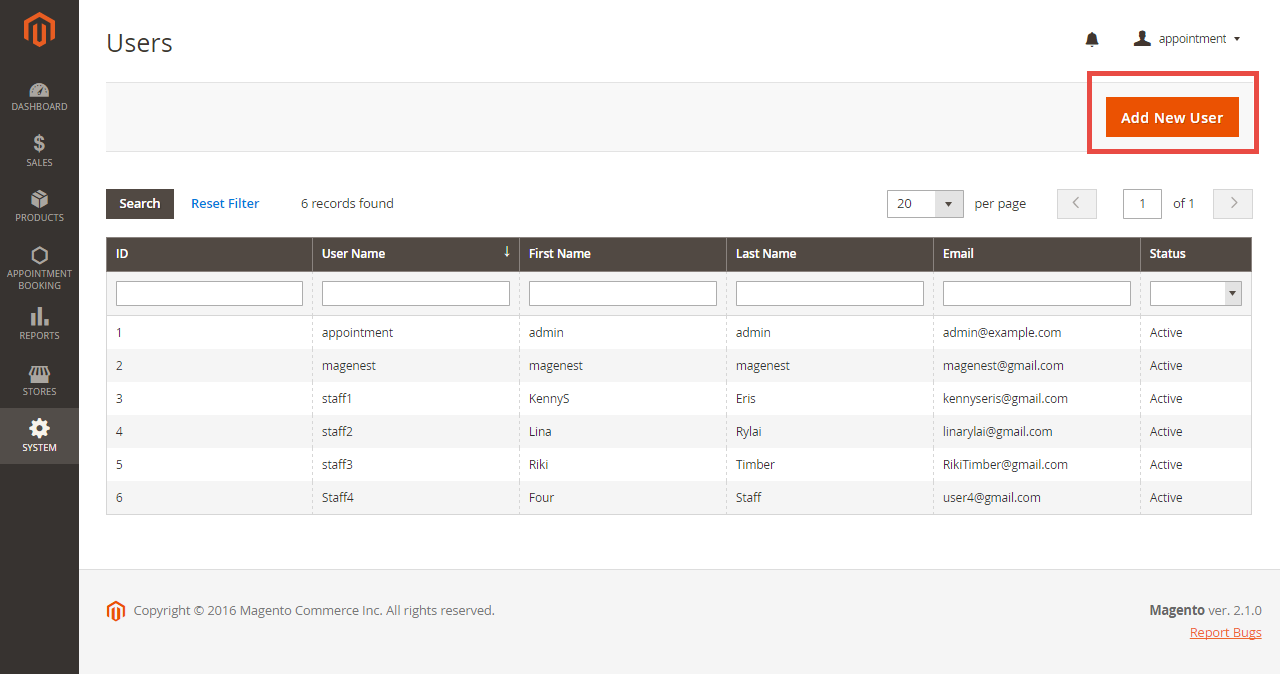
At Staff Management tab, you will be taken to the users list.
In each user info, you are able to make an admin user a staff, and vice versa in the User Role tab.
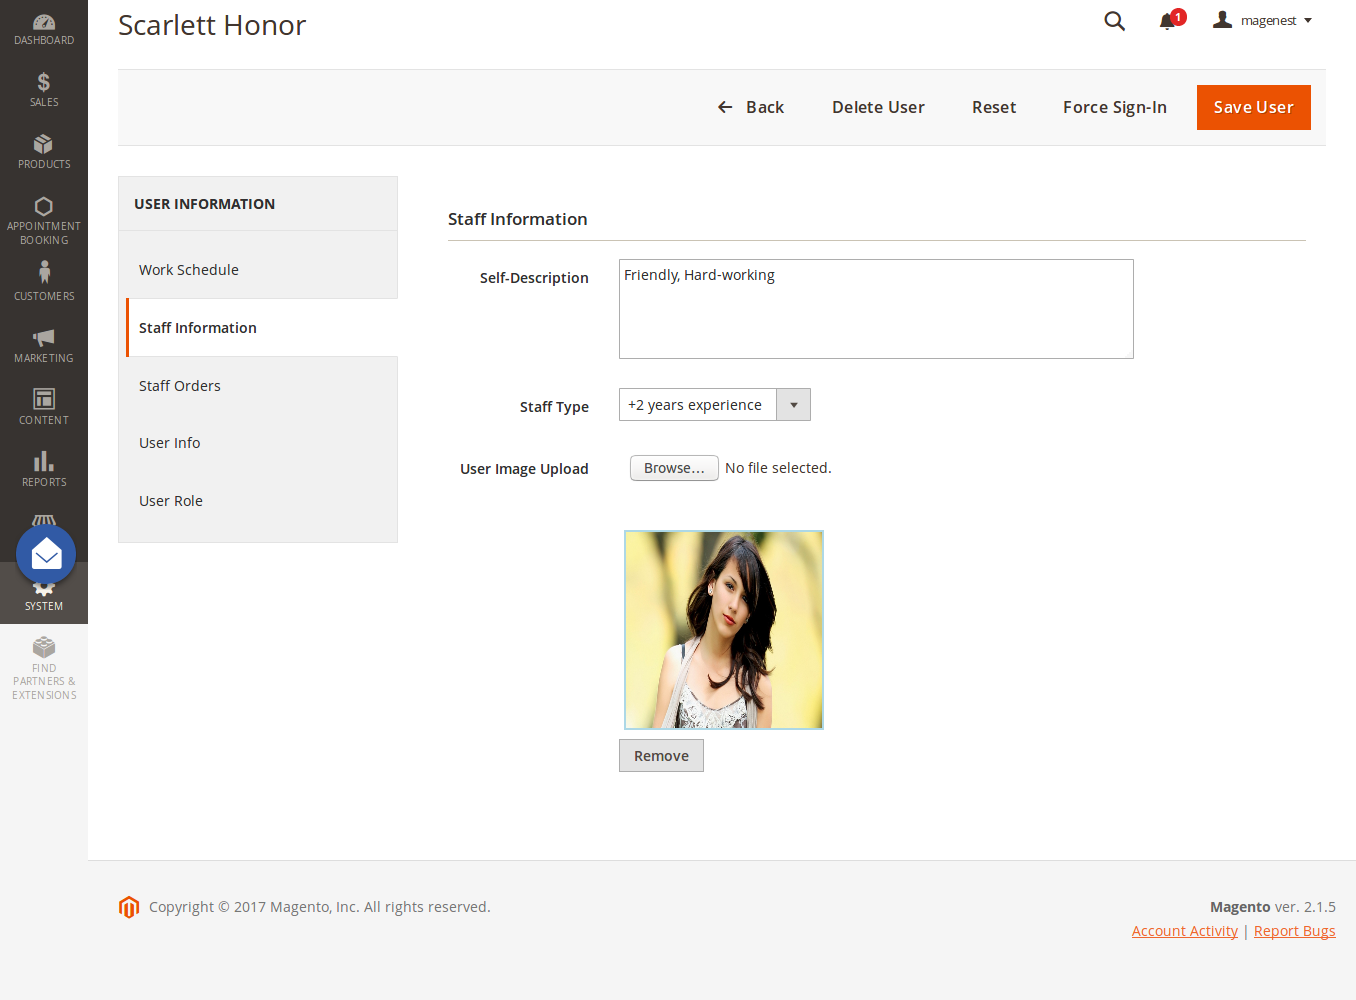
In addition, you can add some information of the staff in the Staff Information
- Self-description: Self introduction of the staff
- Staff type: the expertise level of the staff
- User image upload: Upload profile image to let customers know who serves them.
In Work Schedule, you can set the working time schedule that is available for the staff with the reservation options, days, product ID, and time.
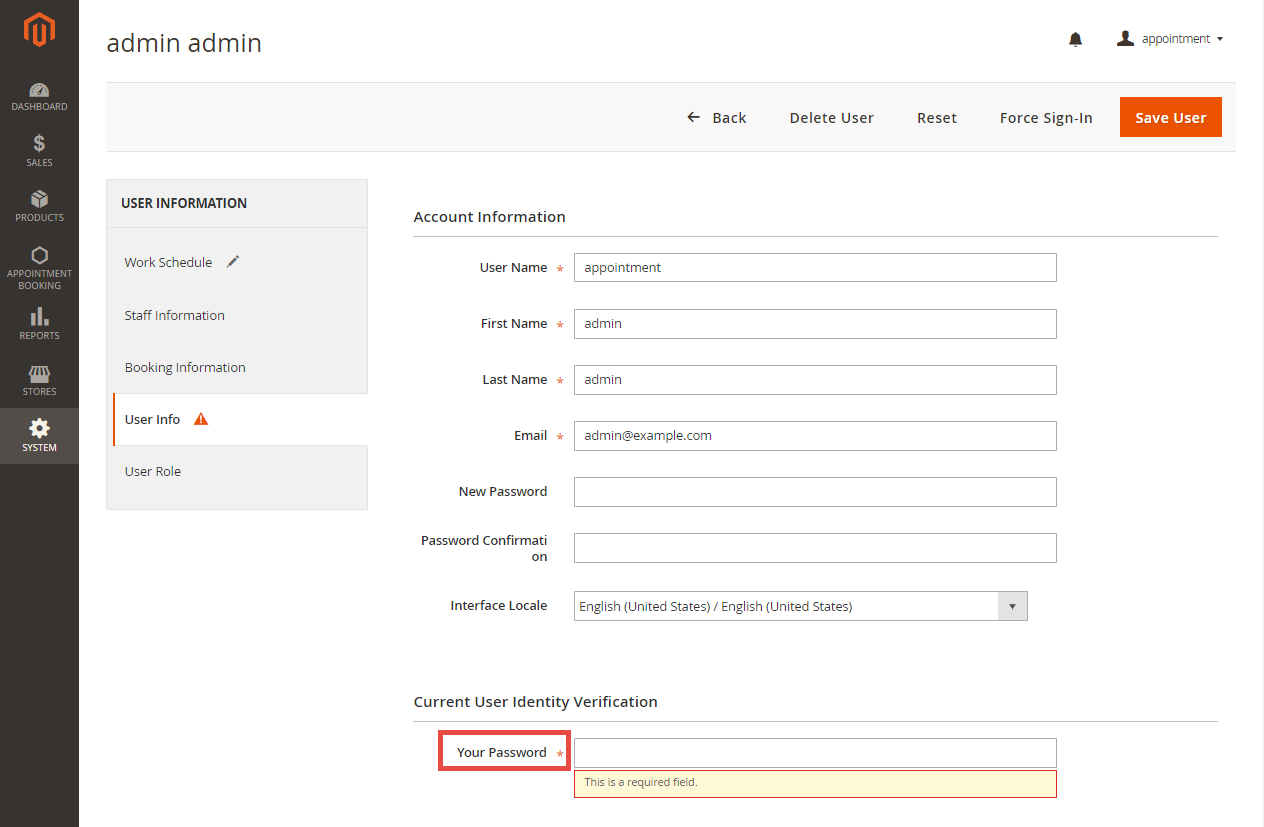
Remember that, you must go to User info tab to reconfirm password when you make any changes.
You can add working schedule for the staff by clicking on Save User button and your newly filled schedules will be saved.
You can also delete an existing schedule by clicking on the Delete User button. Note that the schedule will not be saved if one input is not properly filled.
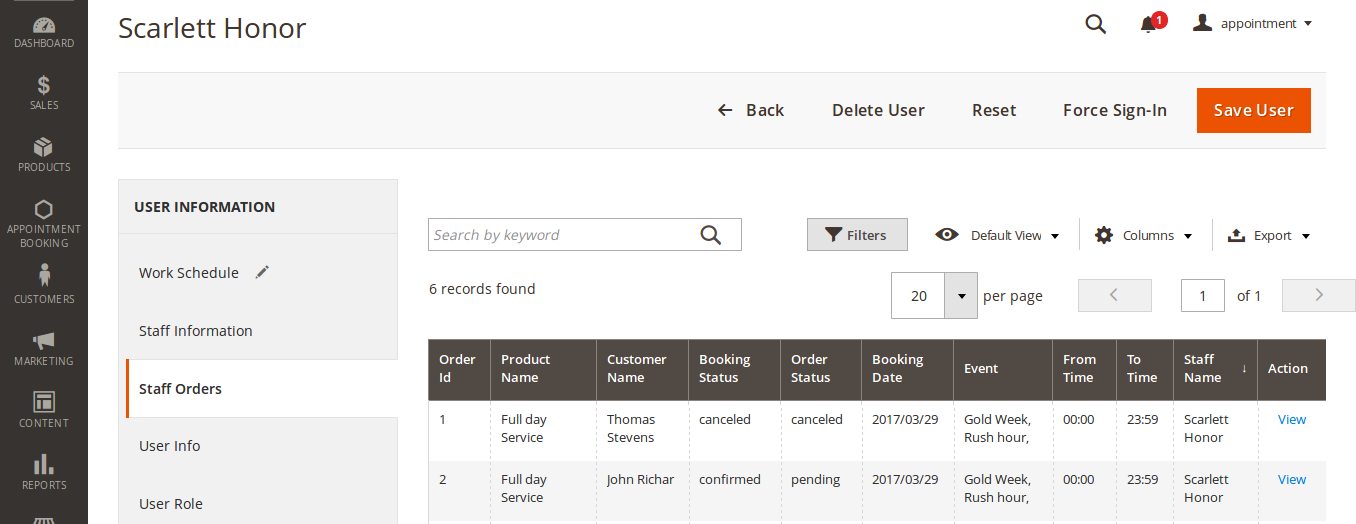
Moreover, you can also track the appointments of the staff in the Staff Orders section.
Usage Procedure
In a frontend detail page of a product of type Appointment Booking, customers are able to select a date with a calendar view as shown.
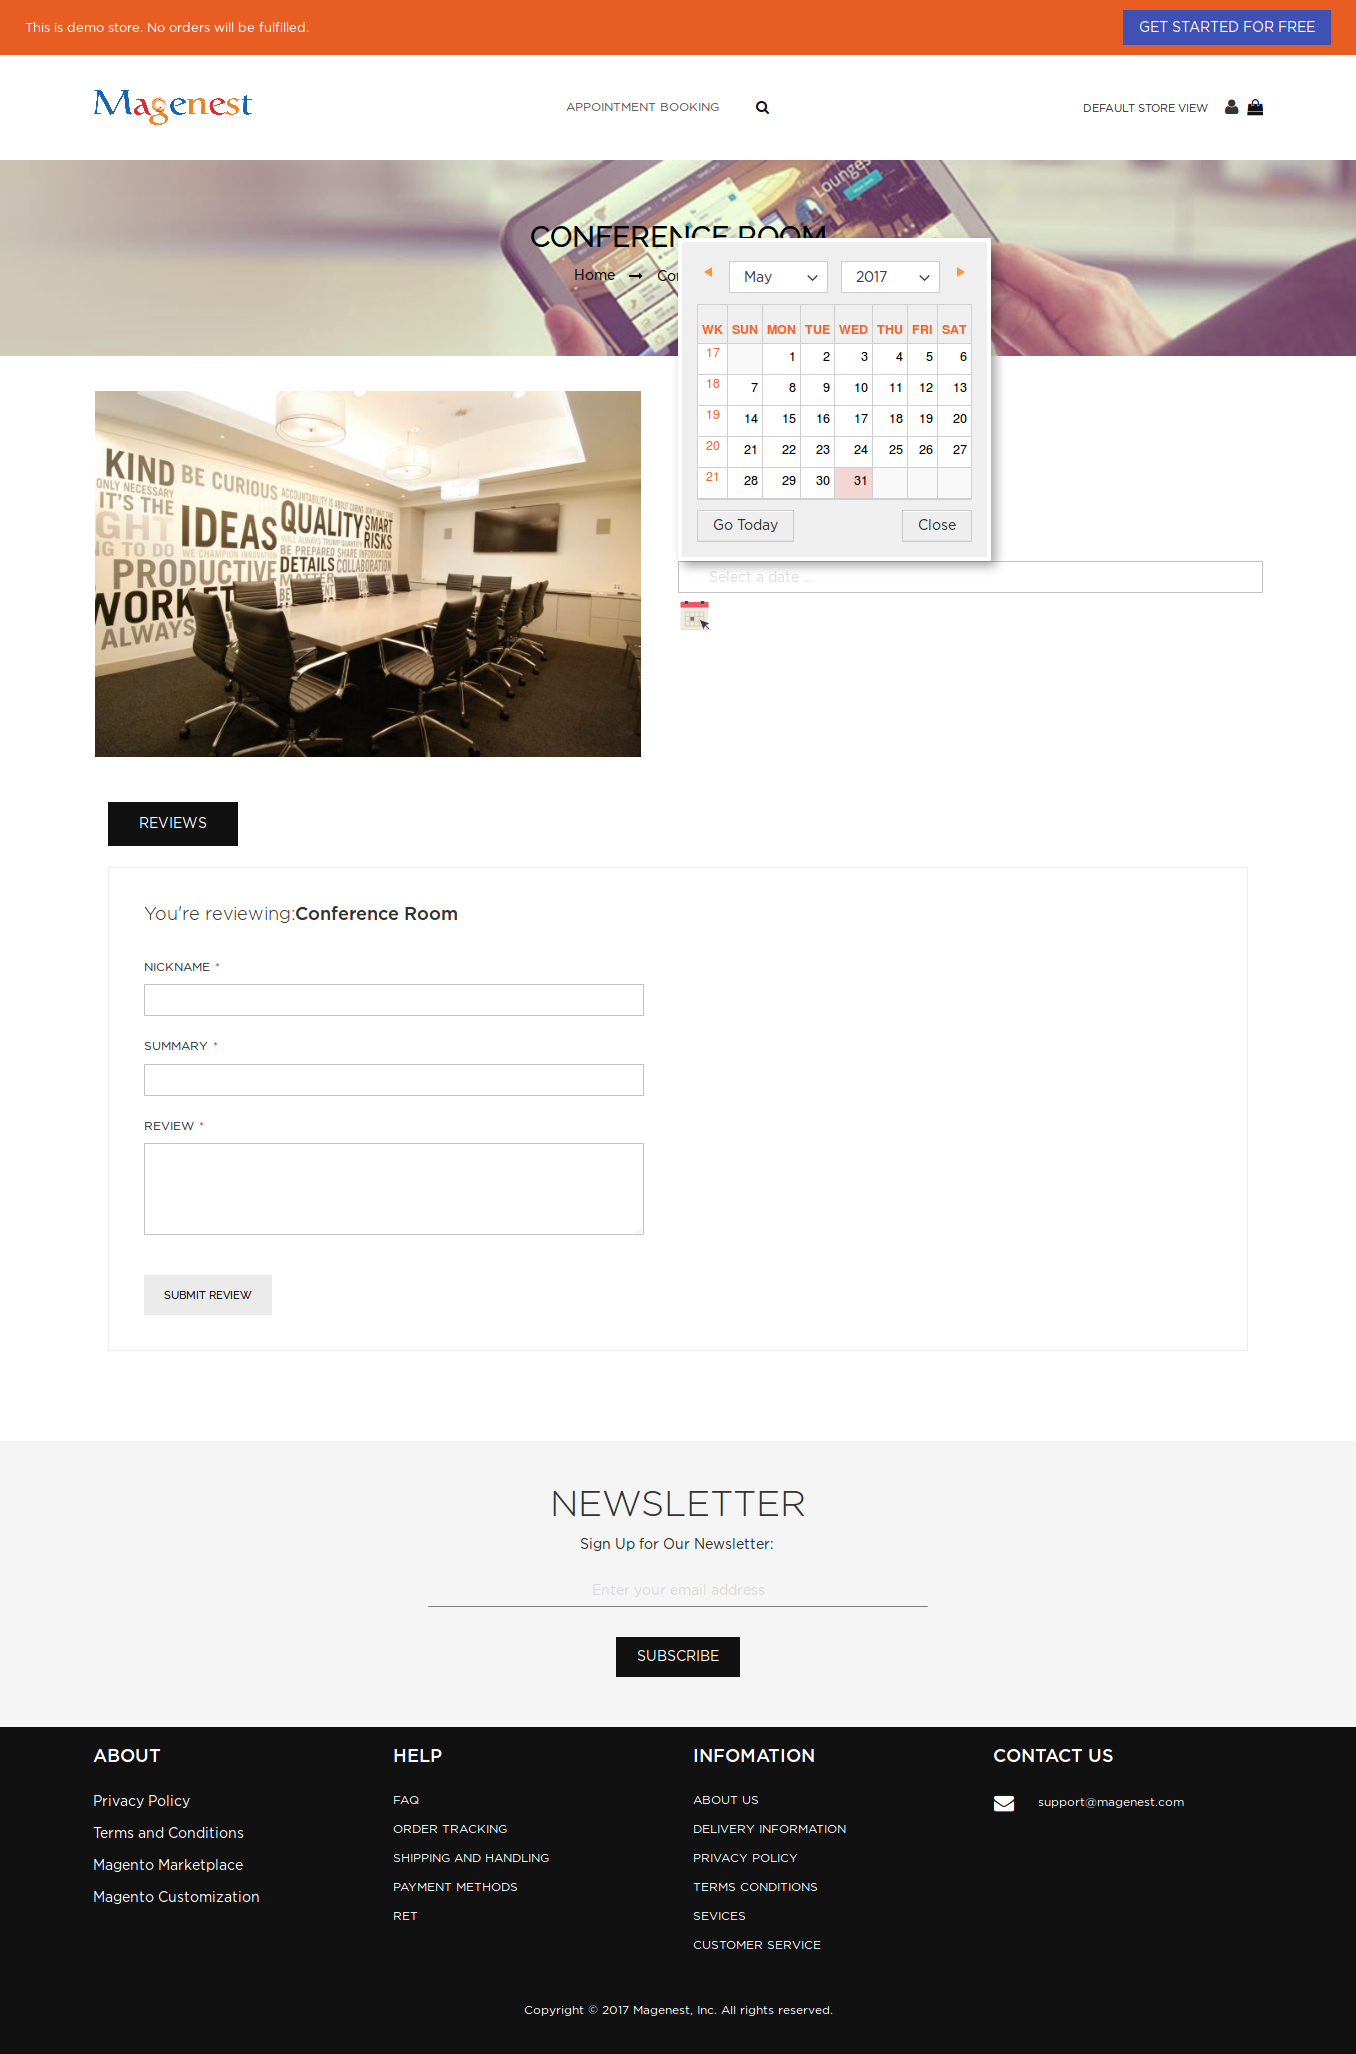
When a day is selected, the system will check if there is any product schedules available that day and display them. It will also check if the selected day is within a special date range as formerly specified.
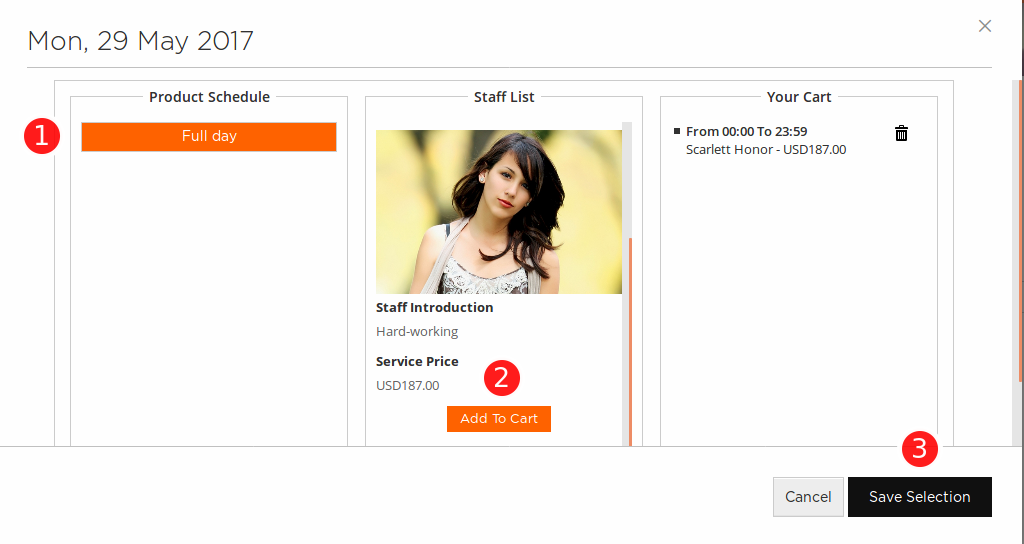
Then if a schedule is selected, the system will now check the staff with the corresponding schedule. Some information about the staff will also be displayed.
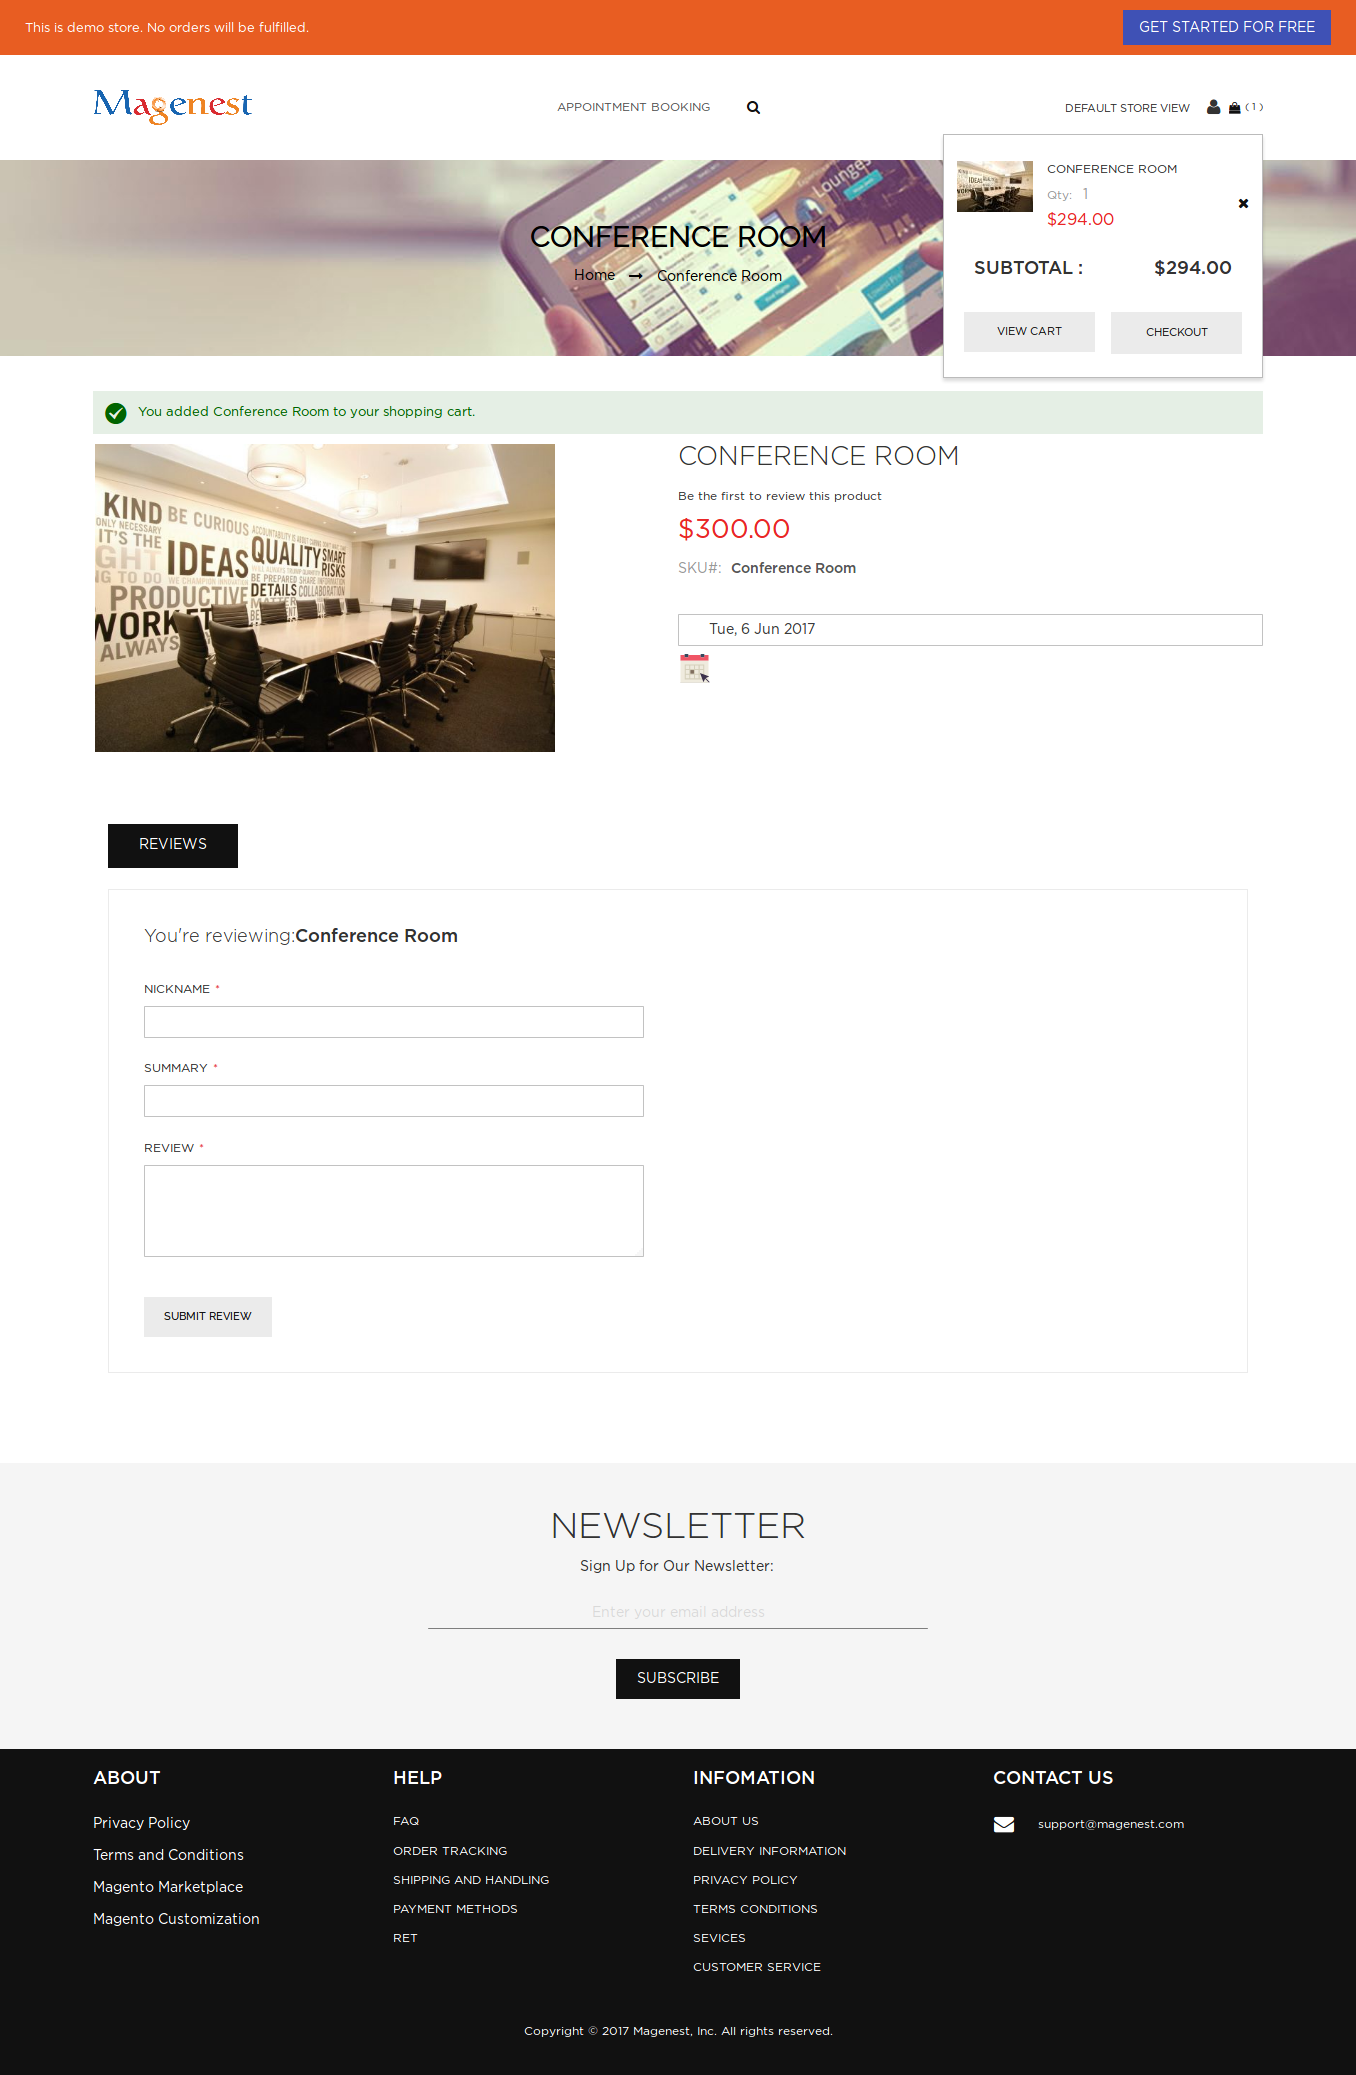
Then when the customer add the product to cart, he will be able to view the product options which are also booking options.
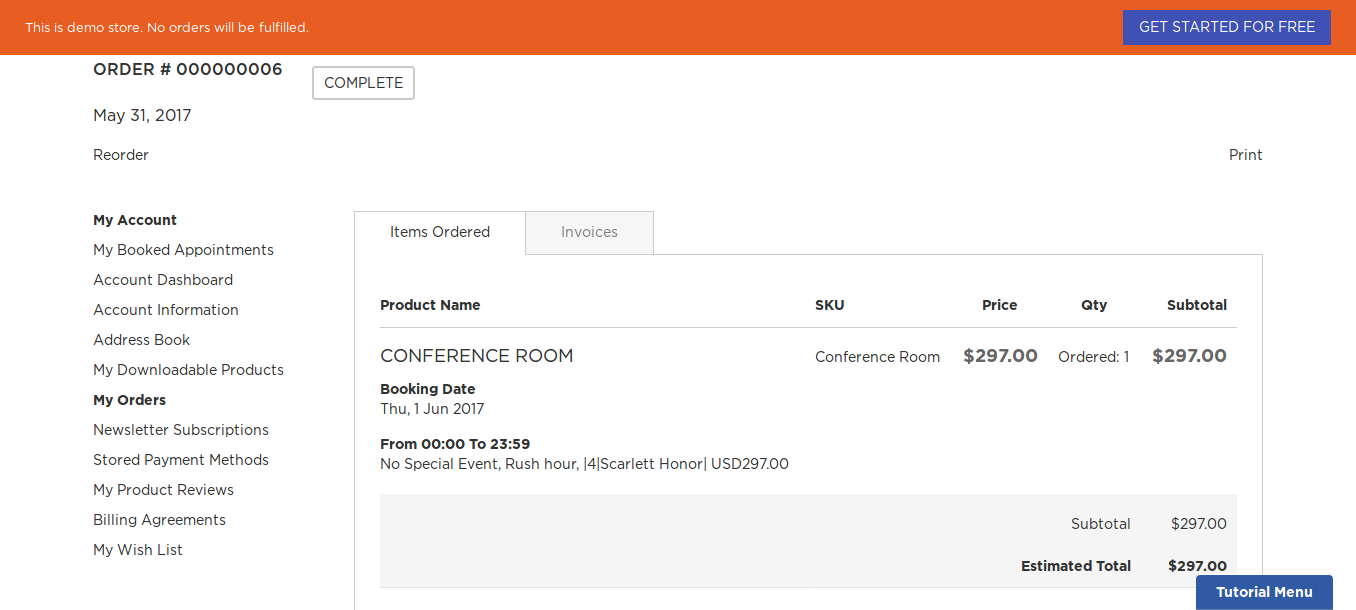
When the order is successfully placed, customers can check their orders in My Orders page in customer's My Account.
For easier management over booked appointments, the customer can also check the My Booked Appointments tab.

From admin's perspective, you can view all booked appointments in Booking Orders tab in Appointment Booking menu.
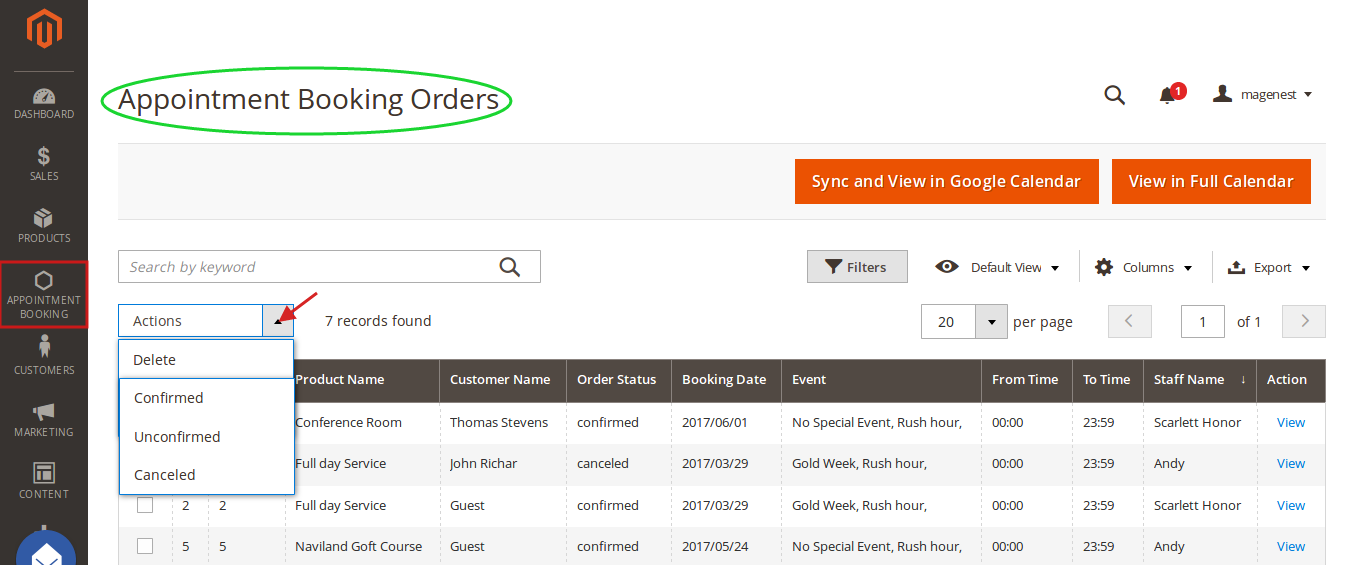
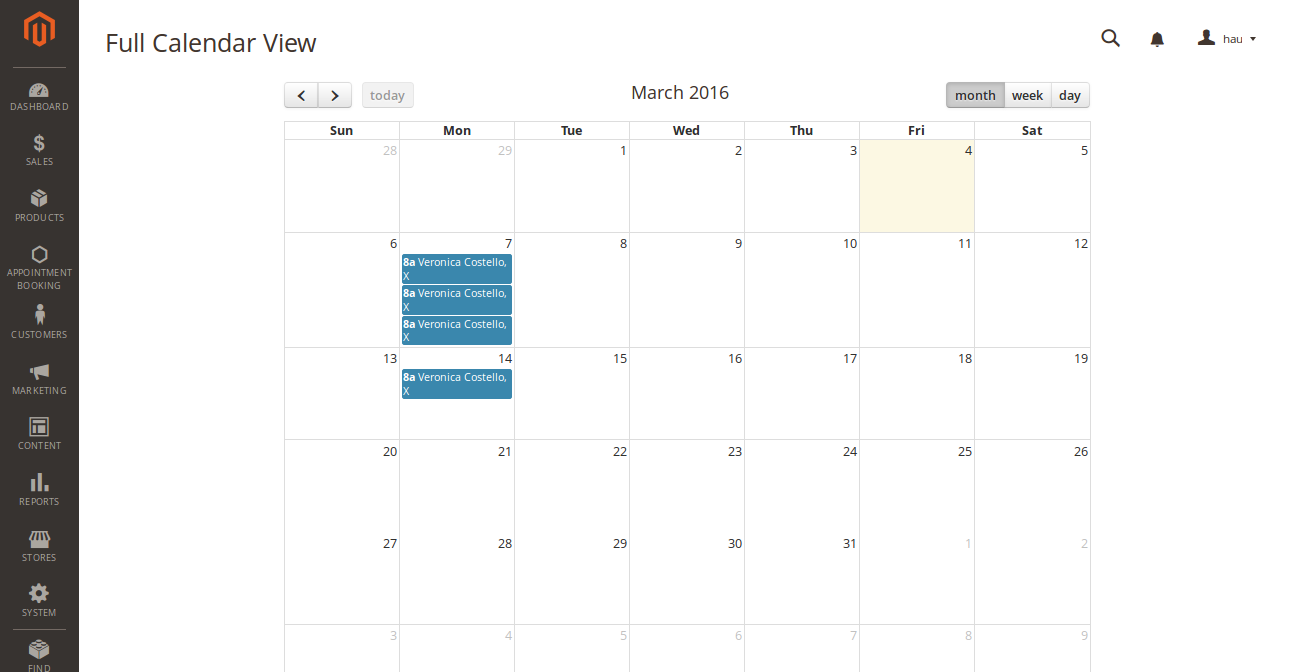
You can view all booked appointments in Full Calendar mode, just by pressing the View in Full Calendar button.
...