...
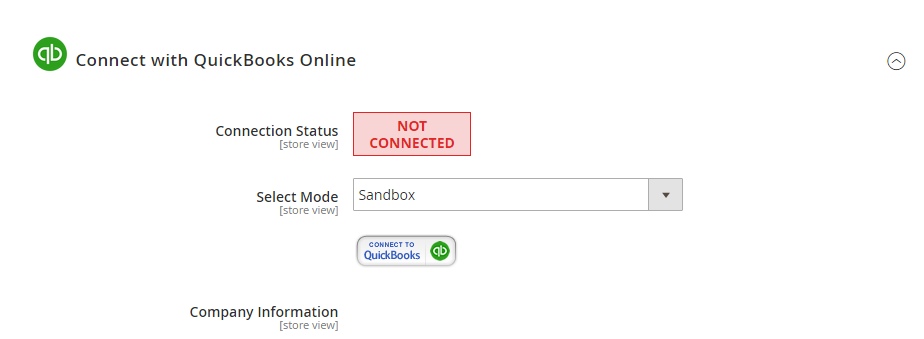
Click on Connect to QuickBooks button. A new page is open. Log in if you already have an account to authenticate users before you can exchange data with it.
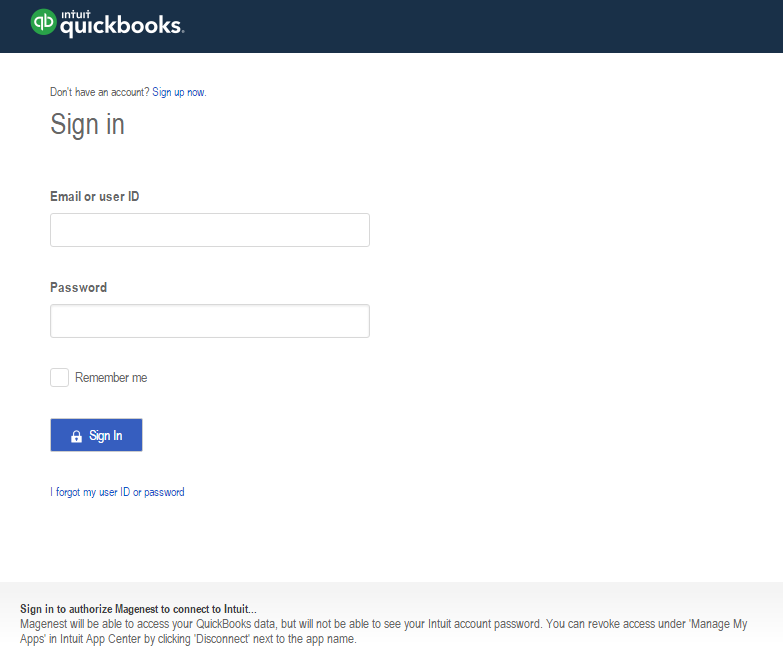
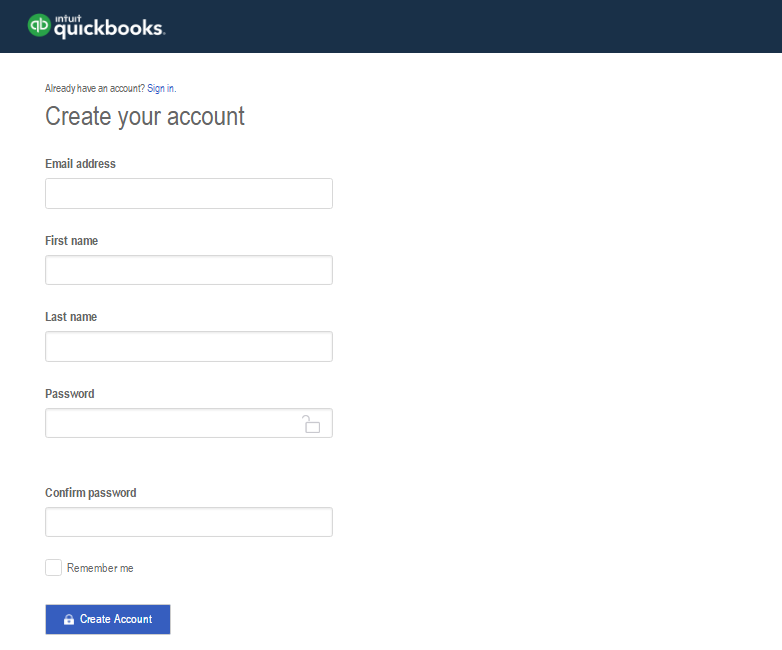
Or click on Sign up now hyperlink to create a new one:
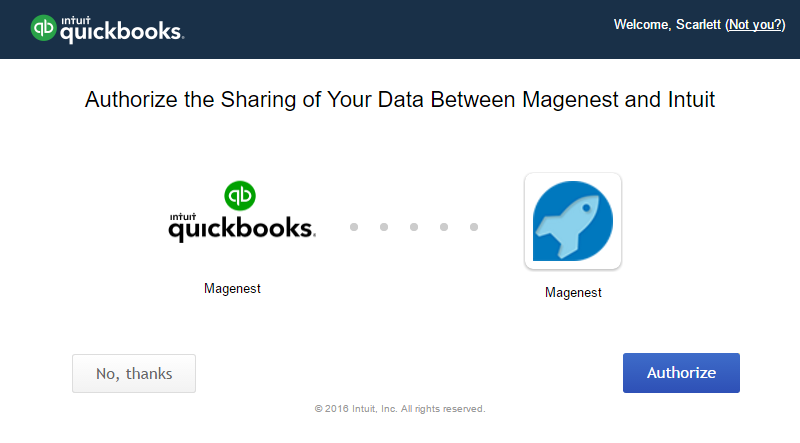
After login QuickBooks Online account successfully, click on Authorize button to finish connection process.
When connecting successfully, the backend page will be displayed as below. Click on Save Config button before continuing. This will help you avoid making the error.

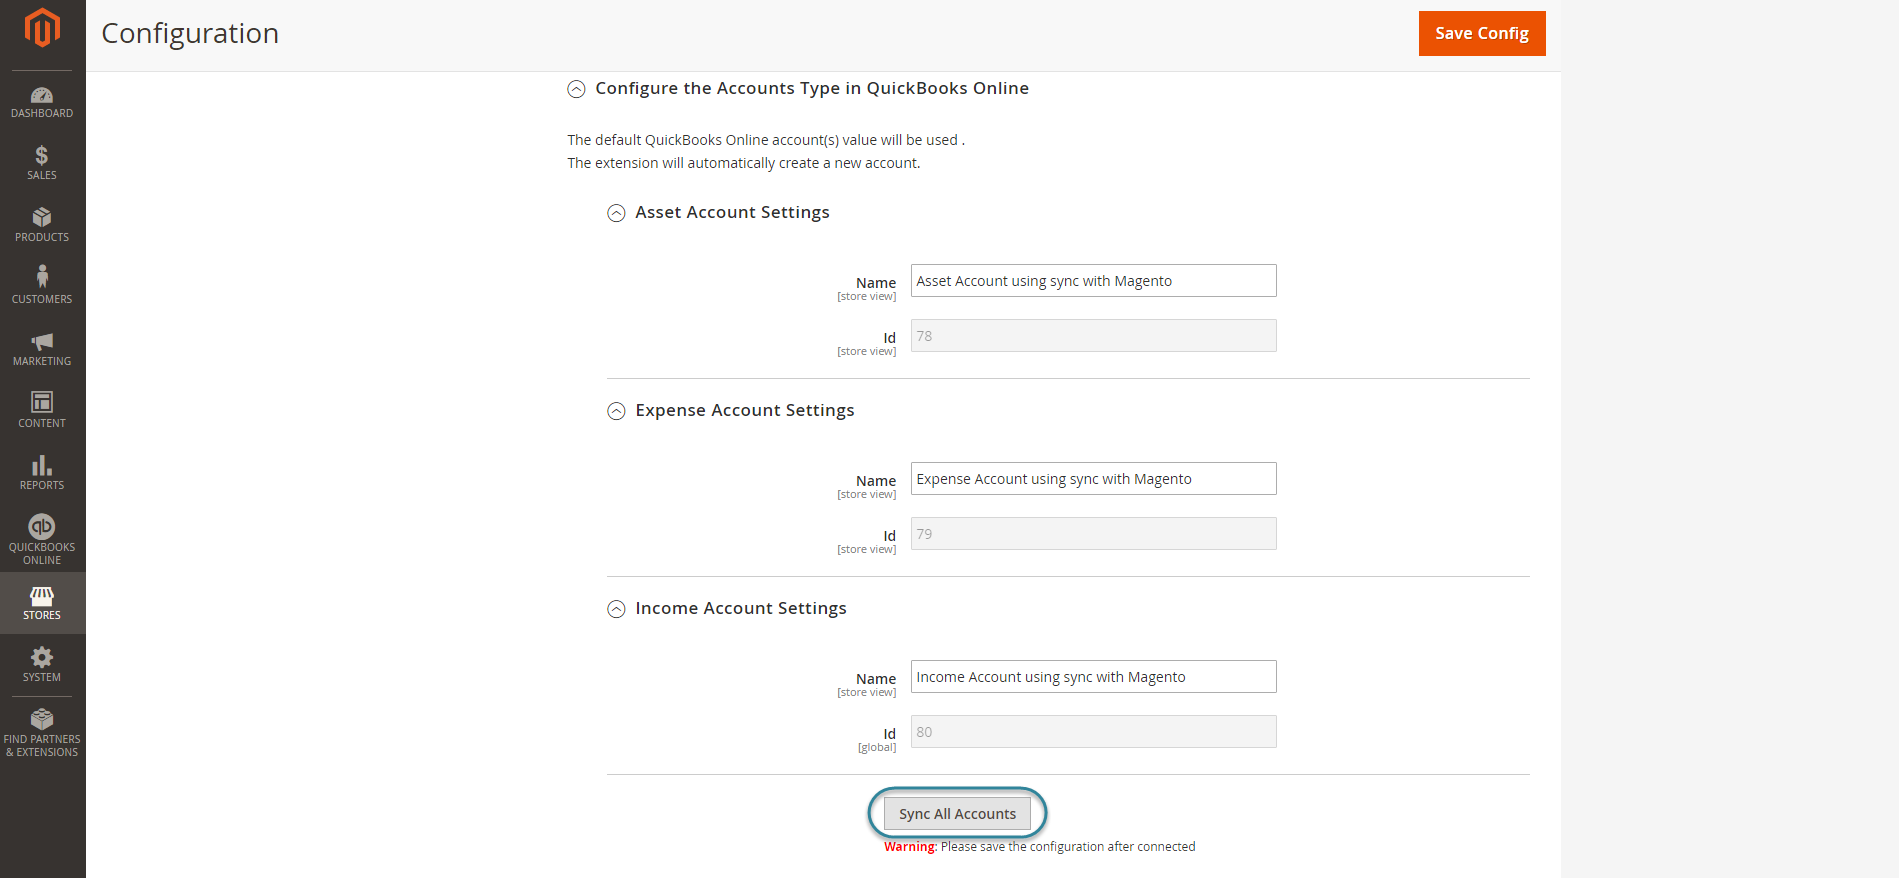
Then, admins need to navigate to the Configure the Accounts Type in QuickBooks Online section and expand it.
Admins will need to set three account types (Asset Account Settings, Expense Account Settings and Income Account Settings) by clicking on the Sync All Accounts button.
Then, the data will be synced automatically.
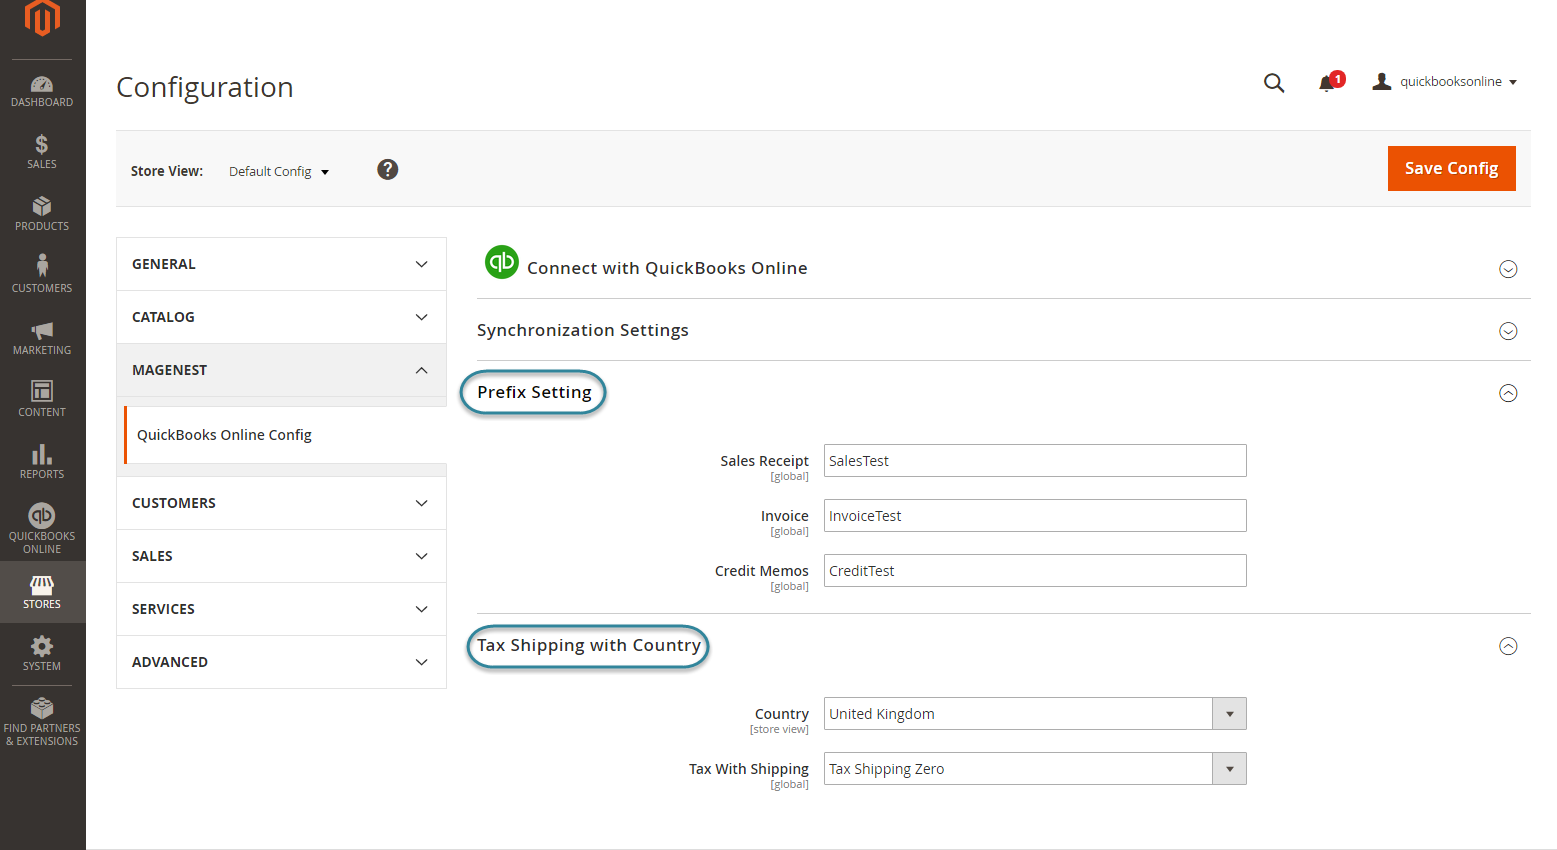
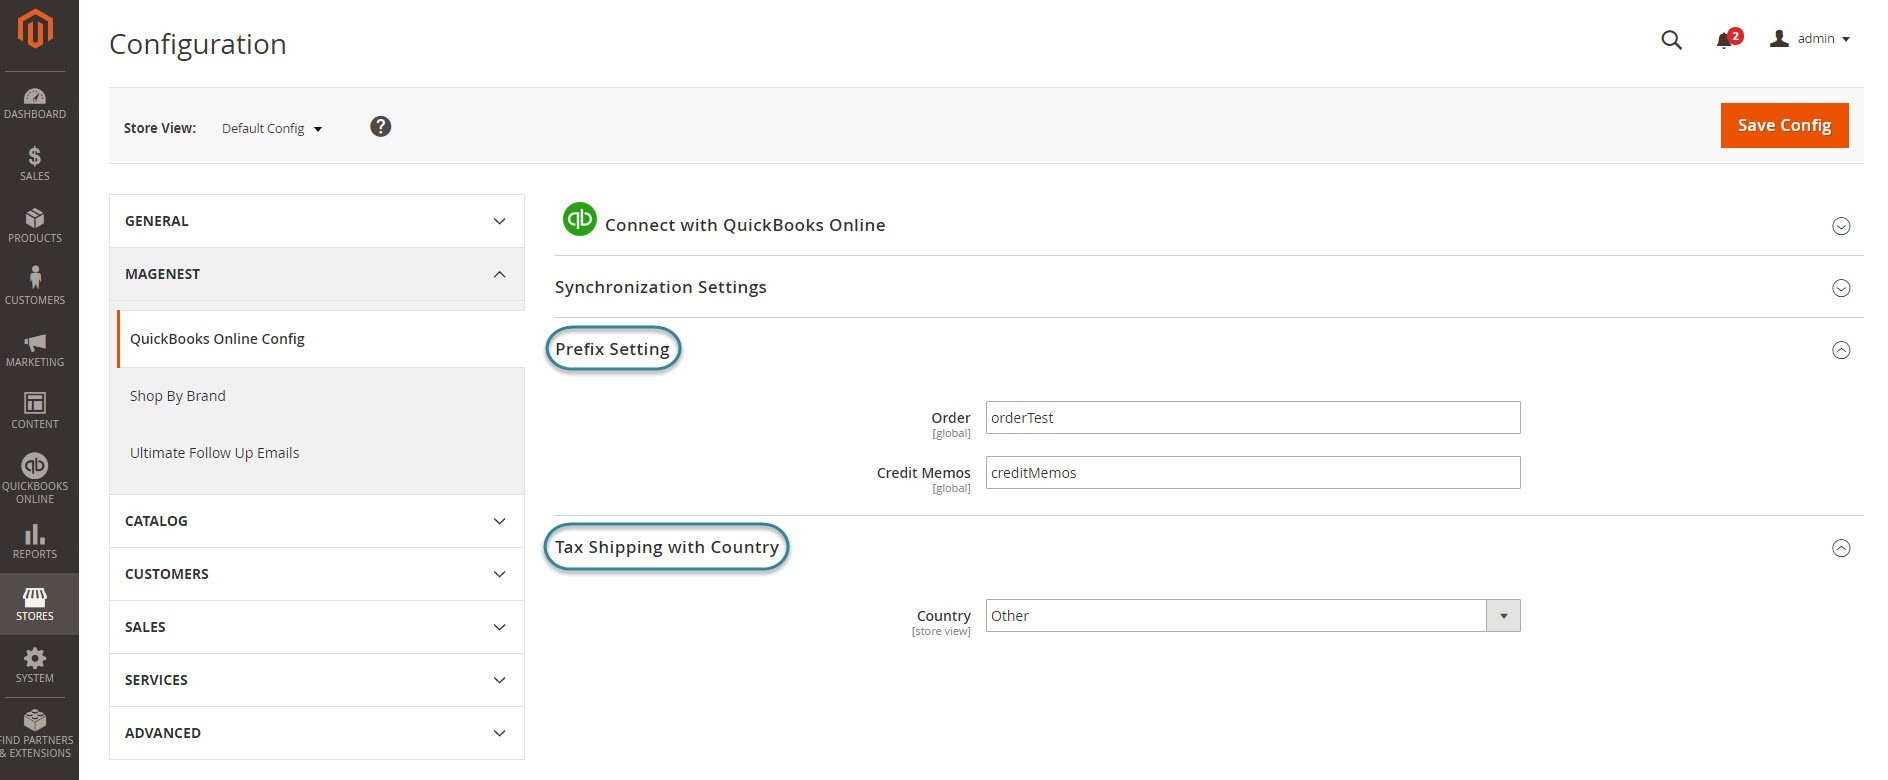
Finally, admins go to Prefix Settings and Tax Shipping with Country section and expand them.![]() Prefix Settings: In order to make sure that the synchronization process works correctly, admins need to set a prefix for each Sales Receipt, Invoice and Credit Memo.
Prefix Settings: In order to make sure that the synchronization process works correctly, admins need to set a prefix for each Sales Receipt, Invoice and Credit Memo.
Example: If admins enter "InvoiceTest" at the Invoice field, the invoice will be synced from Magento to QuickBooks Online with the format InvoiceTestXXXXXXXXXXX.
| Note |
|---|
| Please note that the maximum number of characters allowed in this field is 12 ones. |
![]() Tax Shipping with Country: Admins need to choose their country and set a tax shipping type.
Tax Shipping with Country: Admins need to choose their country and set a tax shipping type.
| Note |
|---|
There are two fields that admins need to consider:
Please note that if you choose the United Kiingdom at Country, it is required to have a shipping tax in QuickBooks Online. So, admins need to set a tax type for the shipping fee. If admins want to choose a free shipping tax, they only need to choose the tax named Tax Shipping Zero created by the extension. If admins want to choose a shipping tax (no free), admins need to create a tax rule before. Then, it will be showed at drop-down options and admins will choose this tax. |
How to synchronize data from Magento 2 store to QuickBooks Online
...
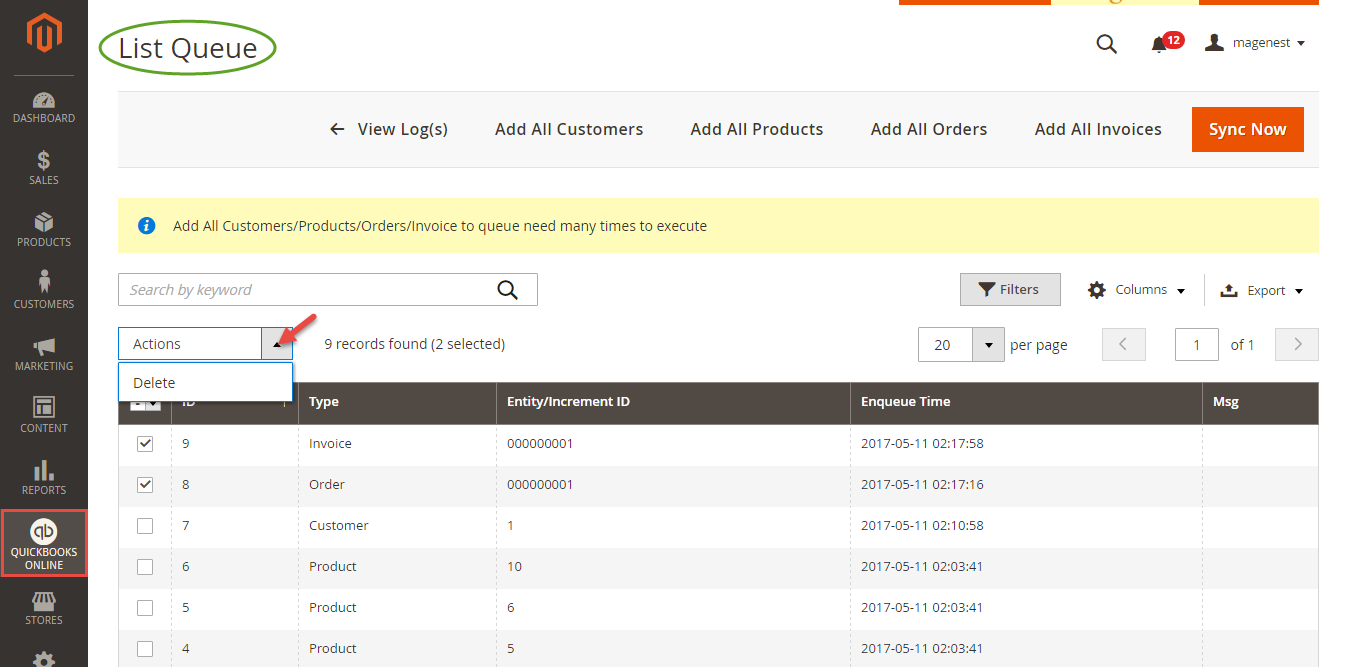
If the App mode is Cron Job, Queue page is the place which the created, updated data is stored in and are waiting to be synced. If you want to sync data right away, you can press Sync Now button. You can decide whether to synchronize any items on List Queue page by remove selected data from the grid.
| Note |
|---|
Please note that synchronizing will take some time, the length of time depends on the size of the database. |
When the progress is done, go to QuickBooks Online > View History Logs and check what is synchronized in the grid.
...