Here we will guide you through the installation process of our extension. First off, open FileZilla, log in to your host as follows:
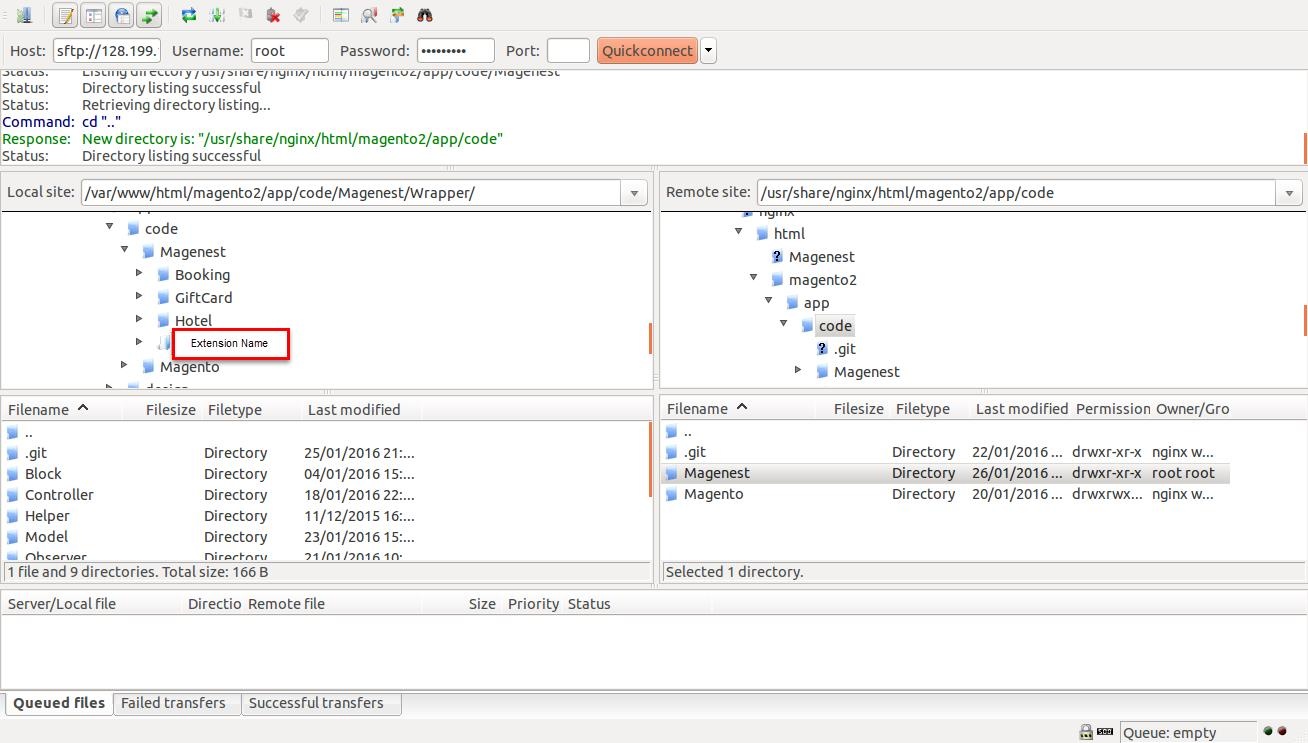
In the above example we above example, we switched the local site to the extension directory, and the remote site to the code directory. Now on the remote site window, inside app/code directory, create a folder named Magenest Magenest/Stripe and go inside it. Now on your local site window, right-click on Extension Name and click Upload. The extension will be uploaded onto your uploaded to your host in a few minutes.
The second method will require you to compress the extension into .zip or .tar.gz format, then execute the following command in your Command Line/Terminal:
scp <path to your extension> <ssh server>:<path to Magenest/Stripe directory>Then log into your ssh server, go to Magenest directory to Magenest directory and execute the following command to decompress the module:
...
tar -xzvf <.tar.gz compressed extension> Now go to your Magento root directory, say it's named magento2, and execute the following commands:
composer composer require stripe/stripe-php (when Stripe version is older than 1.0.8 and not apply the others).: it is very necessary to initialize the library for Stripe.
composer require authorizenet/authorizenet
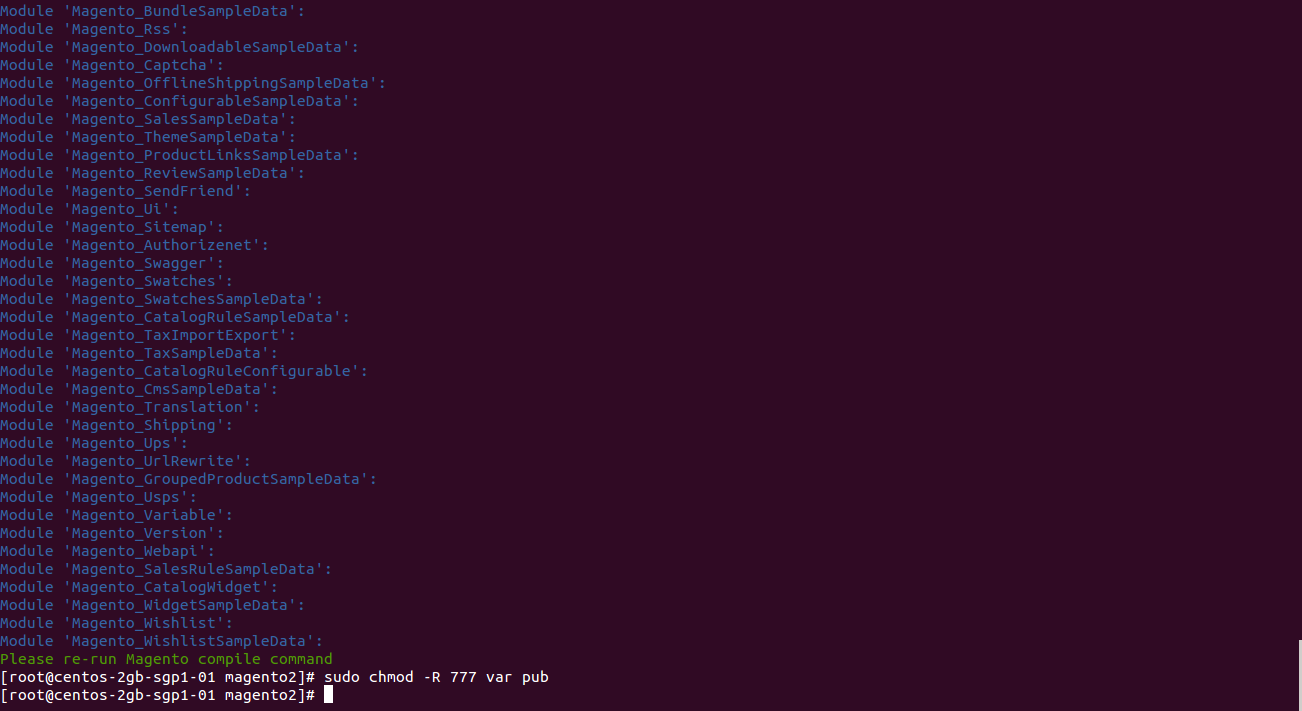
php bin/magento setup:upgrade
php bin/magento setup:di:compile php bin/magento setup:static-content:deploy...
After running all these, your Command line/Terminal window might look like this:
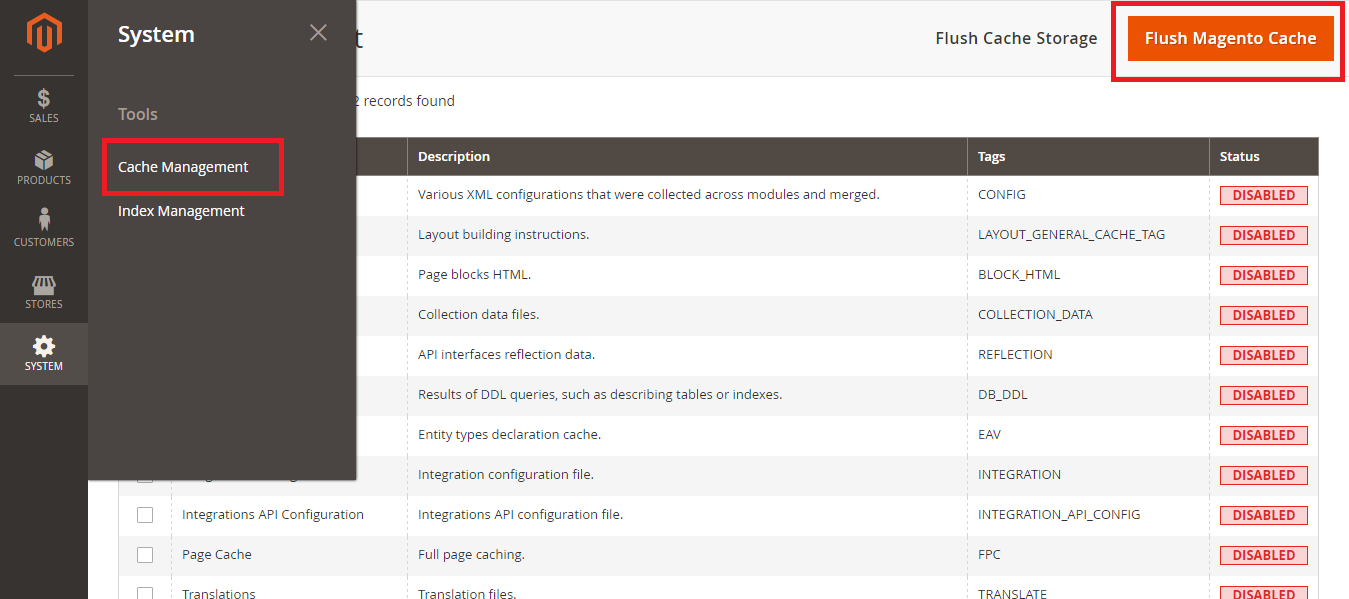
Finally, you need to flush the cache by either type this into the Command Line/Terminal:
...
1. Flush Magento Cache
2. Flush Cache Storage
3. Flush Catalog Images Cache
4. Flush JavaScript/CSS Cache
Now you can go to your store and check if the extension is working as expected.