...
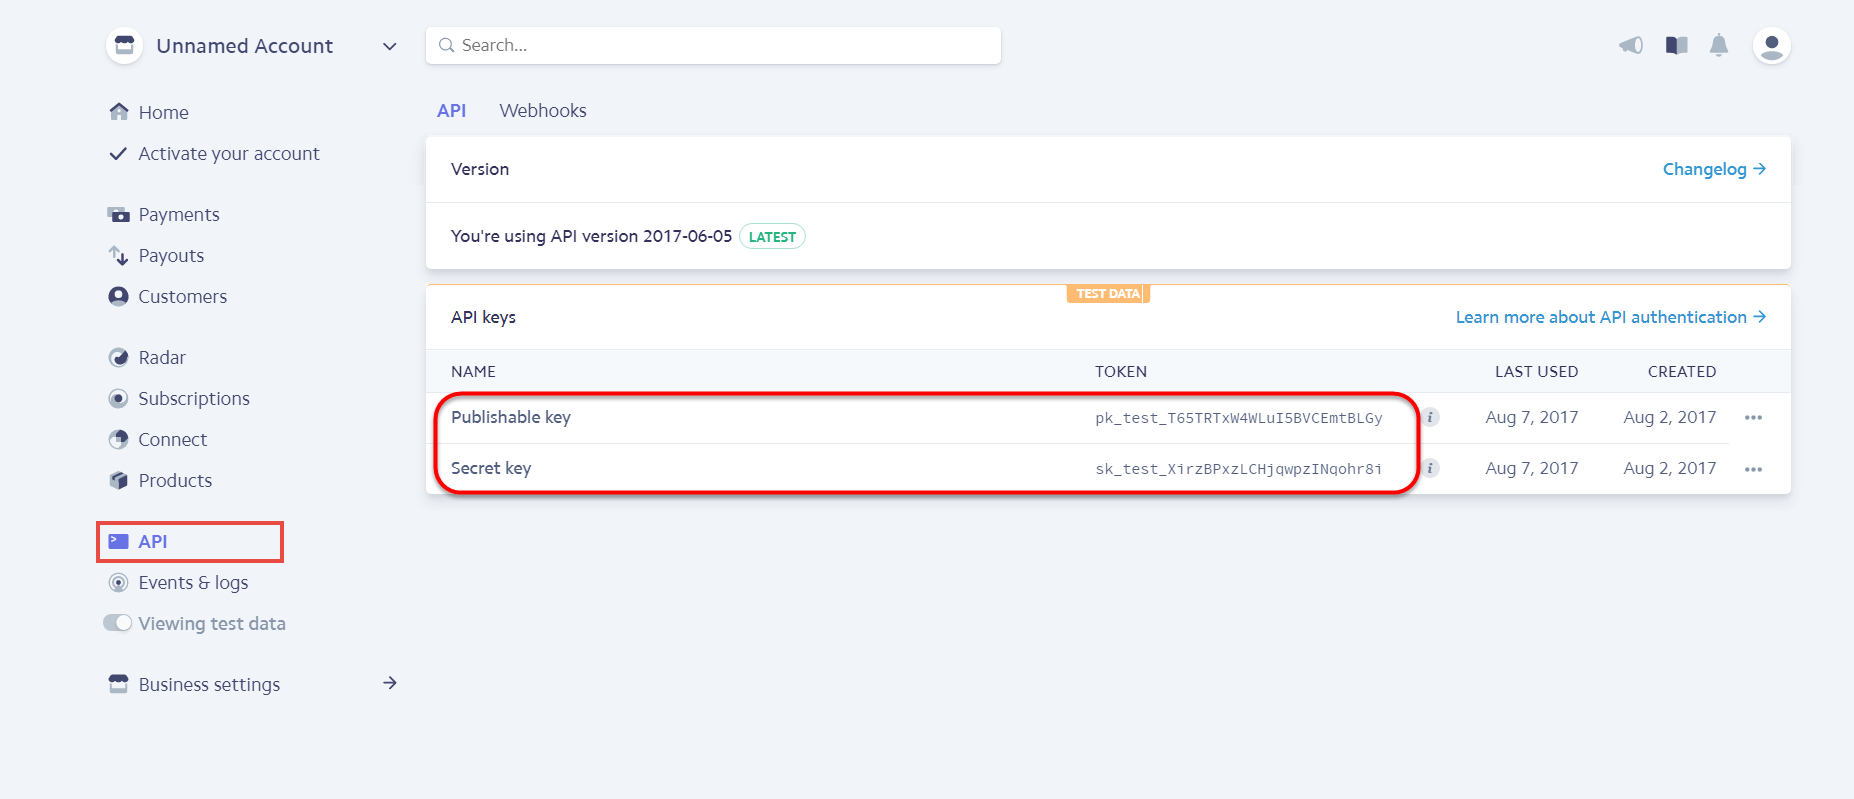
After that, click on API at the left corner > API Keys to take API Keys.
Set Configuration
At back end, admin need to configure some fields to connect between your Magento site and the stripe account.
Firstly, admin click on Stripe Payments > Settings > Stripe Payment Gateway
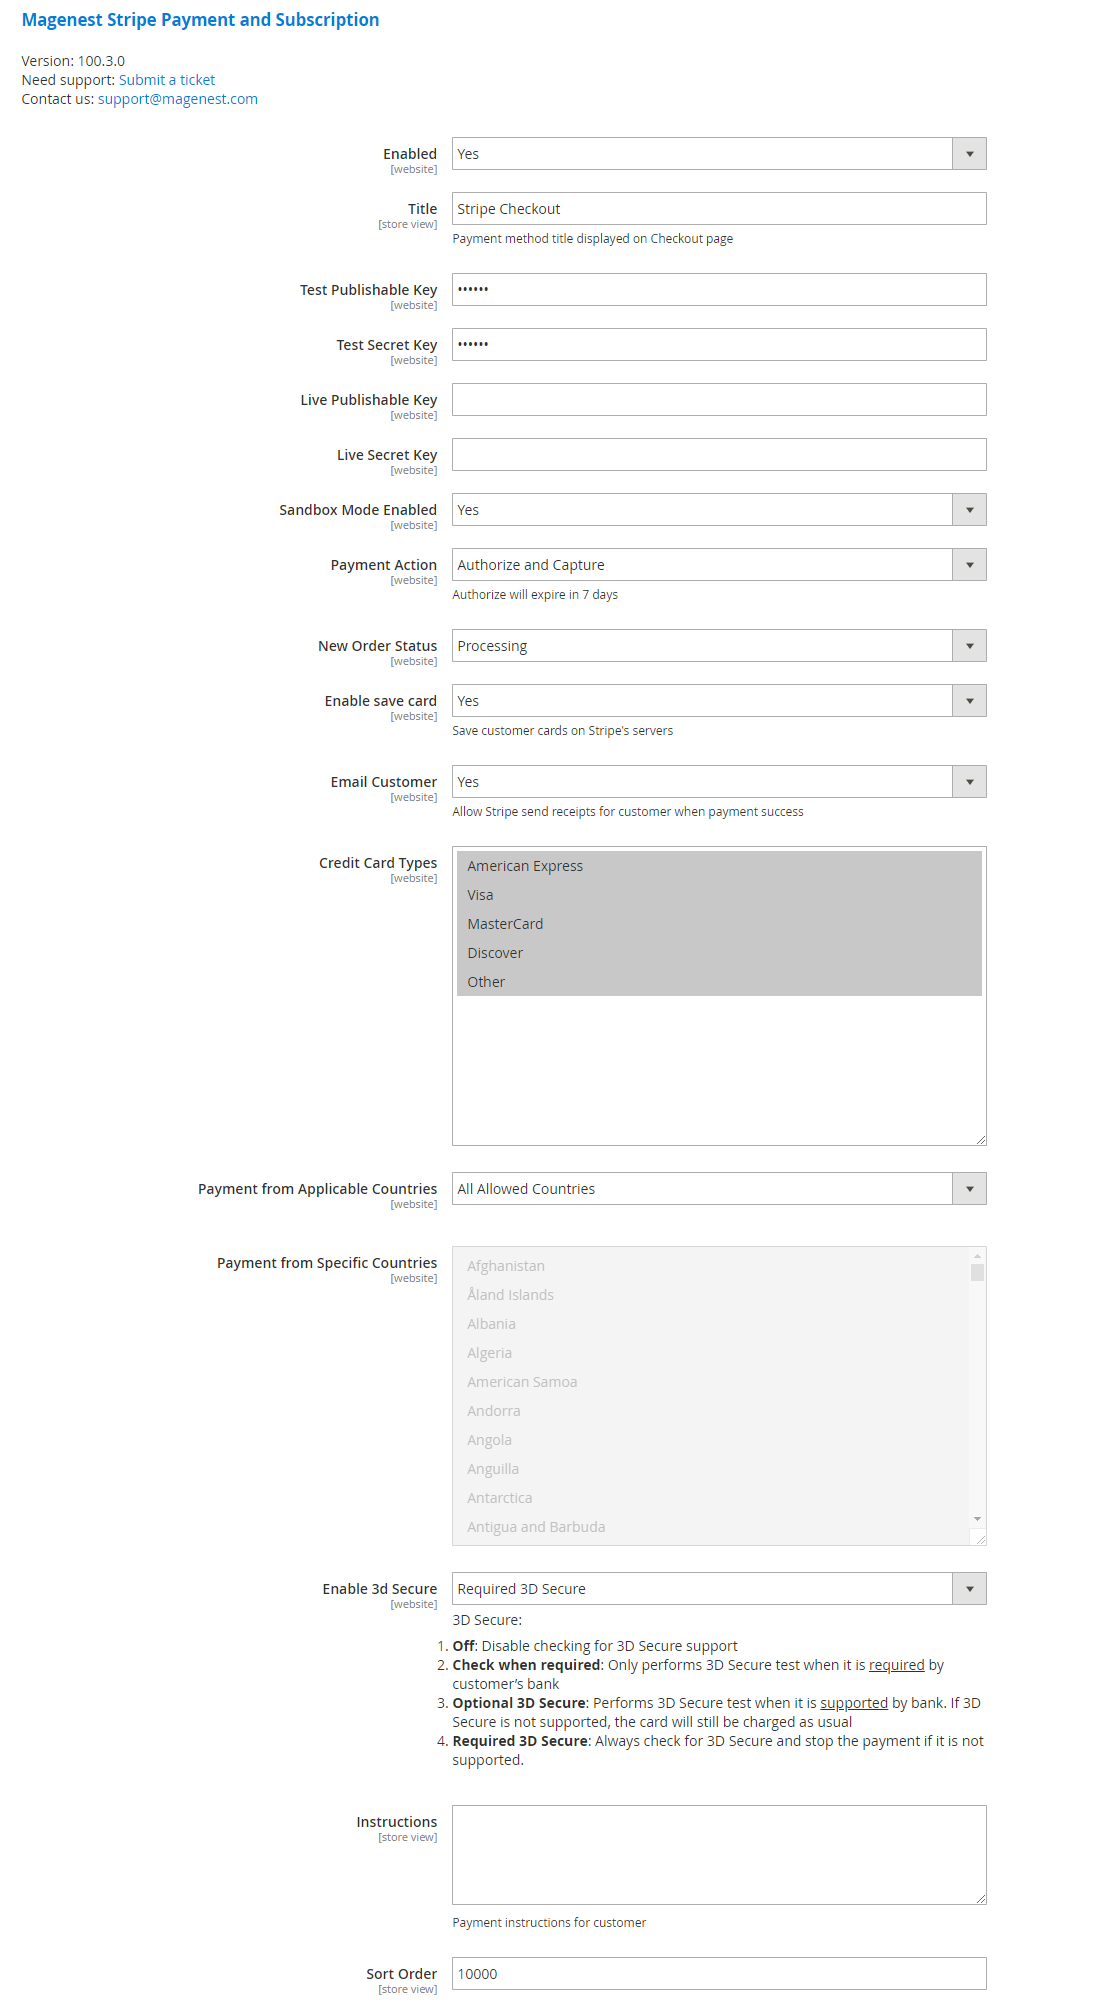
Edit the Title to the title you want to be displayed on the Checkout Page.
![]() If you use the Test Key:
If you use the Test Key:
...
![]() If you use the Live Key:
If you use the Live Key:
- Fill in your Stripe API Keys in Live Publishable Key, Live Secret Key to connect Magento with Stripe Payment Gateway.
- Turn off the Sandbox Mode Enabled by choosing No.
![]() Admin can set the Payment Action to be Authorize and Capture or Authorize Only
Admin can set the Payment Action to be Authorize and Capture or Authorize Only
- Authorize Only (Authorization): will check the card for validity but not charge the account yet until the order is approved and invoiced.
- Authorize and Capture(Sale): will will charge the debit/credit card at the time of the order submission.
![]() Admin can set the New Order Status: Processing, Suspected Fraud
Admin can set the New Order Status: Processing, Suspected Fraud
- Processing: The payment is made successfully and an order invoice is issued.
- Suspected Fraud: No invoice is issued.
In addition, admin can set information for: Title, Secret Key, Publishable Key, Payment Action, New Order Status, Sandbox Mode Enabled, Email Customer, Credit Card Types, Credit Card Verification, Payment from Specific Countries.
We recommend two methods that customers can choose to checkout with Stripe: Stripe Embedded and Stripe Checkout Iframe.
In our example, we use test mode so we will fill test publishable key and test secret key to config between Stripe and Magento 2.
![]() New Order Status: Processing
New Order Status: Processing
![]() Enable save card: Yes to turn on Save Card mode
Enable save card: Yes to turn on Save Card mode
![]() Enable 3D secure: Yes to turn on 3D secure mode.
Enable 3D secure: Yes to turn on 3D secure mode.
There are some notices for 3D secure that we have noted below tool tip. Please read carefully before choosing set up mode.
...
![]() Enable Save Card: Allow customers to save credit card information once they sign in.
Enable Save Card: Allow customers to save credit card information once they sign in.
![]() Email Customer: Allow Stripe to send receipts to customers once the payment is successful.
Email Customer: Allow Stripe to send receipts to customers once the payment is successful.
![]() Credit Card Types: Admin can choose which credit card types they want by choosing one or more items.
Credit Card Types: Admin can choose which credit card types they want by choosing one or more items.
![]() Payment from Applicable Countries:
Payment from Applicable Countries:
- All allowed countries: Enable all allowed countries to make payment.
- Specific Countries: Restrict some countries by unselecting them from the Payment from Specific Countries.
![]() Enable 3D Secure: Enable the 3D Secure with 4 options (Off, Check when required, Optional 3D Secure, Required 3D Secure)
Enable 3D Secure: Enable the 3D Secure with 4 options (Off, Check when required, Optional 3D Secure, Required 3D Secure)
...
- Off: Disable checking for 3D Secure support
...
- Check when required: Only performs 3D Secure test when it
...
- is required by customer’s
...
- bank
- Optional
...
- 3D Secure: Performs 3D Secure test when it
...
- is supported by bank. If 3D Secure is not supported, the card will still be charged as usual
...
- Required 3D Secure: Always check for 3D Secure and stop the payment if it is not supported.
![]() In addition, admin can add/edit the Instructions to instruct customers how to do payment.
In addition, admin can add/edit the Instructions to instruct customers how to do payment.
![]() Sort Order: Insert the sort order number admin wants to create.
Sort Order: Insert the sort order number admin wants to create.
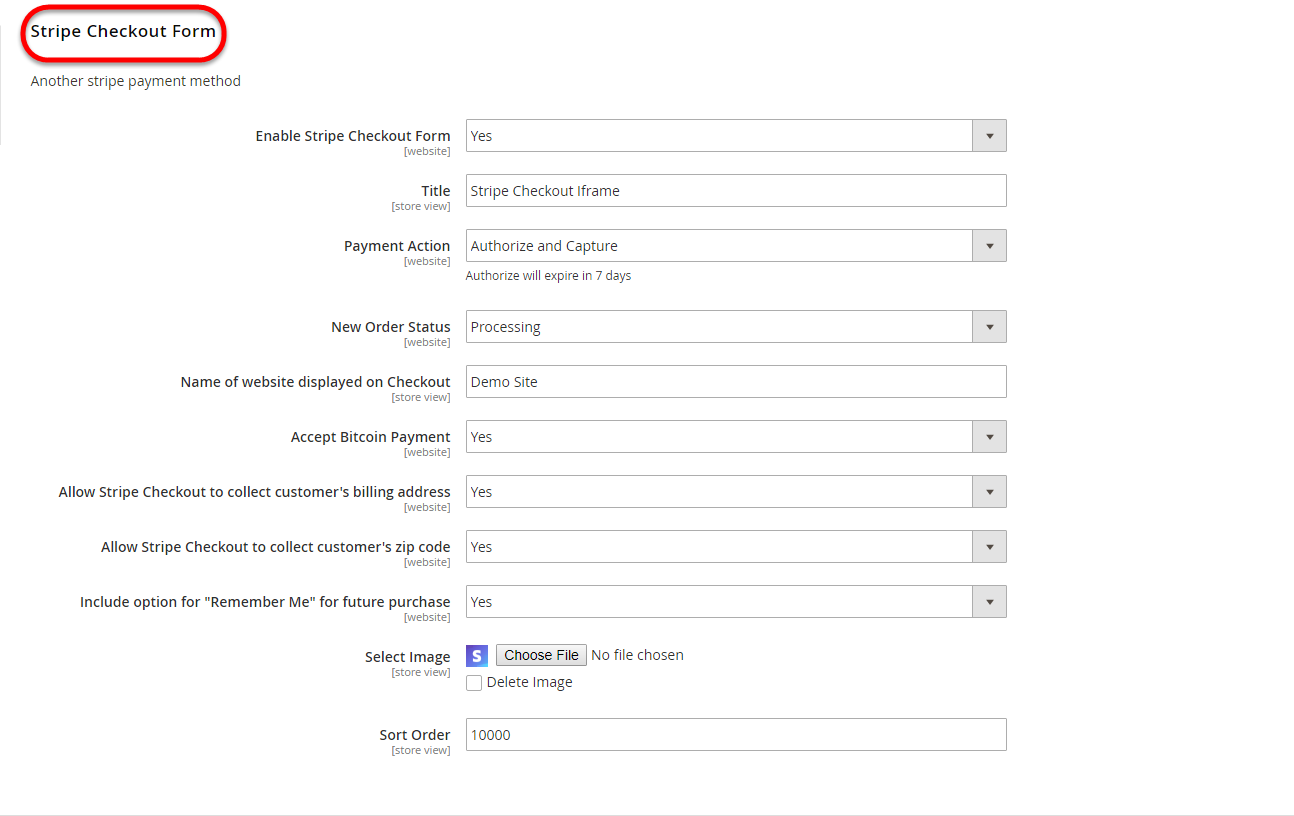
Stripe Checkout Form: IFrame checkout form settings
![]() Enable Stripe Checkout Form: Choose Yes to enable the IFrame checkout form.
Enable Stripe Checkout Form: Choose Yes to enable the IFrame checkout form.
![]() Title: Edit the title for the payment method. Here we recommend you to set it as "Stripe Checkout IFrame"
Title: Edit the title for the payment method. Here we recommend you to set it as "Stripe Checkout IFrame"
![]() New: Three payment methods have been developed for Stripe: Apple/Google Pay, Giro Pay, Alipay.
New: Three payment methods have been developed for Stripe: Apple/Google Pay, Giro Pay, Alipay.
...