Thank you for purchasing our extension. If you have any questions that are beyond the scope of this document, do not hesitate to leave us an email via [email protected]
By: Magenest | Support Portal: http://servicedesk.izysync.com/servicedesk/customer/portal/17
Introduction
Magento 2 Quickbooks Online Integration provides a QuickBooks Online integrated management solution for merchants using Magento 2.
Features
- Allow synchronizing and updating Customers from Magento 2 store to QuickBooks Online both manually and automatically.
- Allow synchronizing and updating Products from Magento 2 store to QuickBooks Online both manually and automatically.
- Allow synchronizing Orders from Magento 2 store to QuickBooks Online both manually and automatically.
- Allow synchronizing Invoices from Magento 2 store to QuickBooks Online both manually and automatically.
- Allow synchronizing Credit Memos from Magento 2 store to QuickBooks Online both manually and automatically.
- Allow mapping payment methods with deposit accounts.
- Allow admin to view the log to see what is synchronized between two apps.
- Allow admin to manage the sync queue to see what will be synchronized next.
System Requirements
Your store should be running on Magento 2 version 2.1.x, 2.2.x, 2.3.x CE & EE
Connect with QuickBooks Online
First of all, you need to integrate Magento 2 store with your QuickBooks Online account.
At back-end of Magento 2 store, click on QuickBooks Online Integration > Configuration:
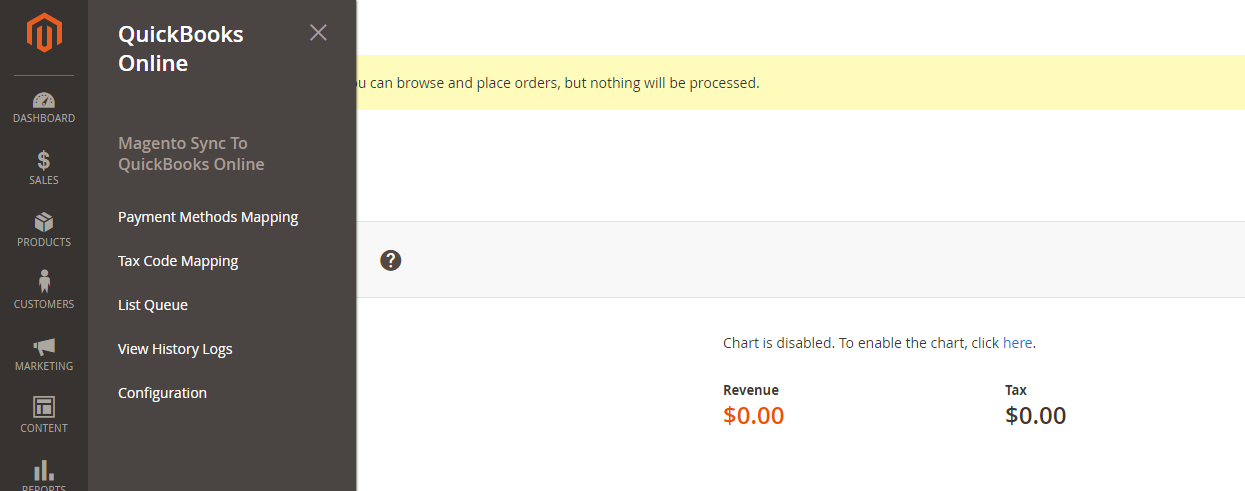
The page will appear as follow:
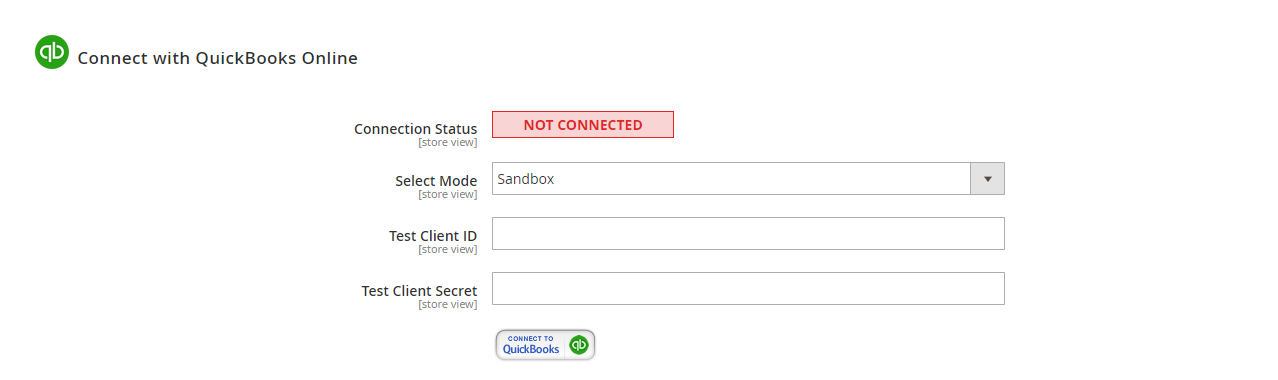
Please follow the step in the video here to set up the environment and connection:
https://www.useloom.com/share/ed648f8241974c6cbd95a27766927a73
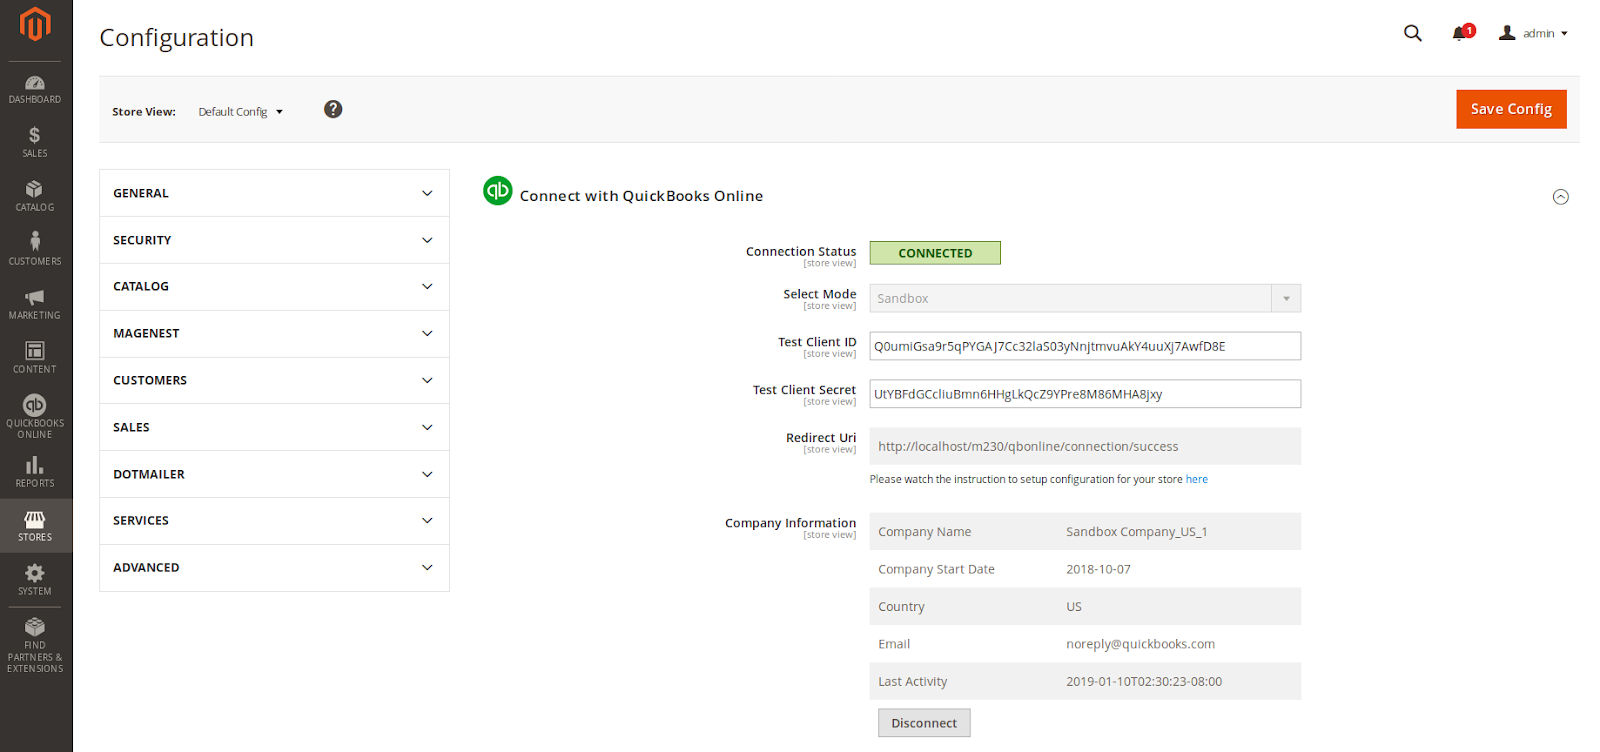
When connecting successfully, the backend page will be displayed as below. Click on Save Config button before continuing. This will help you avoid making the error.
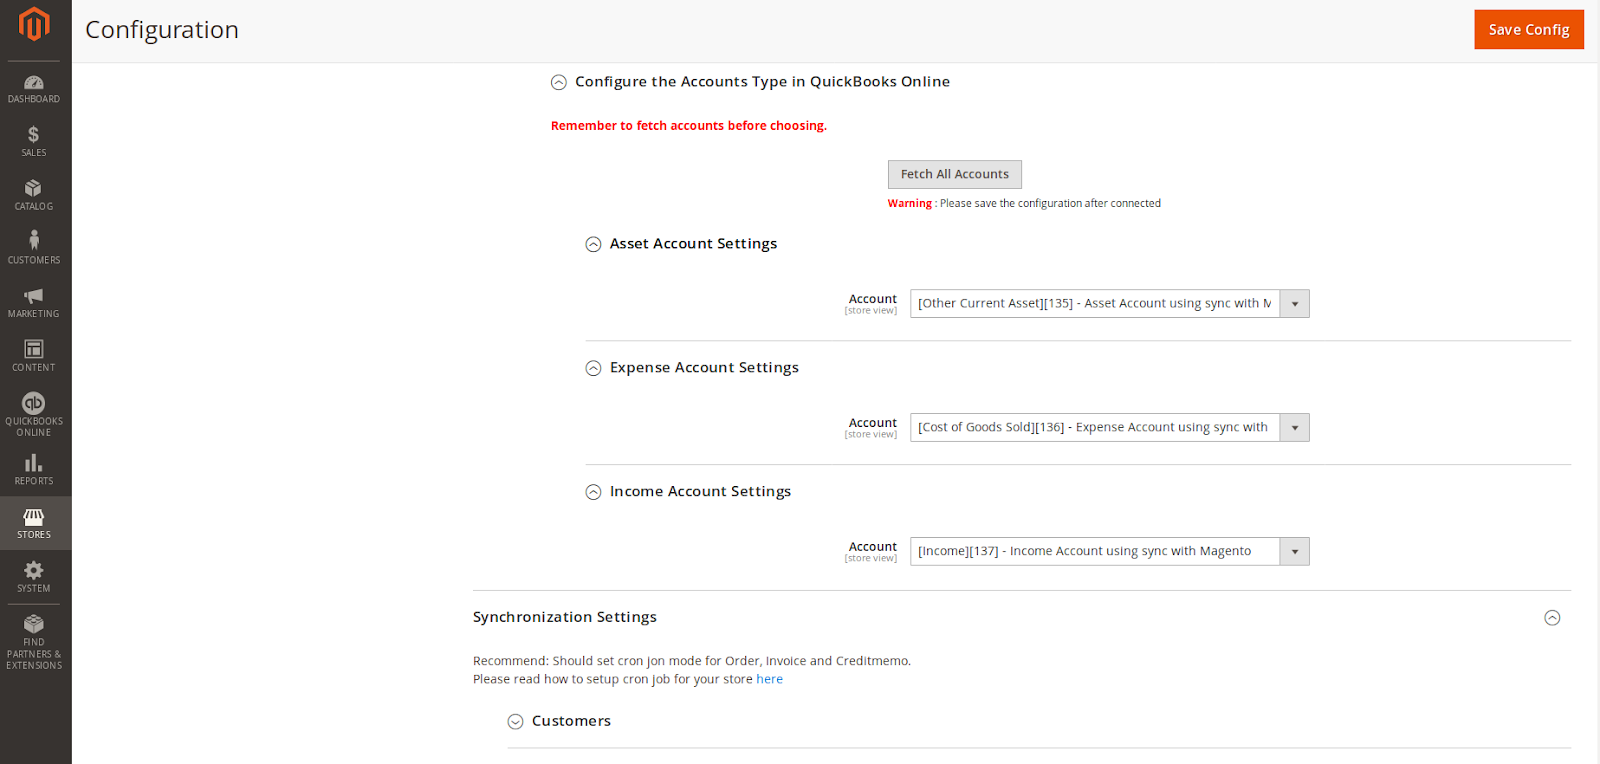
Then, admins need to navigate to the Configure the Accounts Type in QuickBooks Online section and expand it.
Admins will need to set three account types (Asset Account Settings, Expense Account Settings and Income Account Settings) by clicking on the Fetch All Accounts button.
Then, the accounts will be fetched. If accounts are not automatically selected, admin need to select accounts from the drop-downs:
- Asset Account: an account with ‘Other Current Asset’ type
- Expense Account: an account with ‘Cost of Goods Sold’ type
- Income Account: an account with ‘Income’ type
![]() After changing company, you have to sync accounts, tax codes and payment methods again
After changing company, you have to sync accounts, tax codes and payment methods again
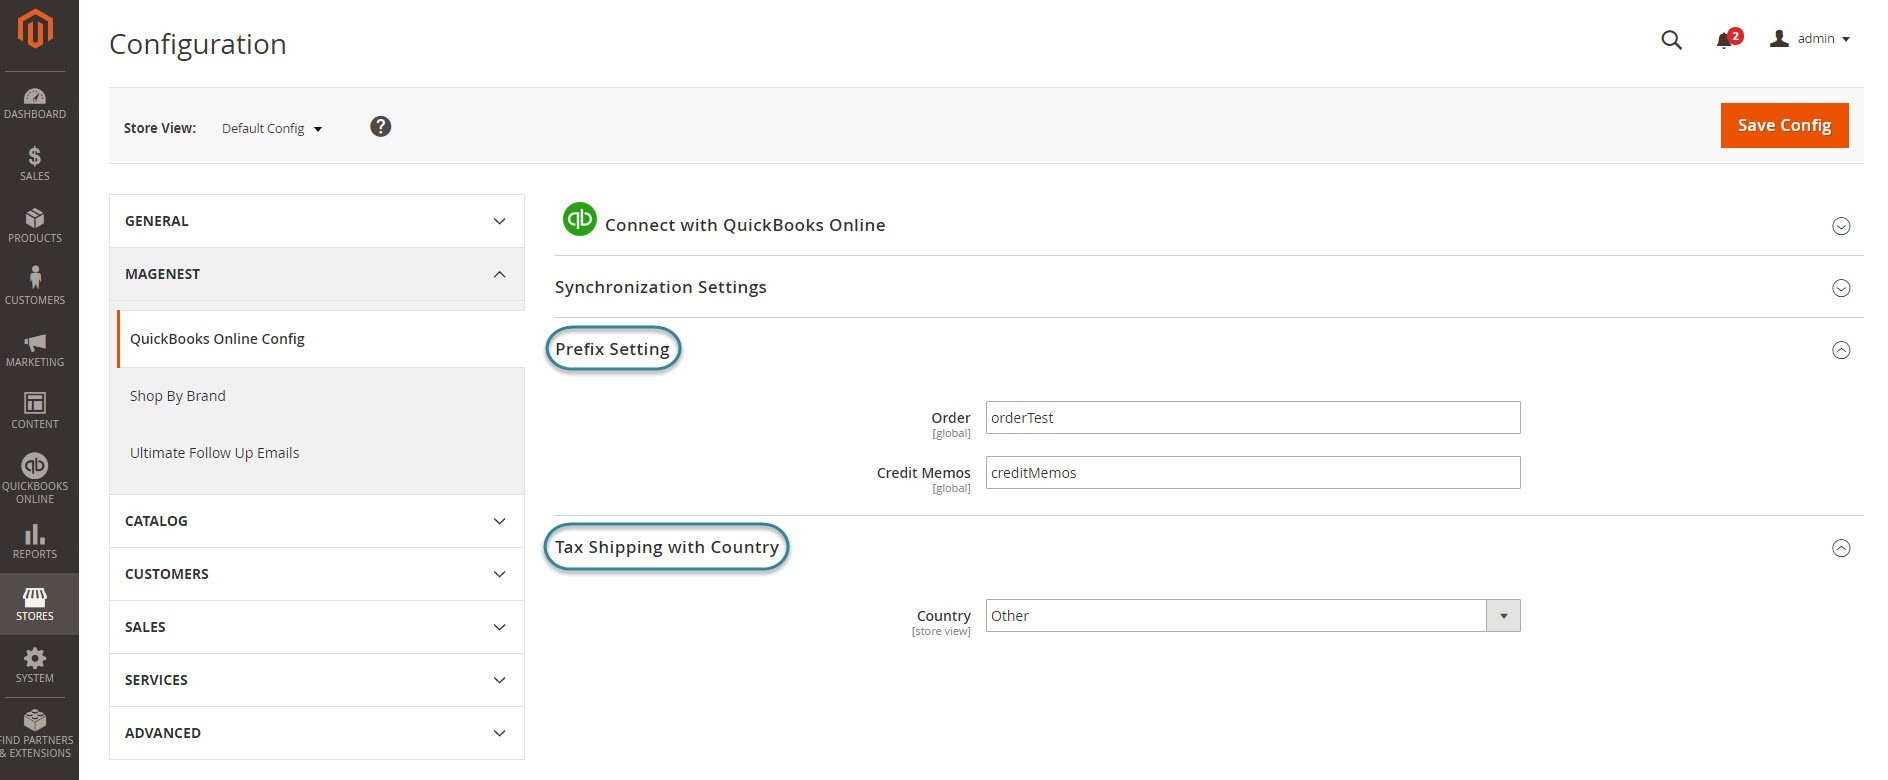
Finally, admins go to Prefix Settings and Tax and Country Settings section and expand them.![]() Prefix Settings: In order to make sure that the synchronization process works correctly, admin should set a prefix for Invoice and Credit Memo, to differentiate between transactions synced from Magento and created on QBO. On QBO Company Settings -> Sales -> Use Custom Transaction number should be OFF.
Prefix Settings: In order to make sure that the synchronization process works correctly, admin should set a prefix for Invoice and Credit Memo, to differentiate between transactions synced from Magento and created on QBO. On QBO Company Settings -> Sales -> Use Custom Transaction number should be OFF.
Example: If admins enter "InvoiceTest" at the Invoice field, the invoice will be synced from Magento to QuickBooks Online with the format InvoiceTestXXXXXXXXXXX.
![]() Tax and Country Settings: Admins need to choose their country and set a tax shipping type.
Tax and Country Settings: Admins need to choose their country and set a tax shipping type.
There are two fields that admins need to consider:![]() Country: Choose United Kingdom, Canada, France, Australia, Global or Other Country.
Country: Choose United Kingdom, Canada, France, Australia, Global or Other Country.
![]() Tax With Shipping:
Tax With Shipping:
Please note that if your Country Setting is not Other, it is required to have a shipping tax in QuickBooks Online. So, admins need to set a tax type for the shipping fee.
If admins want to choose a free shipping tax, they only need to choose the tax named Tax Shipping Zero created by the extension.
If admins want to choose a shipping tax (no free), admins need to create a tax rule before. Then, it will be shown at drop-down options and admins will choose this tax.
![]() Enable this option will log all requests to QuickBooks Online and their responses to [site root]/var/log/qbonline/debug.log. May contains sensitive data.
Enable this option will log all requests to QuickBooks Online and their responses to [site root]/var/log/qbonline/debug.log. May contains sensitive data.
How to synchronize data from Magento 2 store to QuickBooks Online
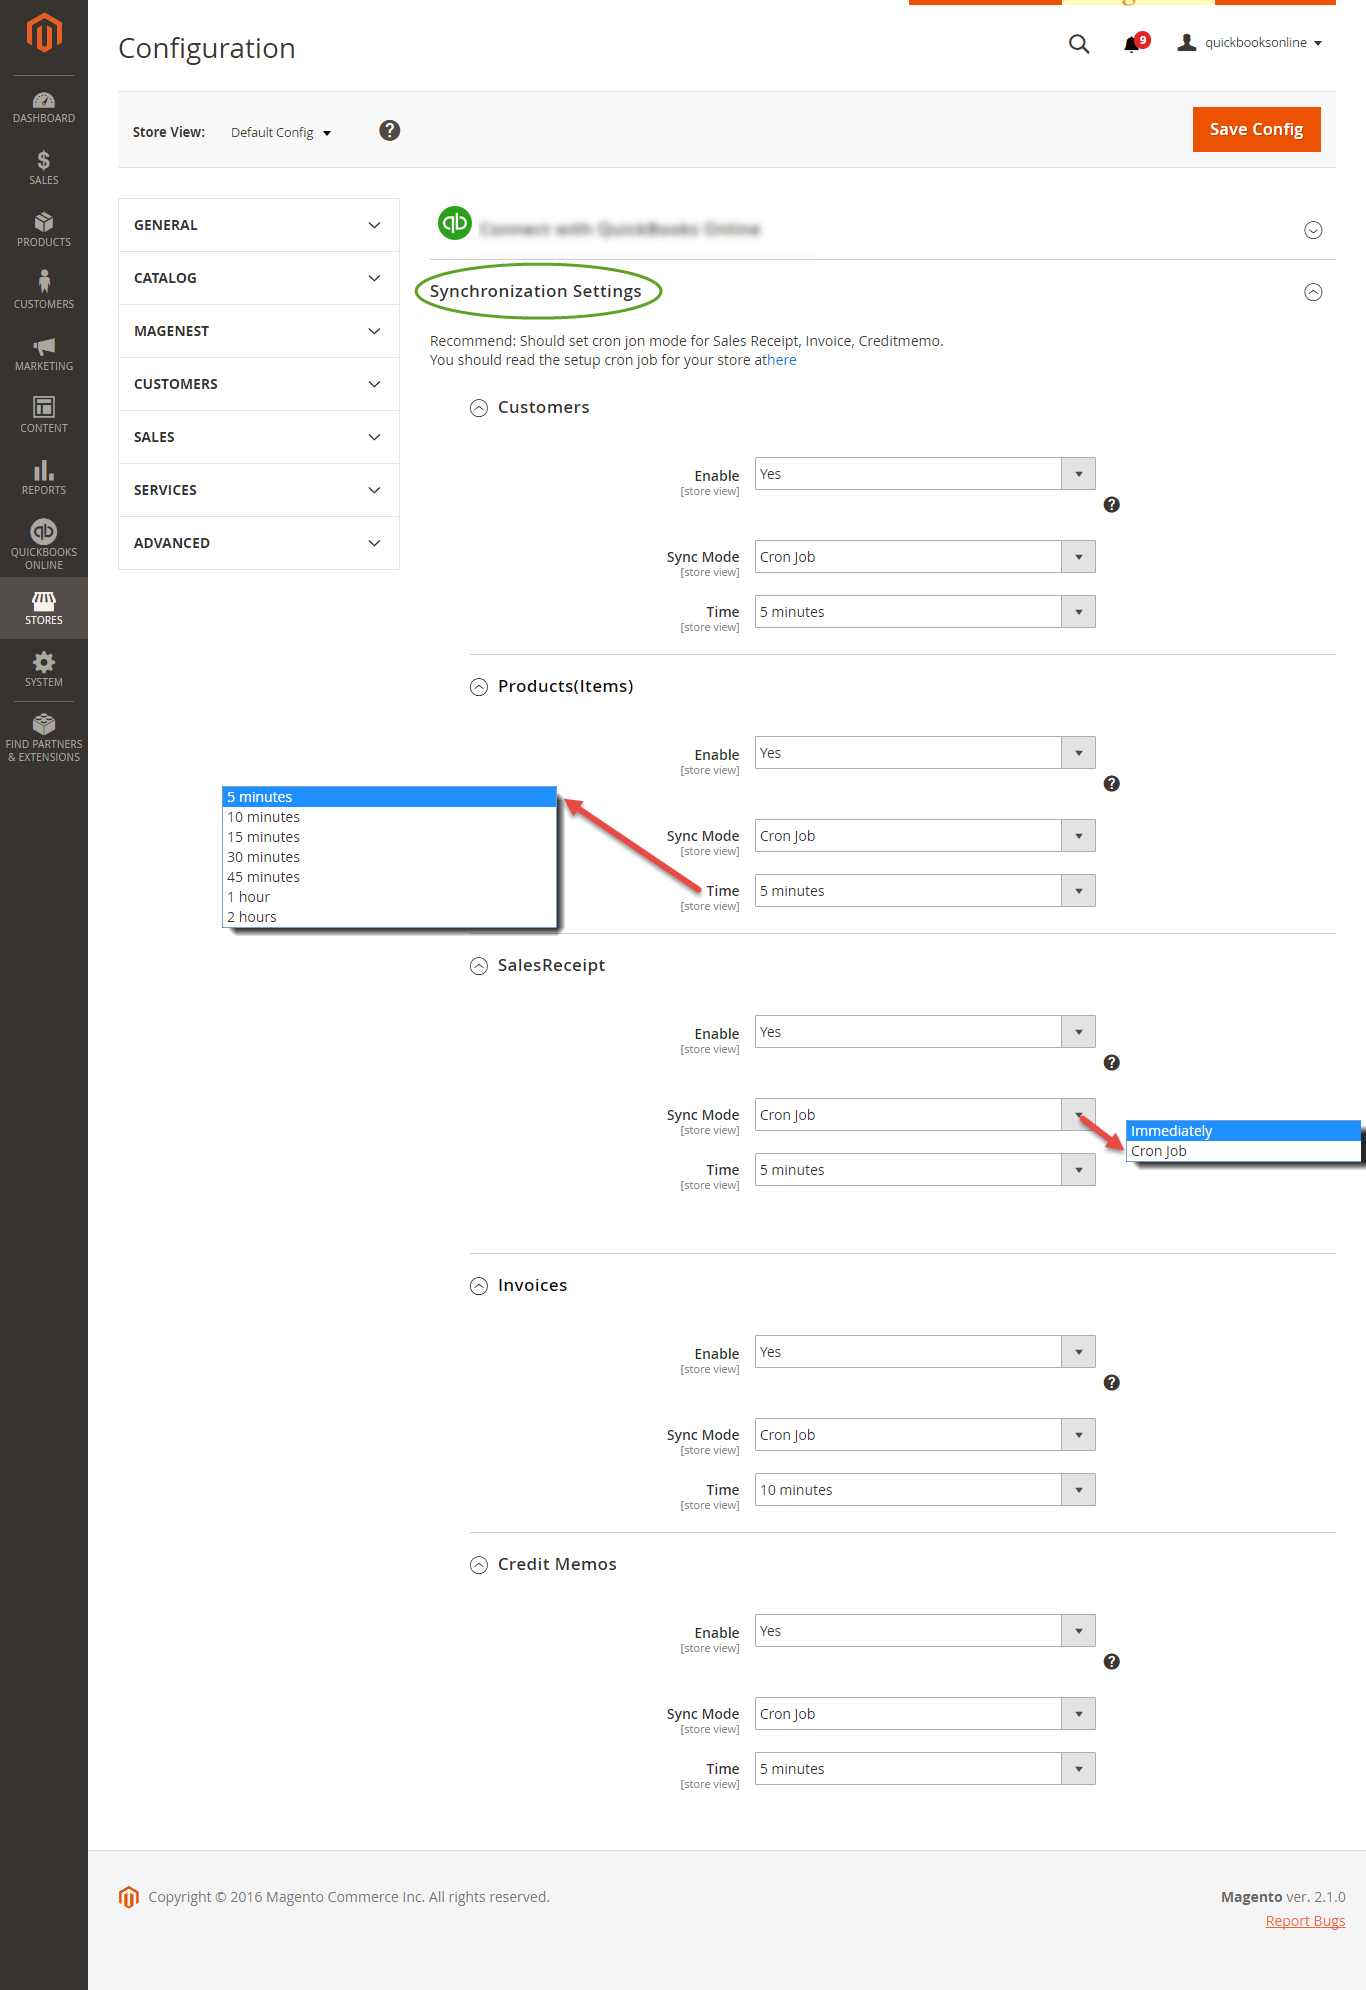
Synchronization Settings
Admins are able to decide whether to synchronize data in Synchronization Settings tab: Customers, Products (Items in QuickBooks Online), Orders, Invoices, and Credit Memos.
Also, admins can choose the way to synchronize data either Immediately mode or Cron Job mode.
Setting Up Field Mapping
- Mapping Payment Methods:
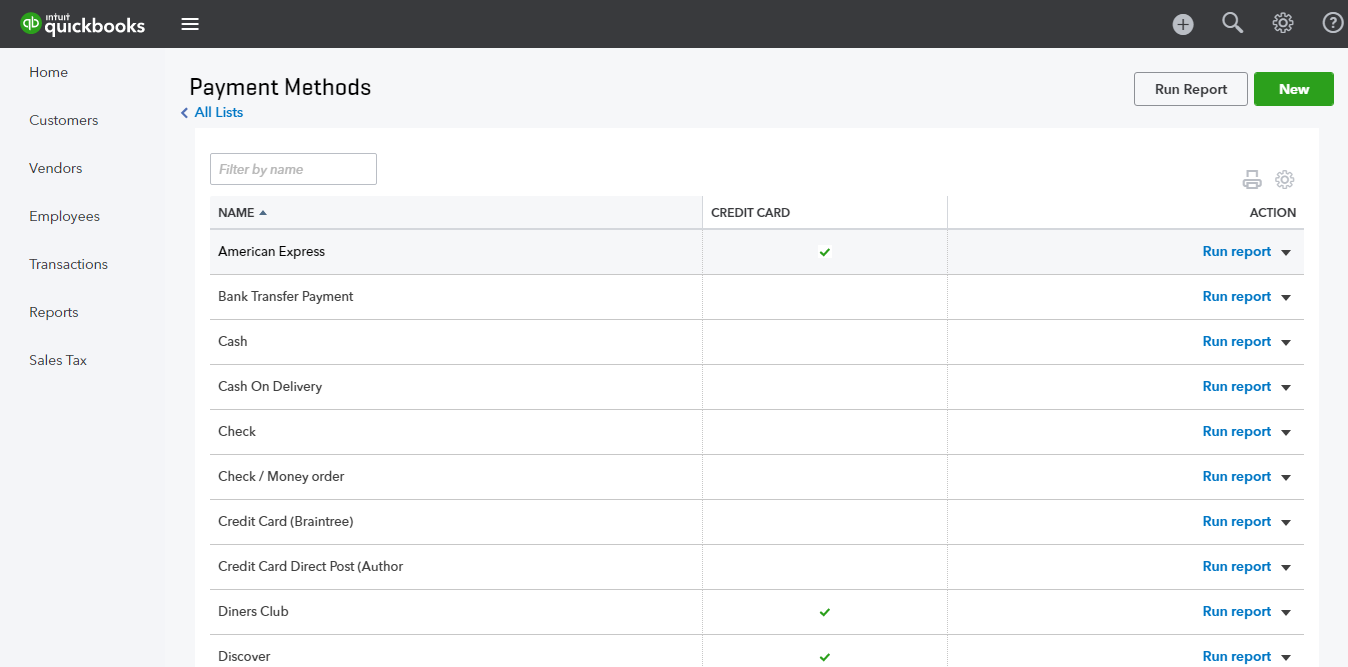
At backend of QuickBooks Online Integration extension, navigate to QuickBooks Online > Payment Method click on Synchronize button to automatically connect payment methods between Magento 2 backend and QuickBooks page.

On QuickBooks page, click on gearwheel simple at the top right then choose All Lists > Payment Methods:
- Mapping Tax:
The system has created a Mapping Tax tab that allows you to mapping tax from your Magento 2 store to QuickBooks Online account. First, admins need to click on Add All Tax Code button to add all tax code of your Magento 2 store to Mapping Tax page. Then, you can use Synchronize button to finish this mapping.
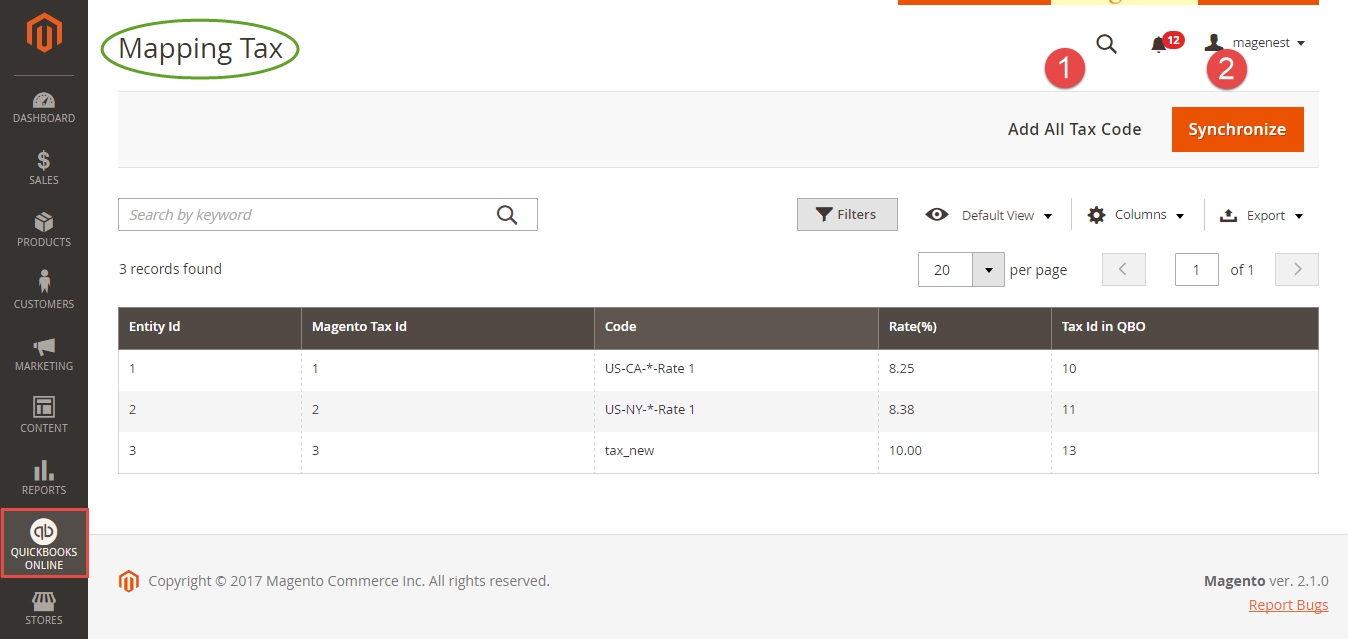
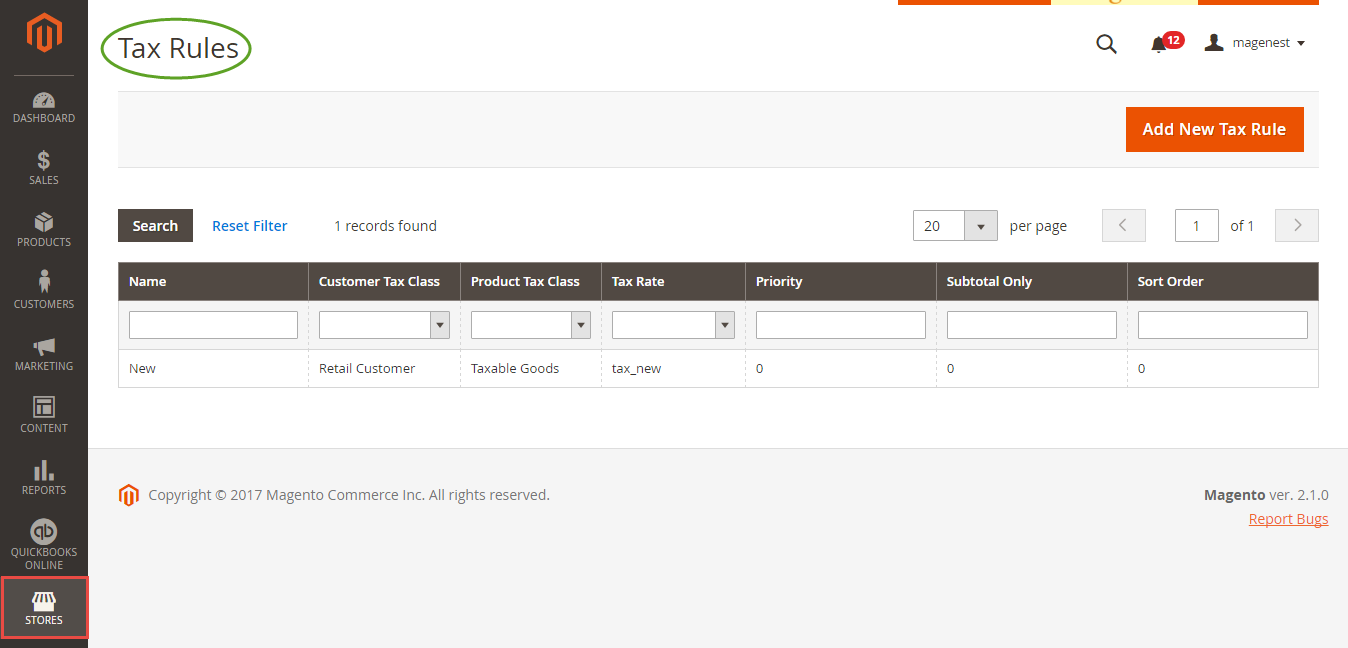
Note that your Magento 2 store need to have Tax Rules before creating mapping tax:
Process Synchronization
If the App mode is Cron Job, Queue page is the place which the created, updated data is stored in and are waiting to be synced. If you want to sync data right away, you can press Sync Now button. You can decide whether to synchronize any items on List Queue page by remove selected data from the grid.
Admin can add all orders, invoices and memos to queue on only add transactions based on their creation date.
Please note that synchronizing will take some time, the length of time depends on the size of the database.

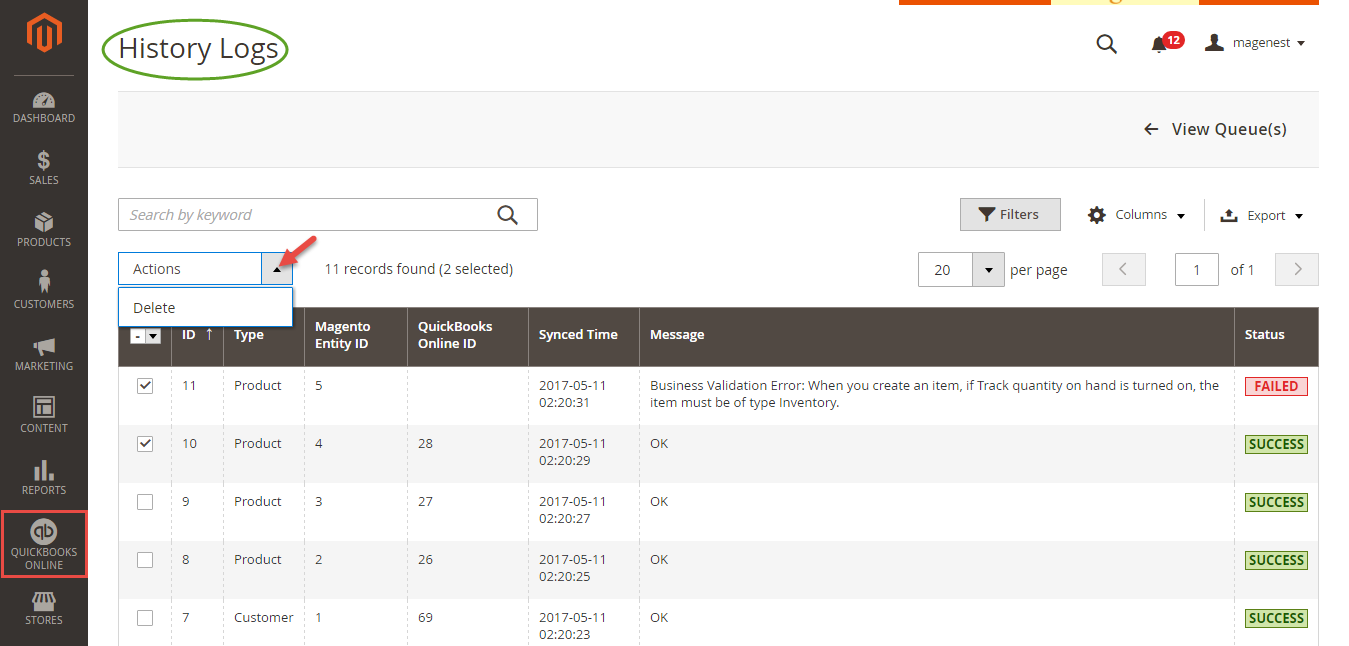
When the progress is done, go to QuickBooks Online > View History Logs and check what is synchronized in the grid.
- If the data is synchronized right, the Status will be SUCCESS and the Message will be "OK"
- If there's a problem during process synchronization, the status will be FAILED and the message tab will show the error message like the record below.
Main Functions
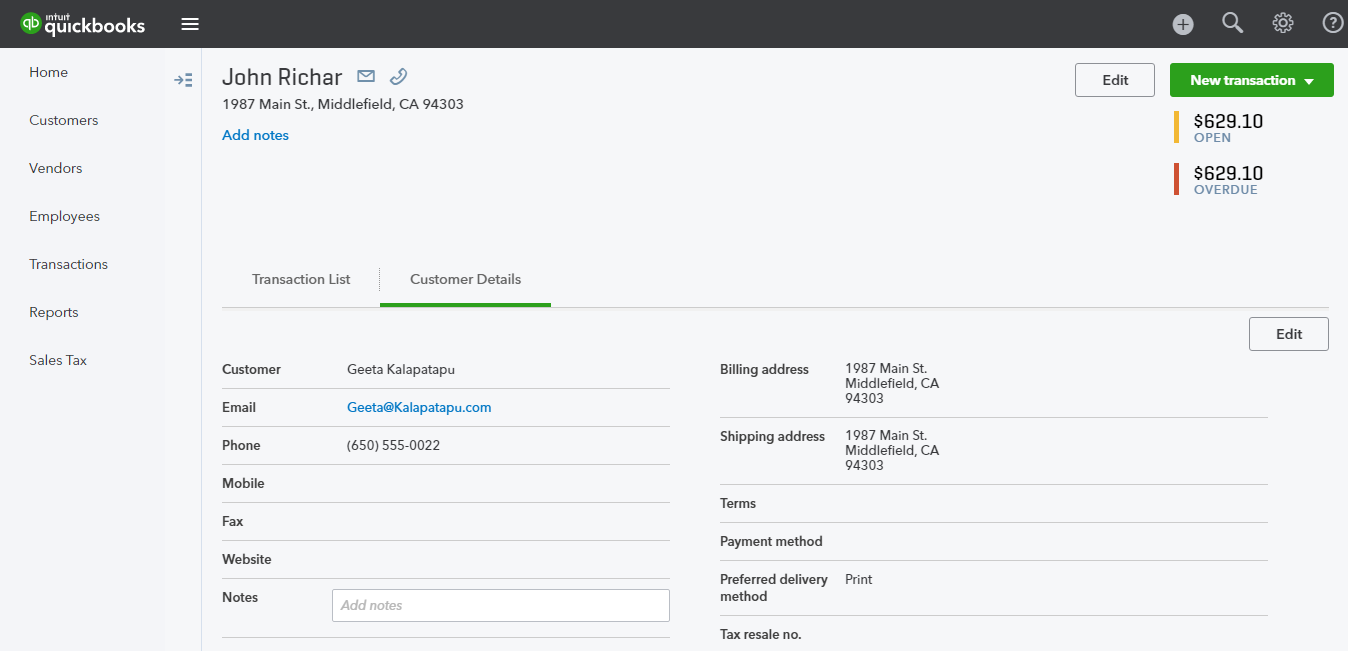
- When a new account is registered in front-end of Magento 2 or an existed customer is updated, QuickBooks Online Integration extension will allow synchronizing this record automatically to
QuickBooks Online.
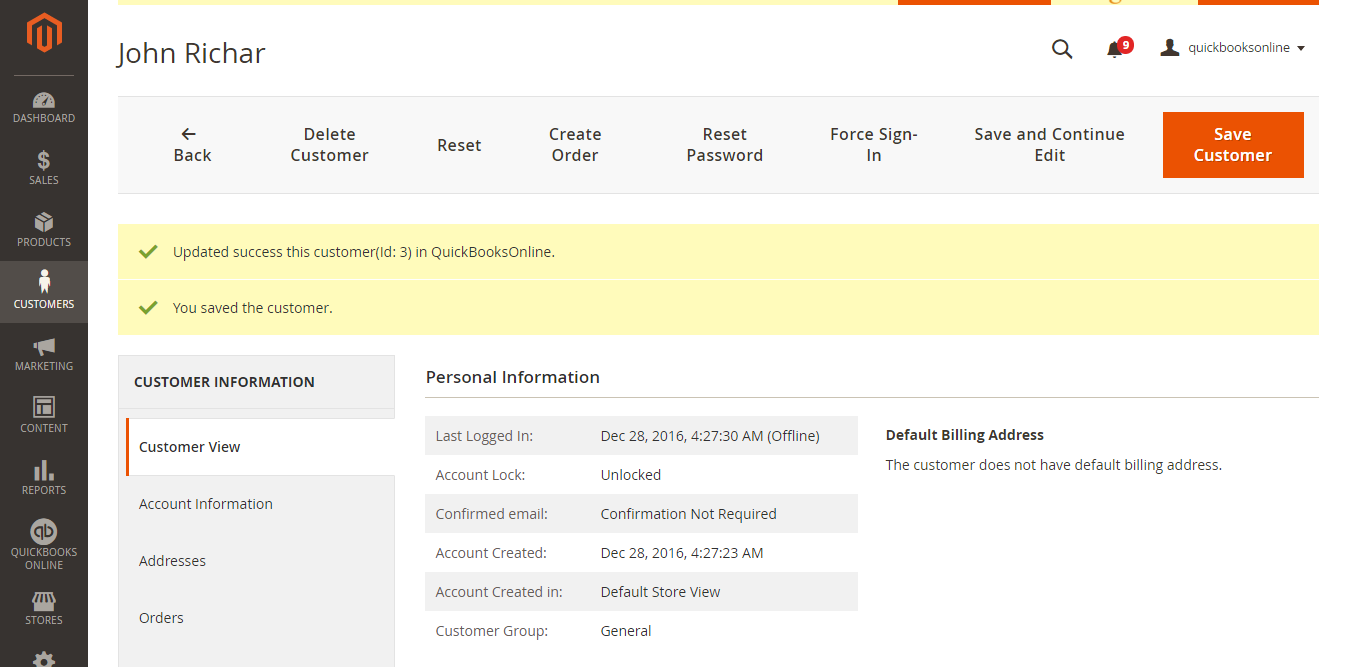
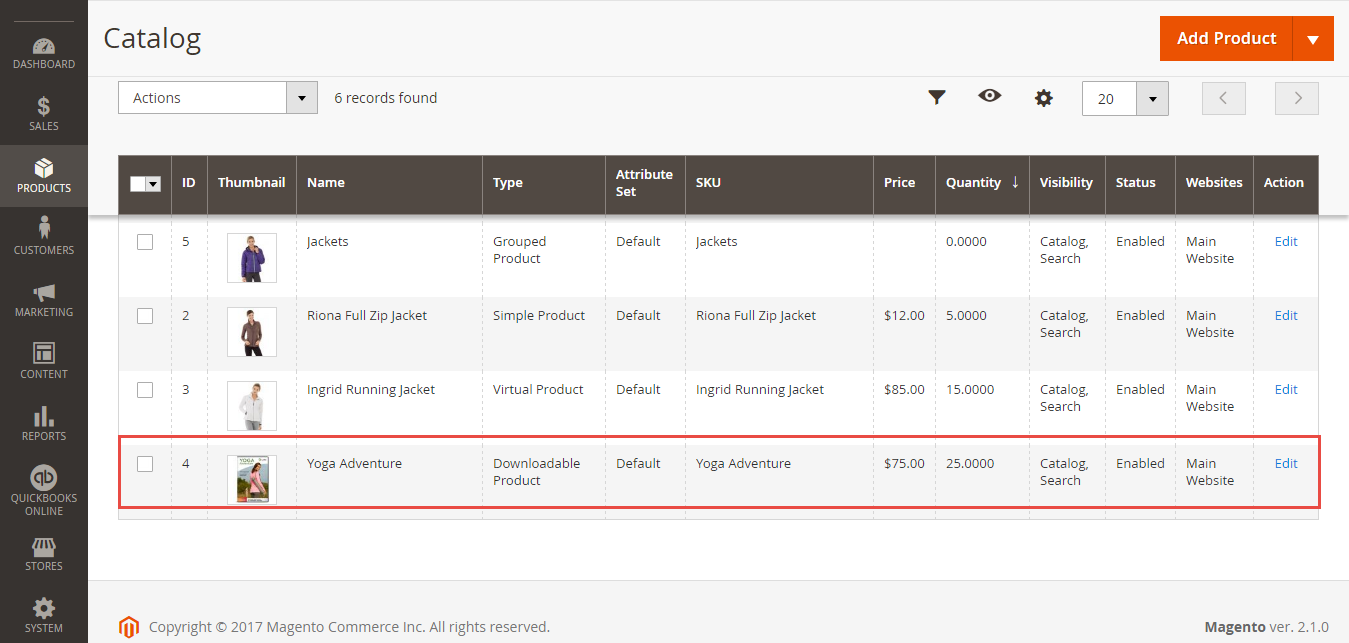
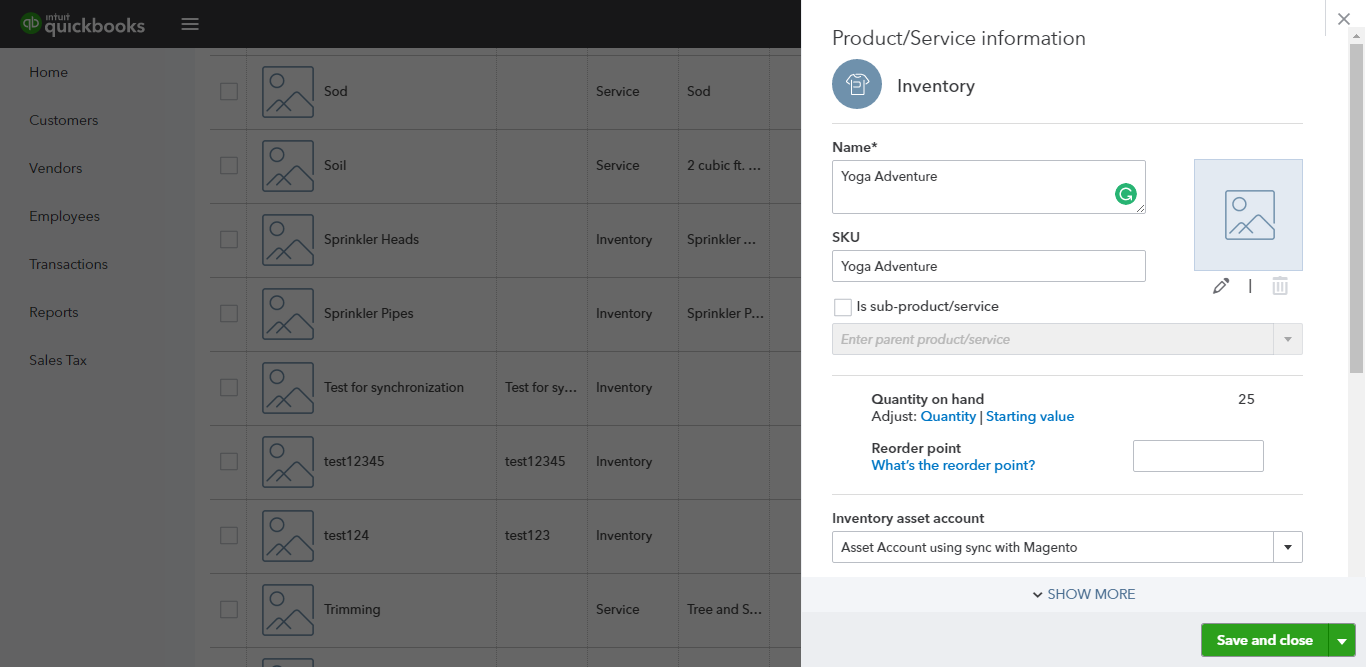
- When admins create or update information of products in Magento 2 store, data will be automatically synced into QuickBooks Online Items.
- When an order is created in Magento 2, this order will be automatically synced in QuickBooks Online as an open invoice
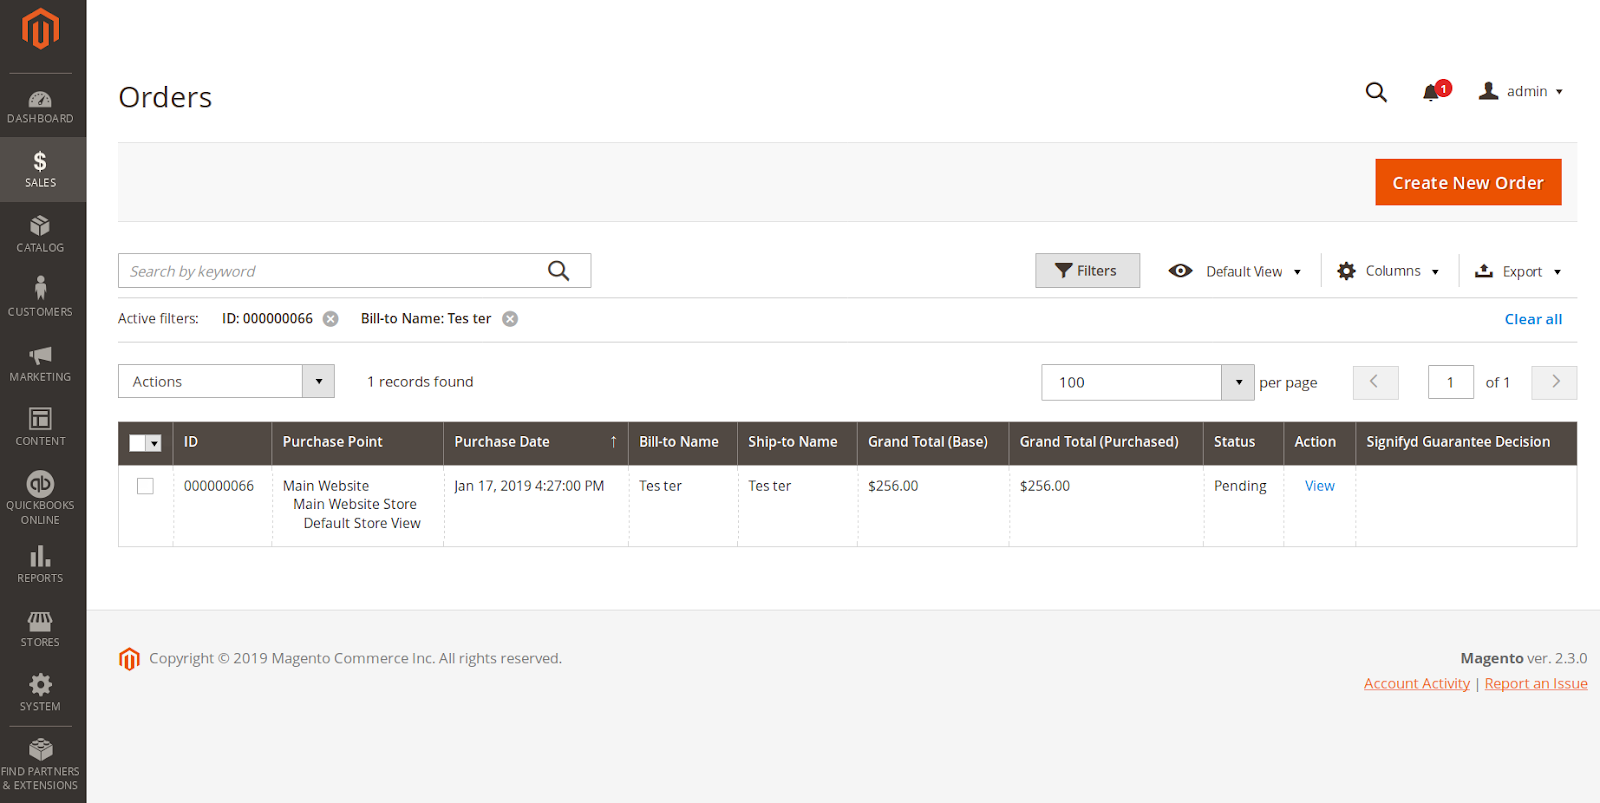
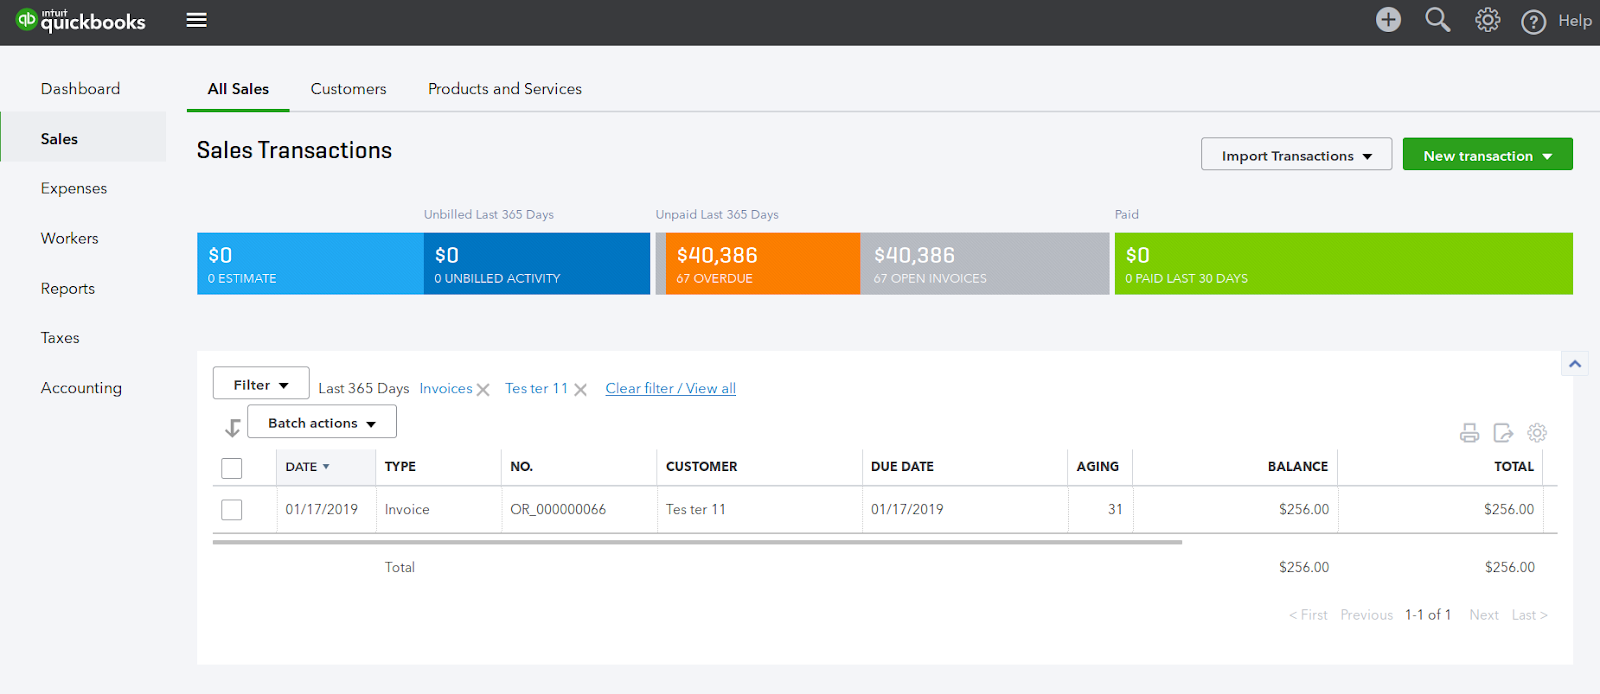
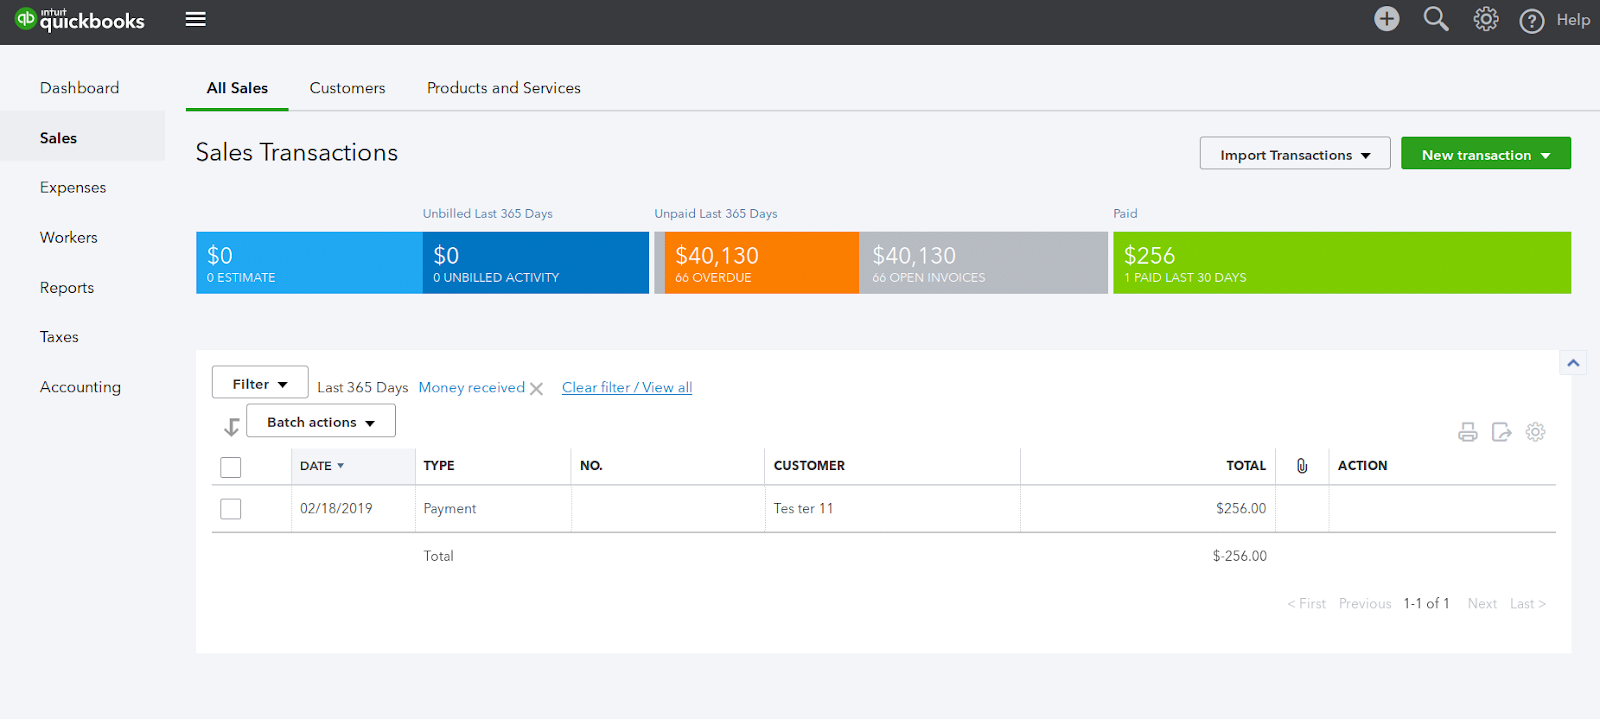
- When an invoice is created in Magento 2, this invoice will be automatically synced in QuickBooks Online as a Payment attached to the open invoice to change invoice status to Paid.

- When a credit-memos is created in Magento 2, this credit-memos will be automatically synced in QuickBooks Online account.

Map Payment methods with deposit accounts
- From QuickBooks Online Synchronization, select Fetch All Accounts.

![]() Note: if the list of accounts has changed on QuickBooks Online, admin have to use this button again for updating.
Note: if the list of accounts has changed on QuickBooks Online, admin have to use this button again for updating.
- From QuickBooks Online, go to Payment Methods Mapping, then press Synchronize.
- Select any payment method, choose a deposit account from the dropdown list, then Save.
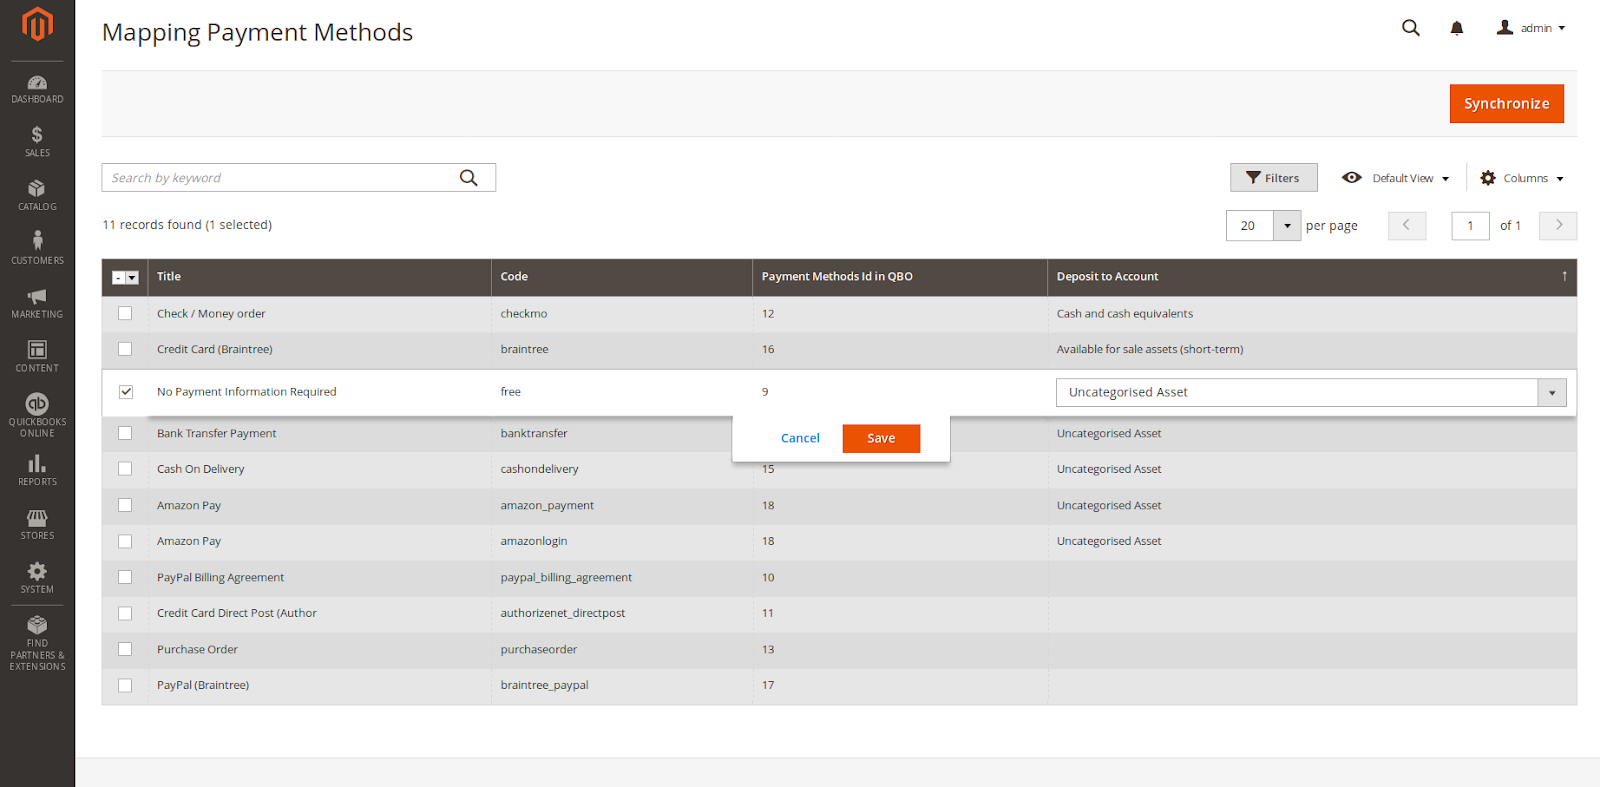
![]() Note: Only accounts with type Current Assets or Cash and cash equivalents can be used as a deposit account. Invoices with payment methods not linked to a deposit account will be synced to Undeposited Funds/Uncategorized Assets account by default.
Note: Only accounts with type Current Assets or Cash and cash equivalents can be used as a deposit account. Invoices with payment methods not linked to a deposit account will be synced to Undeposited Funds/Uncategorized Assets account by default.
QuickBooks Online Default Synchronization Fields
Customer
Magento Customer | QBO Customer |
First name | Given Name |
Last name | Family Name |
ID | Suffix |
Telephone | Phone |
Default Billing Address | Bill Address |
Default Shipping Address | Shipping Address |
First name + Last name + ID | Display Name (unique) |
qbo_id | ID |
Product
Magento Product | QBO Item |
Name | Name, PurchaseDesc, FullyQualifiedName |
Short Description | Description |
Price | Unit Price |
Tax Enable | Taxable |
Sku | Sku |
Qty | Qty On Hand |
Created At | Inventory Start Date |
![]() Qty On Hand and Inventory Start Date requires QuickBooks Online Plus plan or above. QBO Item name depends on setting on Magento (use Product name/use product SKU/use both name and SKU )
Qty On Hand and Inventory Start Date requires QuickBooks Online Plus plan or above. QBO Item name depends on setting on Magento (use Product name/use product SKU/use both name and SKU )
Order
Magento 2 Order | QBO Open Invoice |
Increment ID | Document Number |
Customer | CustomerRef |
Items | Line Items |
Grand Total | Total Amount |
Customer Email | Billing Address |
Tax | TnxTaxDetail -> Total Tax |
Created At | TnxDate |
Product Qty | Quantity each product in order |
Price Each Product | Rate |
Total amount each Product | Amount |
Discount Amount | Discount |
Shipping Fee | Shipping |
Billing address | Billing address |
Shipping Address | Shipping Address |
Invoice
Magento Invoice | QBO Payment |
Method QBO ID | Payment Method Ref |
Created At | TxnDate |
Tax Amount | TxnTaxDetail -> Total Tax |
Customer Reference | CustomerRef |
Order ID | Linked Invoice ID |
Grand Total | Total Amount |
Customer Email | Billing Email Address |
Credit Memo
Magento Credit Memo | QBO Credit Memo |
Increment ID | Document Number |
Created At | TxnDate |
Tax Amount | TxnTaxDetail -> Total Tax |
CustomerRef | Customer Reference |
Items | Line Items |
Item qty | Qty |
Product price | Amount |
Amount product | Total |
Shipping Fee | Shipping |
Discount Amount | Discount |
Grand Total | Total Amount |
Customer Email | Billing Email Address |
Common Issues
The redirect_uri query parameter value is invalid.
![]() Cause: the redirect URI on the Intuit app is different from the URI on Magento installation.
Cause: the redirect URI on the Intuit app is different from the URI on Magento installation.
![]() Reason: the redirect URI shown on Magento QuickBooks Online config page is [website base URL]+’qbonline/connection/success’. The real redirect URI might be different due to Magento settings or web server settings.
Reason: the redirect URI shown on Magento QuickBooks Online config page is [website base URL]+’qbonline/connection/success’. The real redirect URI might be different due to Magento settings or web server settings.
![]() How to solve: find the real redirect URI of Magento site:
How to solve: find the real redirect URI of Magento site:
Copy the redirect URI and open this link on new browser tab.
Copy the final URL in the address bar (ends in ‘qbonline/connection/index/’).
Change the final URL to end with ‘qbonline/connection/success’ and use the modified address as redirect URI on Intuit App.
Save the Intuit app then reconnect.
Make sure all your transactions have a tax rate before you save
![]() Cause: QuickBooks tax is not properly set on Magento.
Cause: QuickBooks tax is not properly set on Magento.
![]() Reason: some countries i.e. UK or Canada requires all sale items to have a tax code, including tax-free items, which needs to have a 0% rate attached.
Reason: some countries i.e. UK or Canada requires all sale items to have a tax code, including tax-free items, which needs to have a 0% rate attached.
![]() How to solve: verify the following steps are performed on Magento backend:
How to solve: verify the following steps are performed on Magento backend:
On Tax Code Mapping menu, choose ‘Add All Tax Codes’ then ‘Synchronize’ . Synced tax rates will have a ‘Tax ID in QBO’ value. If there are rates without value after syncing, please check History Logs menu for the cause
On QuickBooks Online config page, on Tax and Country Settings, select your country. If Free Tax and Tax With Shipping option shows up, select the appropriate rate for them (if your site doesn’t have a 0% rate, our extension creates a tax_zero_qb 0% rate which you can choose instead)
Save Config and resync failed transactions
Invalid header line detected’ for all requests to QuickBooks, or Config page is blank'
![]() Cause: Magento 2 doesn’t intercept responses from QuickBooks correctly.
Cause: Magento 2 doesn’t intercept responses from QuickBooks correctly.
![]() Reason: QuickBooks have started sending responses in HTTP/2 instead of HTTP/1.1 . Some versions of Magento 2 doesn’t read HTTP/2 responses correctly.
Reason: QuickBooks have started sending responses in HTTP/2 instead of HTTP/1.1 . Some versions of Magento 2 doesn’t read HTTP/2 responses correctly.
![]() How to solve: patch the bug with reading HTTP/2 responses.
How to solve: patch the bug with reading HTTP/2 responses.
Backup the file at [site root]/vendor/magento/zendframework1/library/Zend/Http/Response.php
Open this file with a text editor and find the following 2 lines:
if (! preg_match('|^\d\.\d$|', $version) ) {
(around line 185) and change it to
if (! preg_match('|^\d(\.\d)?$|', $version)) {
if ($index === 0 && preg_match('#^HTTP/\d+(?:\.\d+) [1-5]\d+#', $line)) {
(around line 517) and change it to
if ($index === 0 && preg_match('#^HTTP/\d+(?:\.\d+|) [1-5]\d+#', $line)) {
- Save the file, clear cache and try again.
Update
- When a new update is available, we will provide you with a new package containing our updated extension.
- You will have to delete the module directory and repeat the installing steps above.
- Flush the config cache. Your store and newly installed module should be working as expected.
Support
- We will reply to support requests within 2 business days.
- We will offer lifetime free update and 6 months free support for all of our paid products. Support includes answering questions related to our products, bug/error fixing to make sure our products fit well in your site exactly like our demo.
- Support DOES NOT include other services such as customizing our products, installation and uninstallation service.
Once again, thank you for purchasing our extension. If you have any questions relating to this extension, please do not hesitate to contact us for support.