...
Configuration
Video Tutorial
| Widget Connector | ||||||
|---|---|---|---|---|---|---|
|
Set up Vtiger account
Go to https://www.vtiger.com/log-in/ to log in (if you already have a Vtiger account) or register a new one.
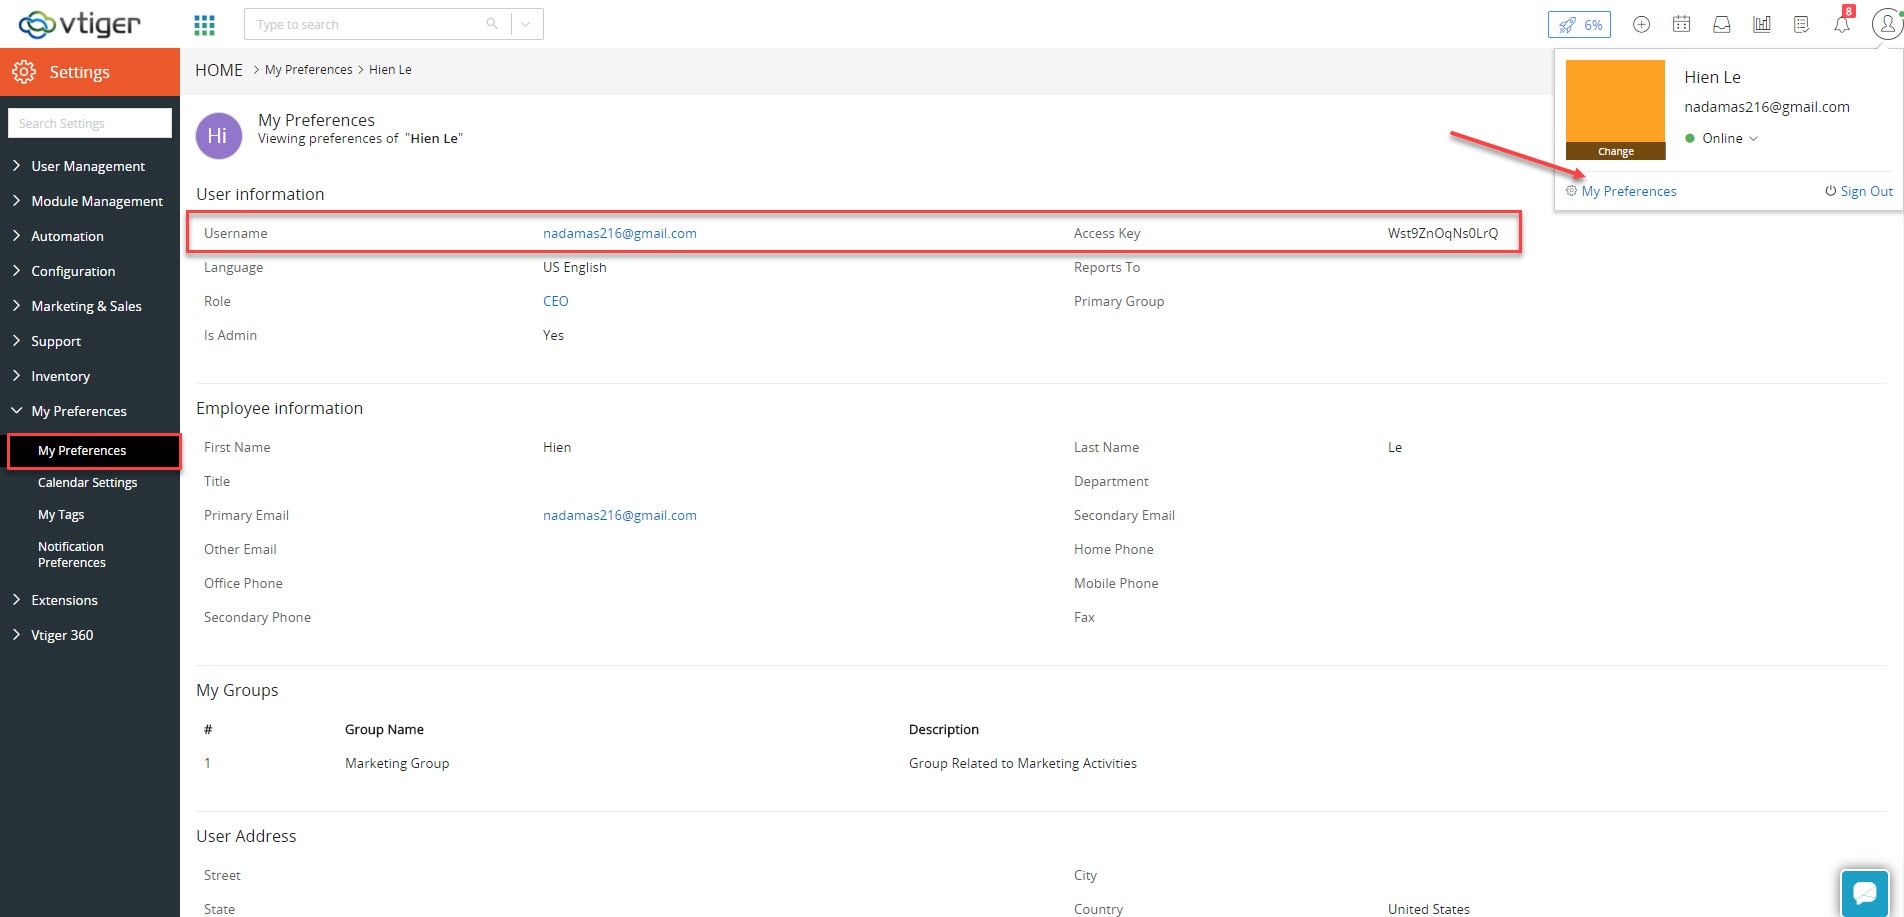
Getting Vtiger Access Key
Access your Vtiger account and click on your profile name on the top right corner, then go to My Preferences
Magento Back End
Configuration
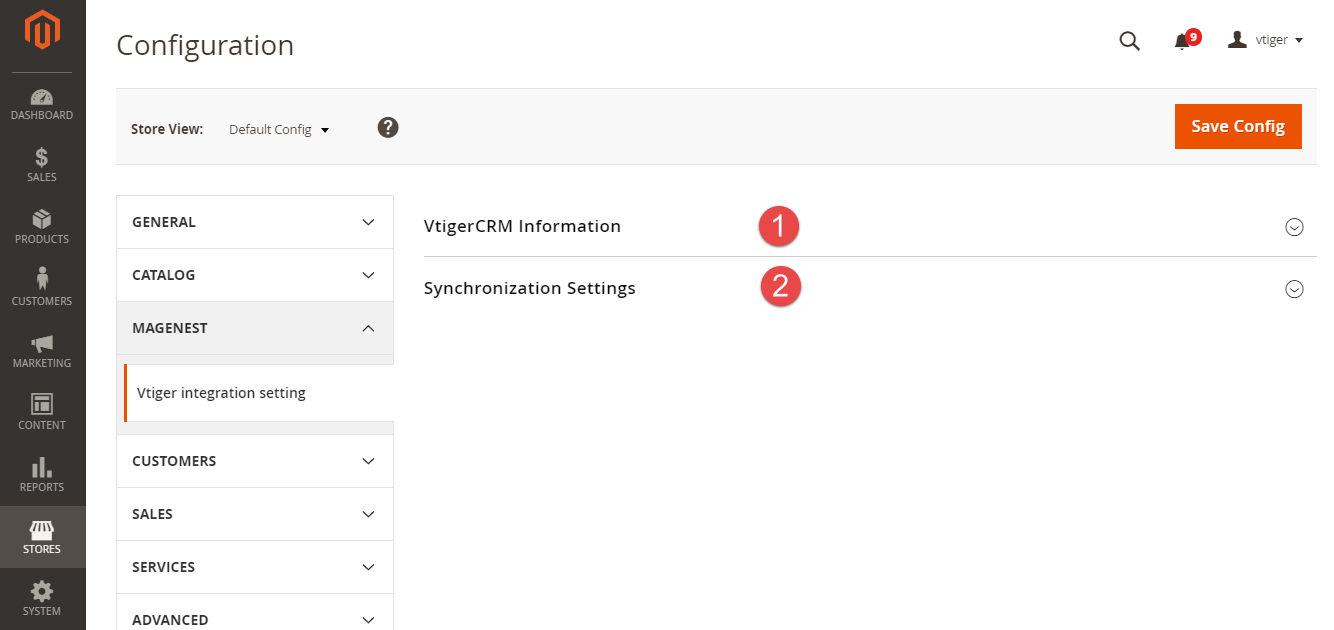
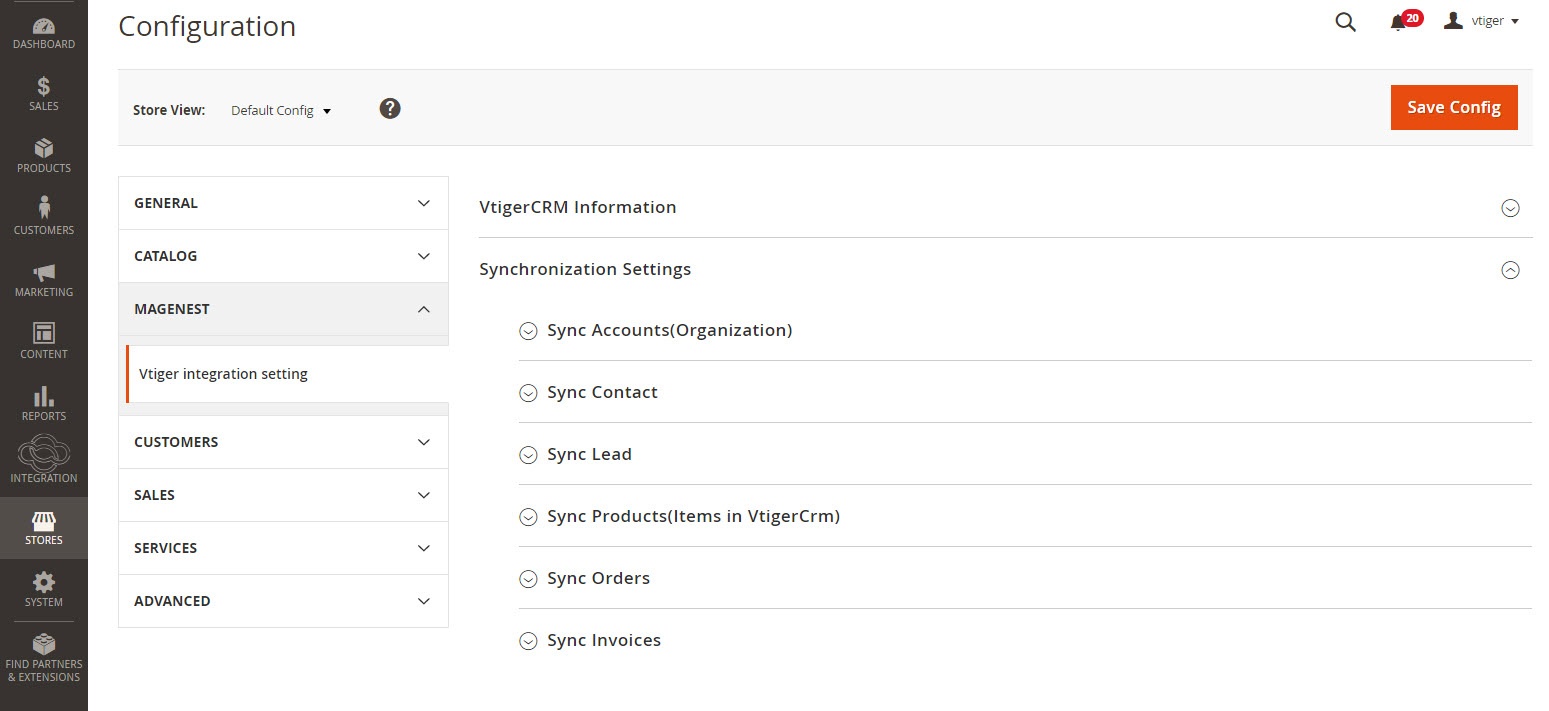
On the left menu bar, go to Vtiger CRM Integration > Configuration > Magenest > Vtiger Integration Setting
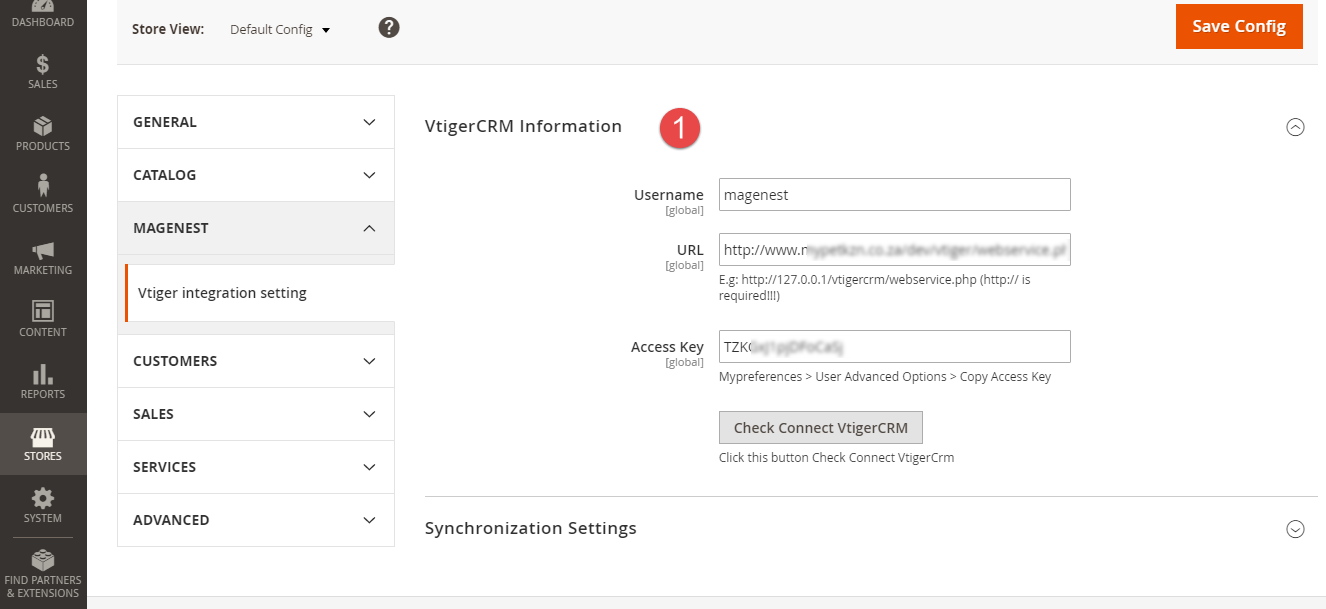
In the VtigerCRM Information section, there are three fields will be shown.
- Username: Your Vtiger username.
- URL: Please follow the format of your_vtiger_site/webservice.php
- Access Key: Used the access key in your preferences in Vtiger (see the "Get Vtiger access key" guide above)
Click on the Save Config and Check Connect VtigerCRM button.
 Set Set Up Field Mapping
In order to synchronize data fields from Magento 2 store to your Vtiger CRM account correctly, you need to create the mapping for these fields first.
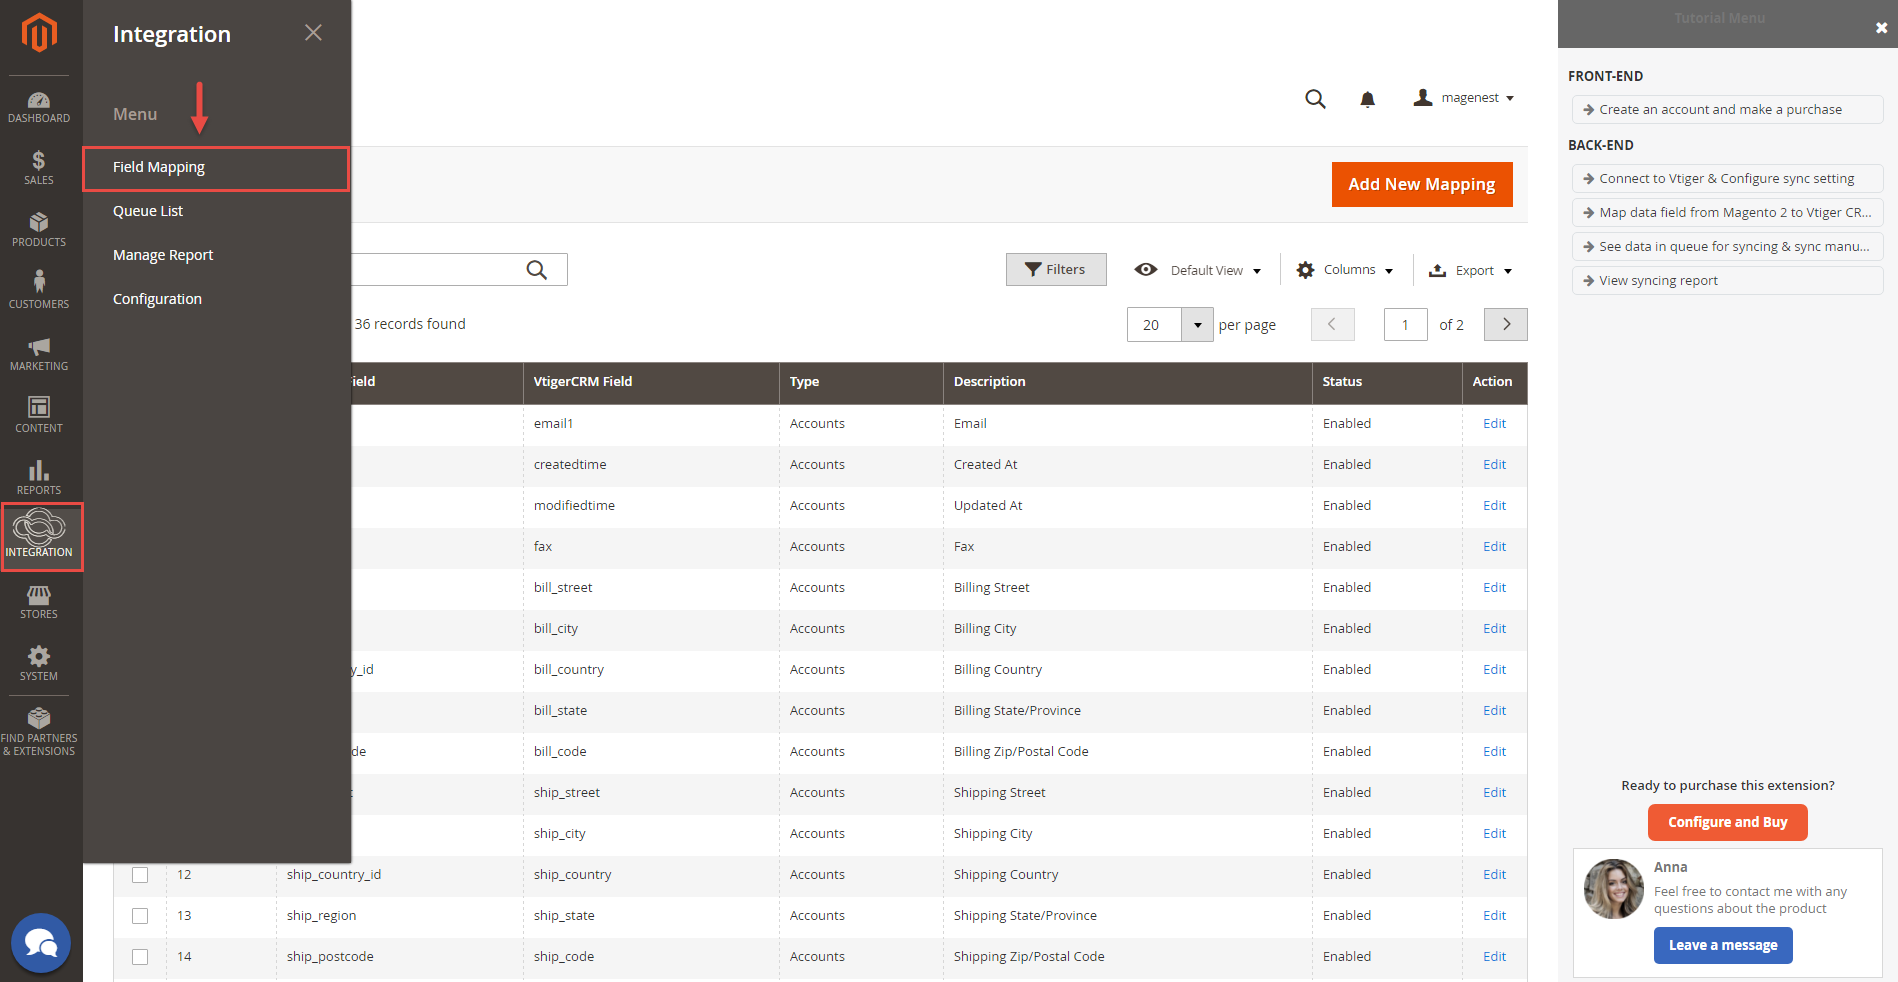
Go to Vtiger Integration > Field Mapping
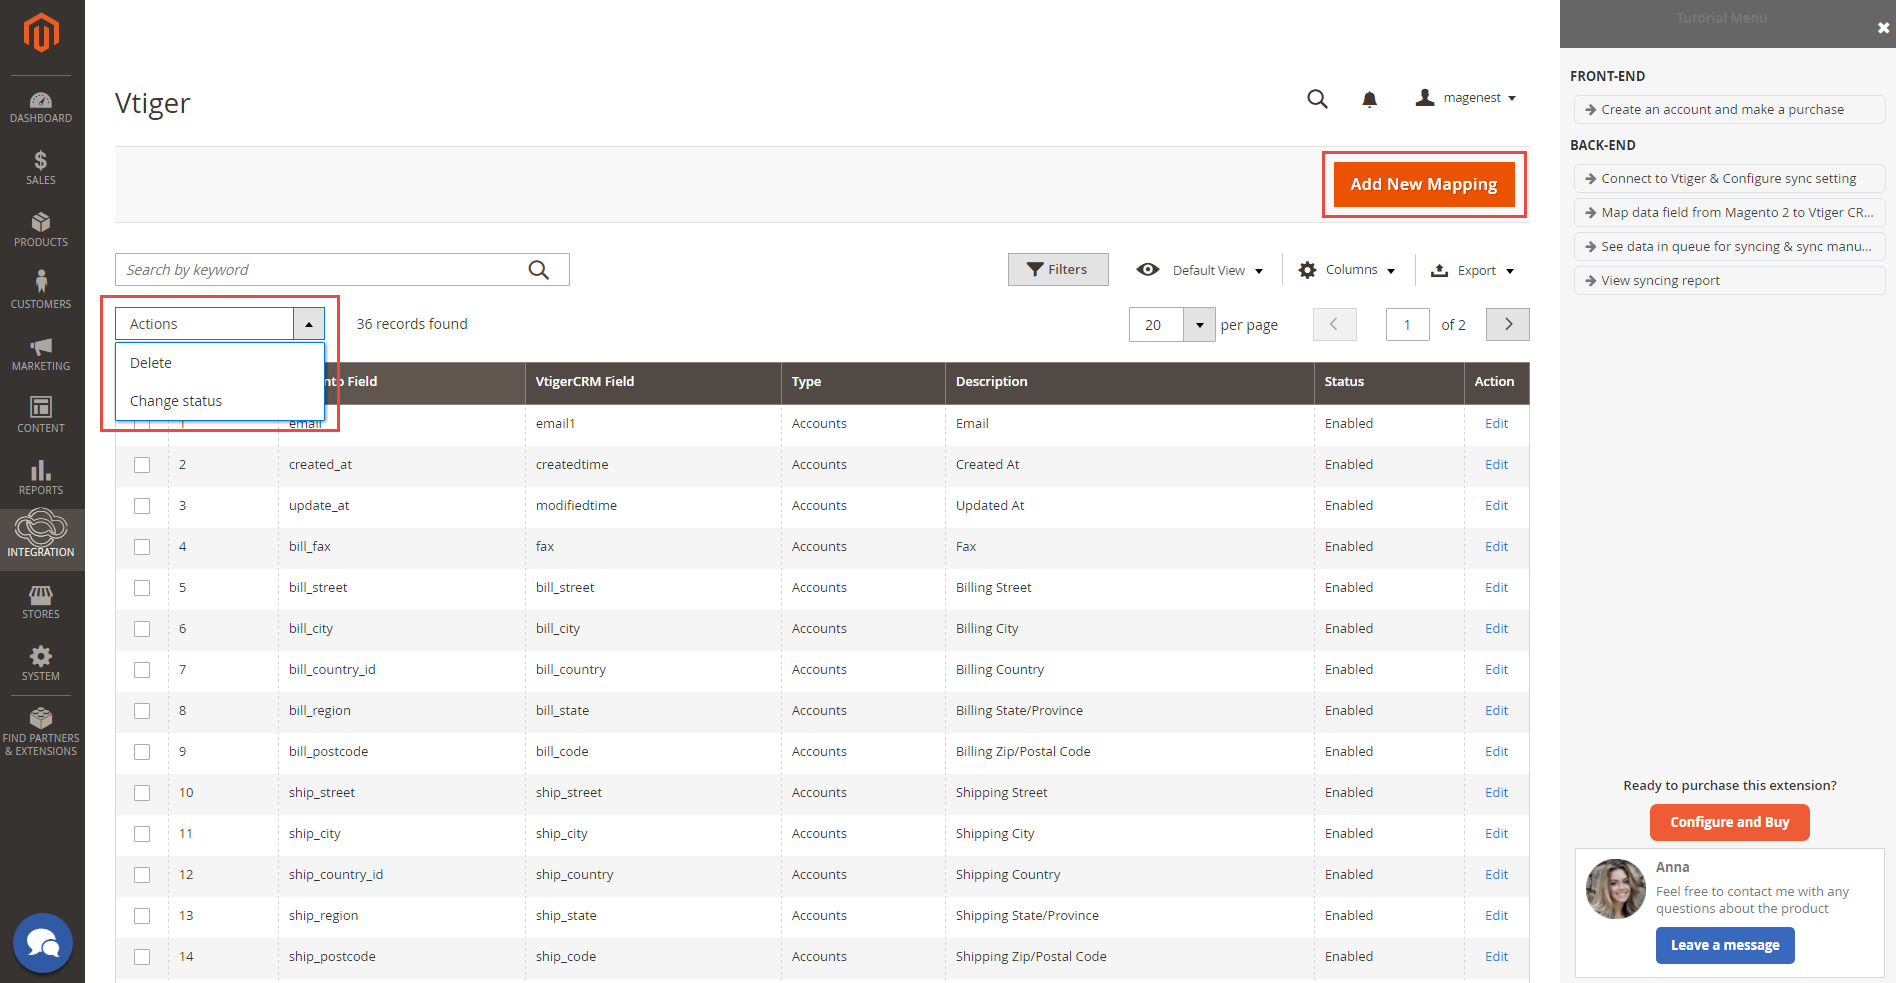
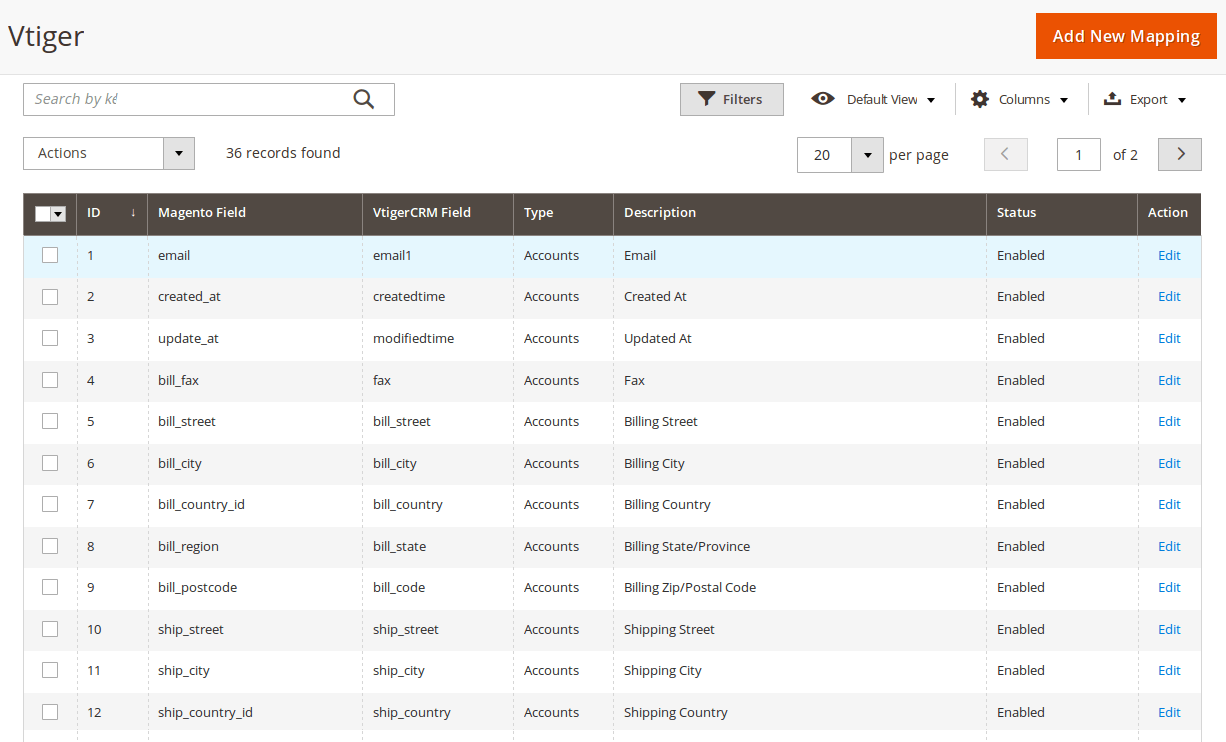
The module enables a grid table to manage mapping fields between Magento 2 and Vtiger CRM. You can choose which data fields you want to sync from Magento 2 to Vtiger CRM account.
From the manage mapping, you can export, change the status withenableand with enable and disable options, edit or delete a mapping.
In order to create a new mapping, please click on the Add New Mapping button
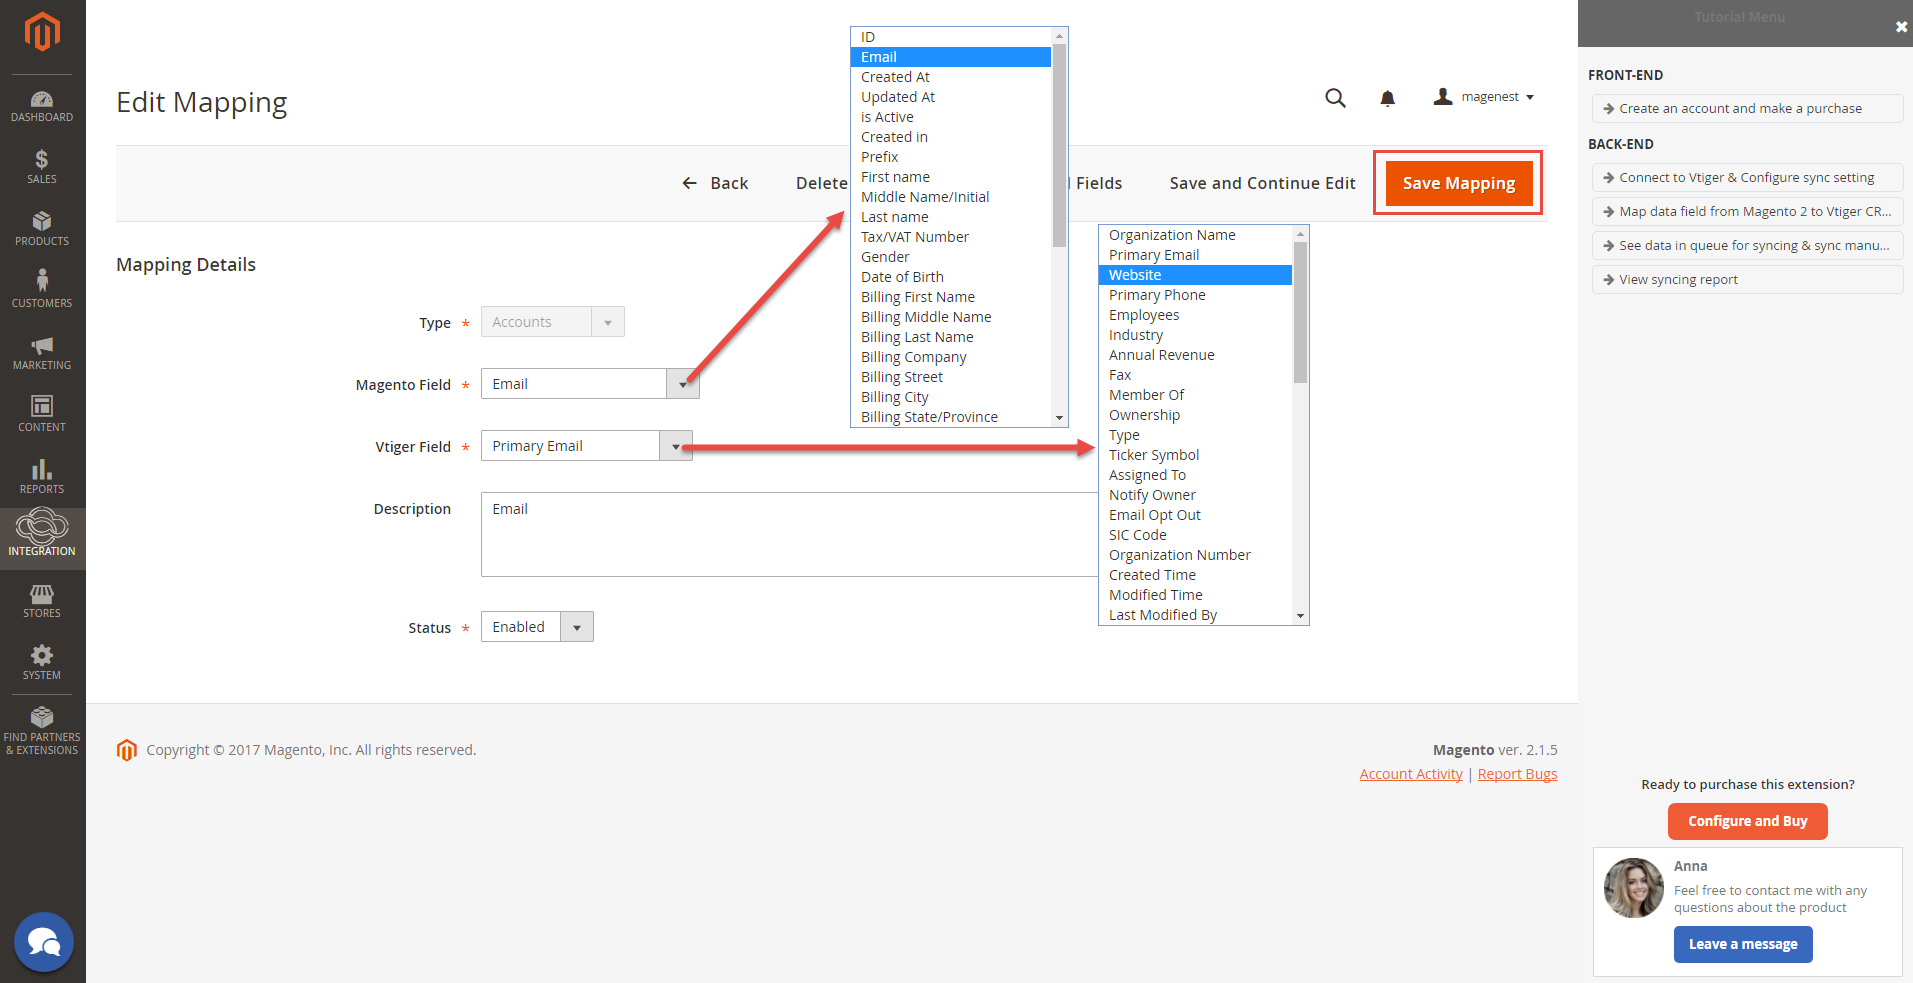
Fill in mapping information:
- Type: select data type: Leads, Contacts, Accounts, SalesOrders, Invoices, Products, Campaigns.
- Description: describe the data information
- Magento field: select Magento data field fromdropdown list which you want to synchronize. want to synchronize from Magento
- Vtiger field: select Vtiger field fromdropdown list which you want to store data in. synchronize into Vtiger.
- Status: select Enabled/Disabled.
Remember to click Click Save Mapping to store information.save the field mapping setting.
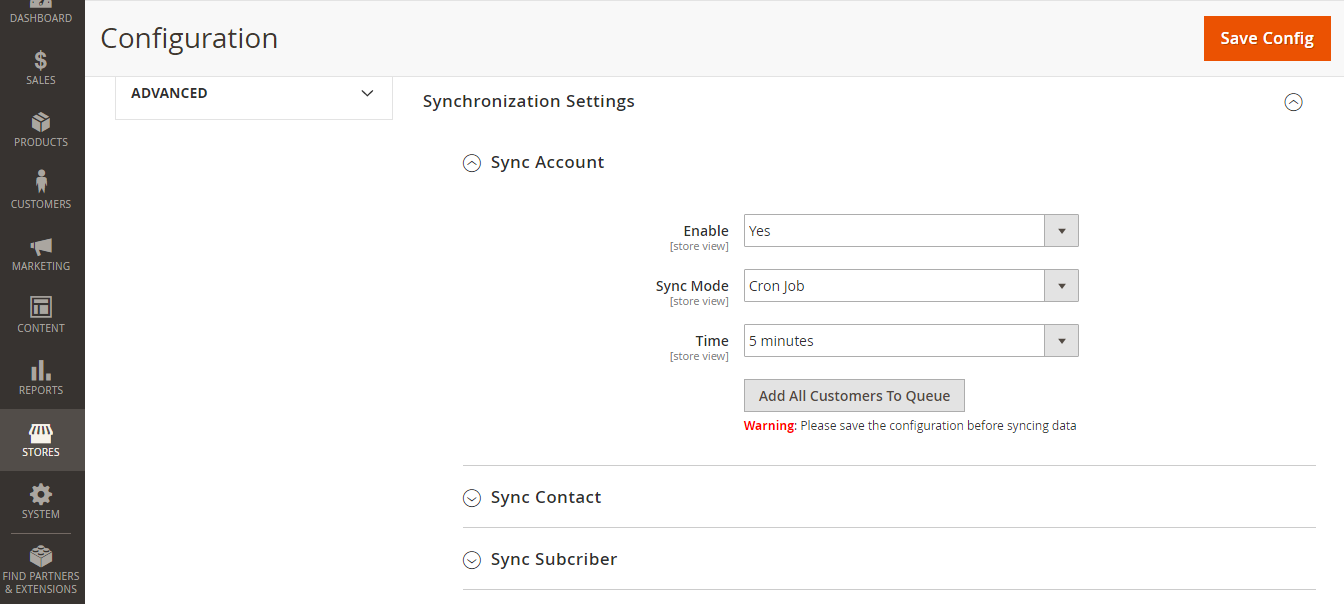
In the Synchronization Settings section, there are synchronization settings: Sync Accounts (Organization), Sync Contact, Sync Lead, Sync Products (items in Vtiger CRM), Sync Orders, and Sync Invoices.
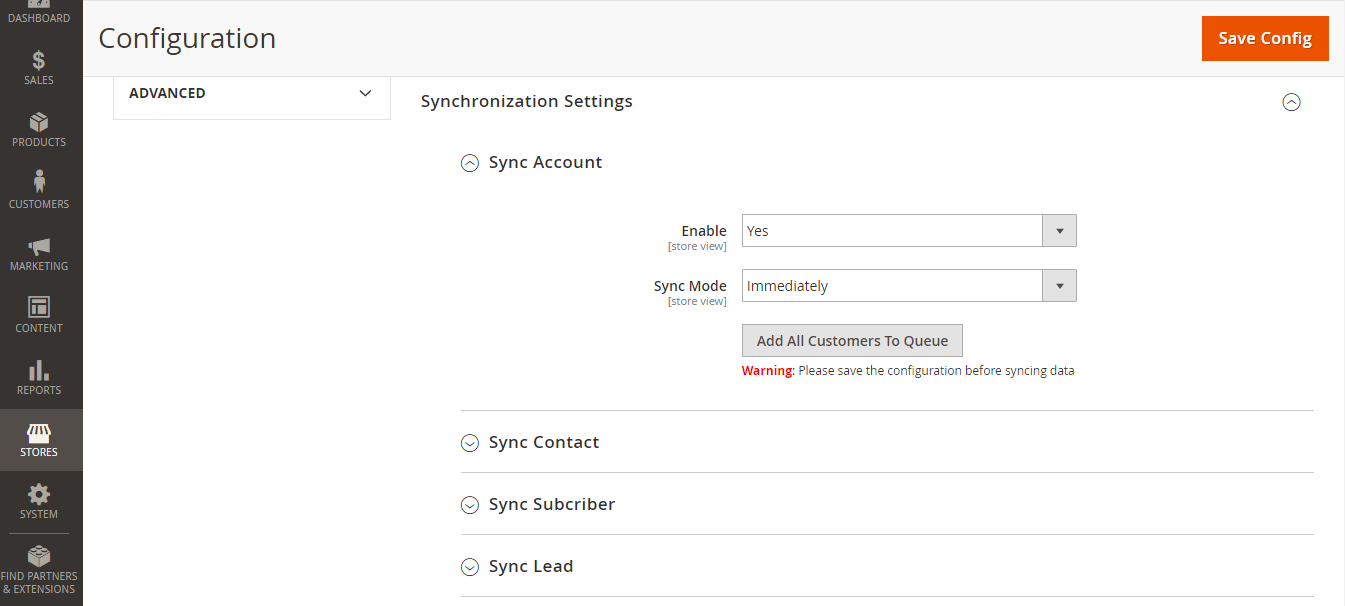
In each section, you can
- Enable: Choose Yes to enable the synchronization mode. The Sync Mode will show up
- Sync Mode: You can set the sync mode to be Immediately or Cron Job
Immediately: The extension will sync all of account from the Magento 2 site to the Vtiger CRM account immediately.
- Cron Job: The data will be sync manually according to the time setting. You have 7 options: 5 minutes, 10 minutes, 15 minutes, 30 minutes, 45 minutes, 1 hour, 2 hours. By this time, the data will be added to Queue List before processing.
Example: When admin set 5 minutes at the Time field, that means the data of account will be synced from the Magento 2 site to the Vitger CRM account after 5 minutes automatically.
Process Synchronization
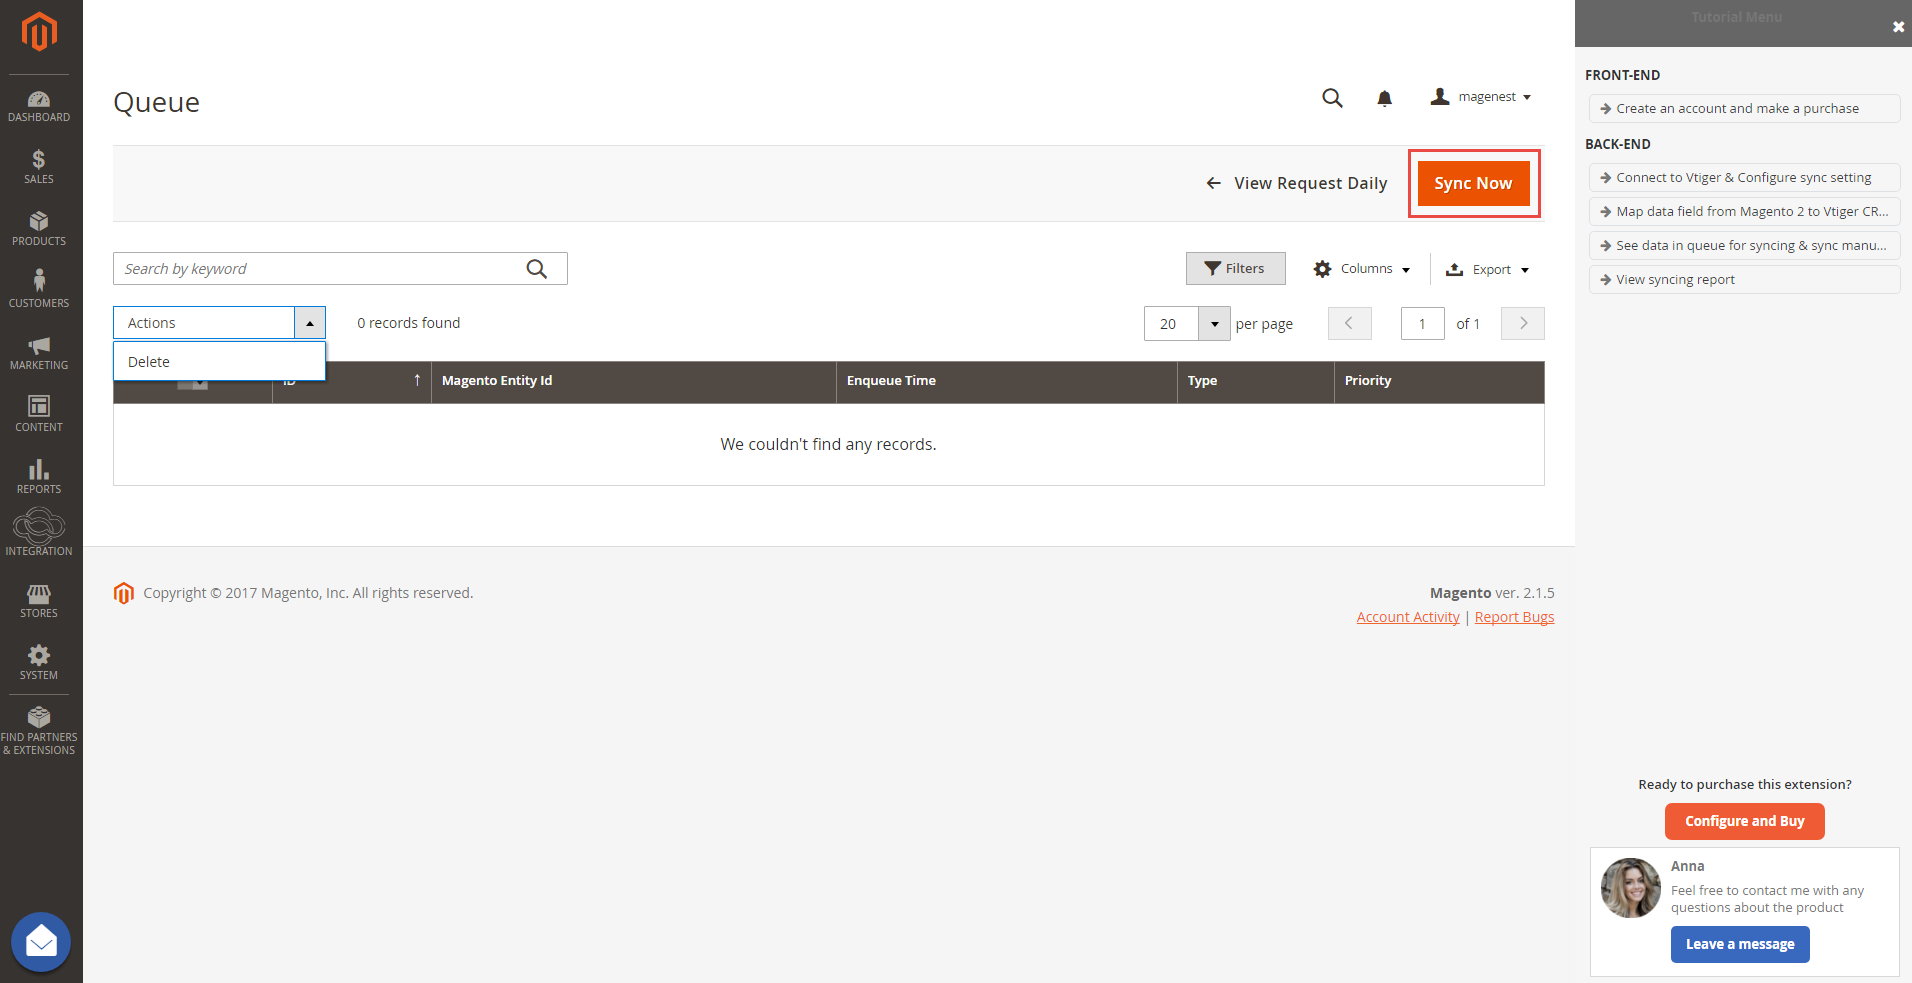
If the App mode is Cron Job, Queue page is the place which the created, updated data is stored in and are waiting to be synced. If you wish to sync data right away, you can press Sync Now button.
| Note |
|---|
| Note that synchronizing will take some time, the length of time depends on the size of data. |
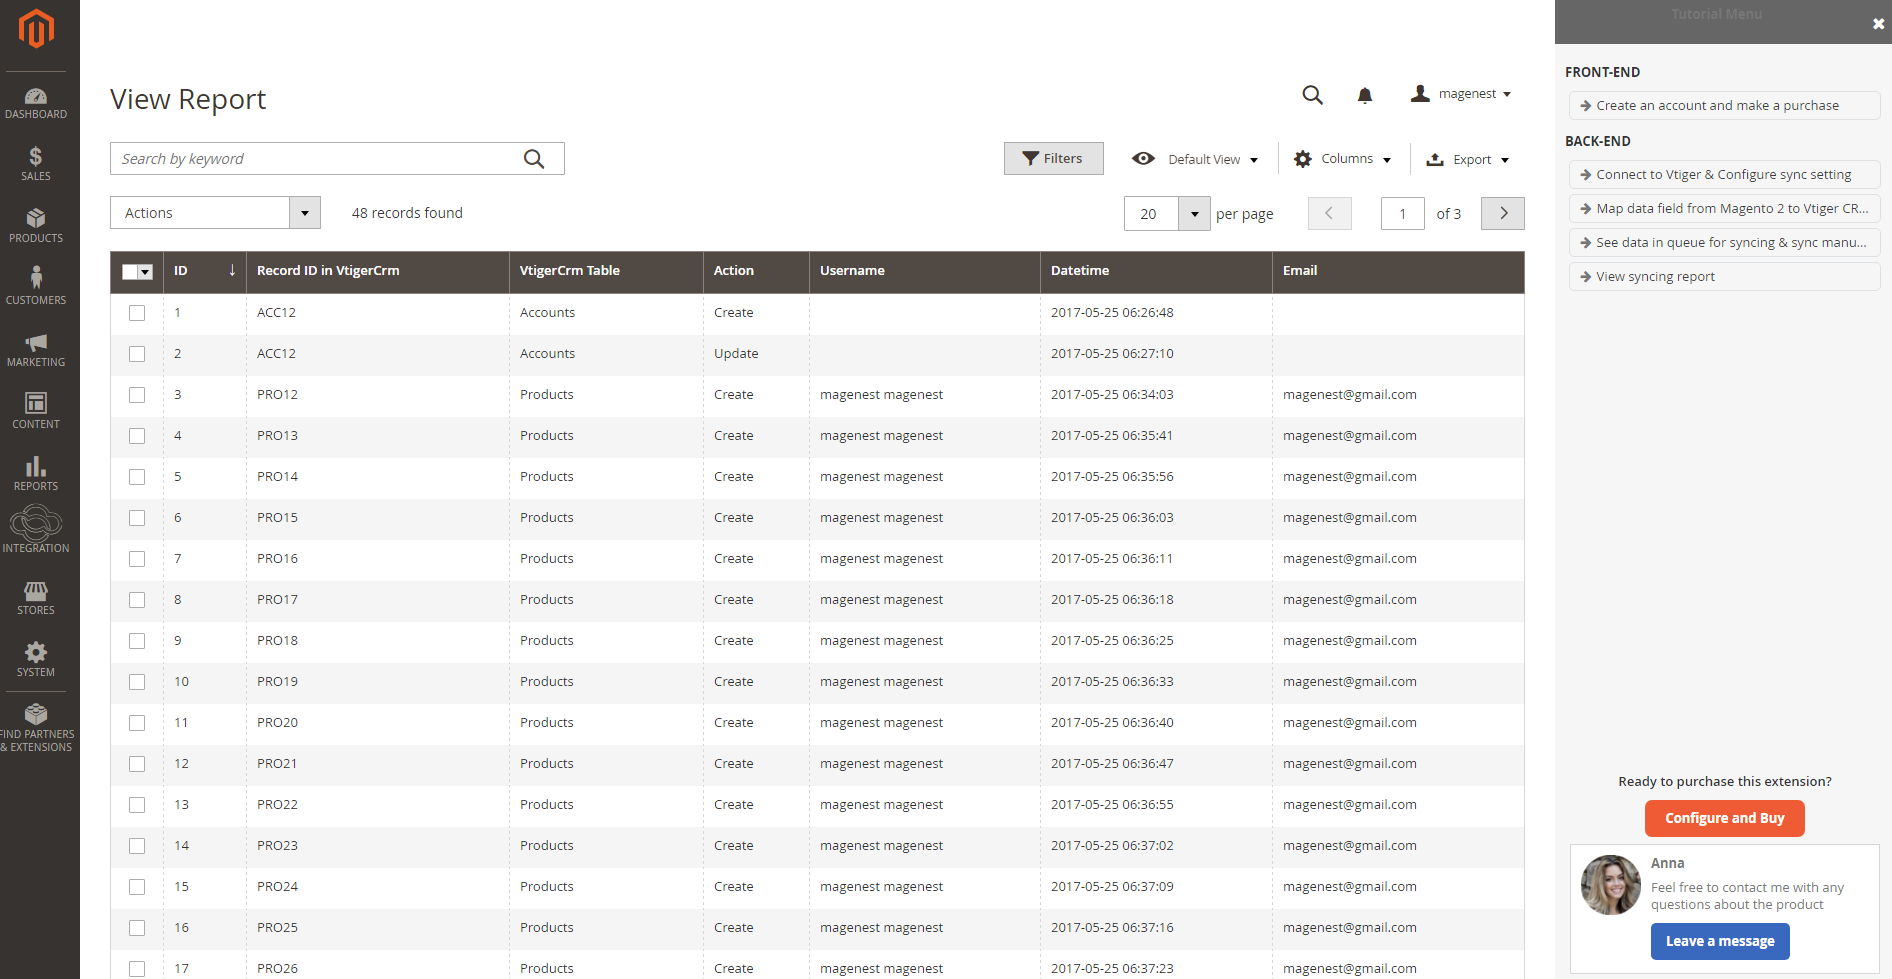
When the process is done, go to Vtiger Integration > View Report to check what is synced in the grid.
- If the data is synced right, the Status will be success and the Message will be "OK"
- If there's a problem during syncing process, the Status will be error and the Message tab will show the error messagelike the record below.
Moreover, admin can easily check the synchronization with View Request Daily button and View On Vtiger button.
Navigate to Vtiger Integration > Request Daily Report, admins can easily follow their synchronization status.
Data Integration Settings
Click on VtigerIntegration > Field Mapping.You can define field mappings between Magento and VtigerCRM easily.
To add a new mapping, click on Add button, Add New Mapping page will show up
Type: Choose table you want to map
Vtiger Field: Choose Vtiger Field
Magento Field: Choose corresponding Magento Field
Status: Inactive or active
Description: Describe your mapping
Hit Save when done, your mapping is ready for the next sync.
Main Functions
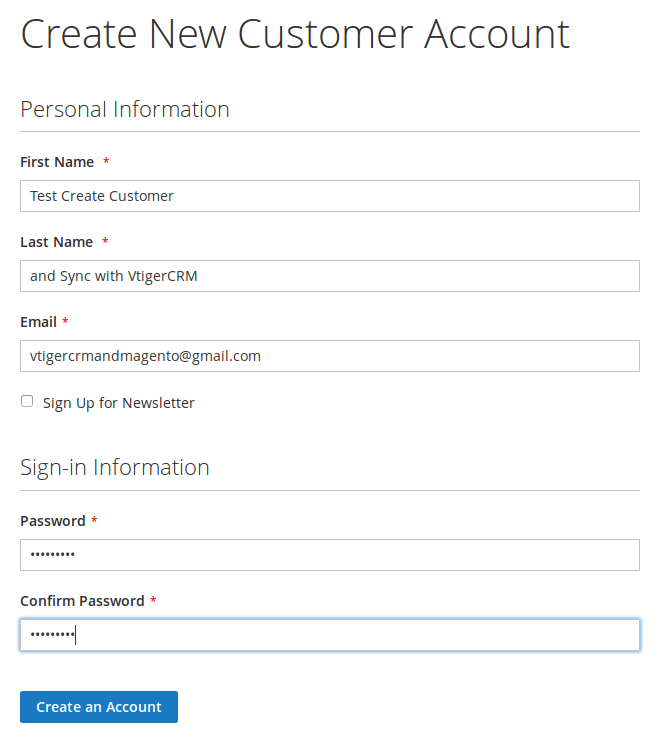
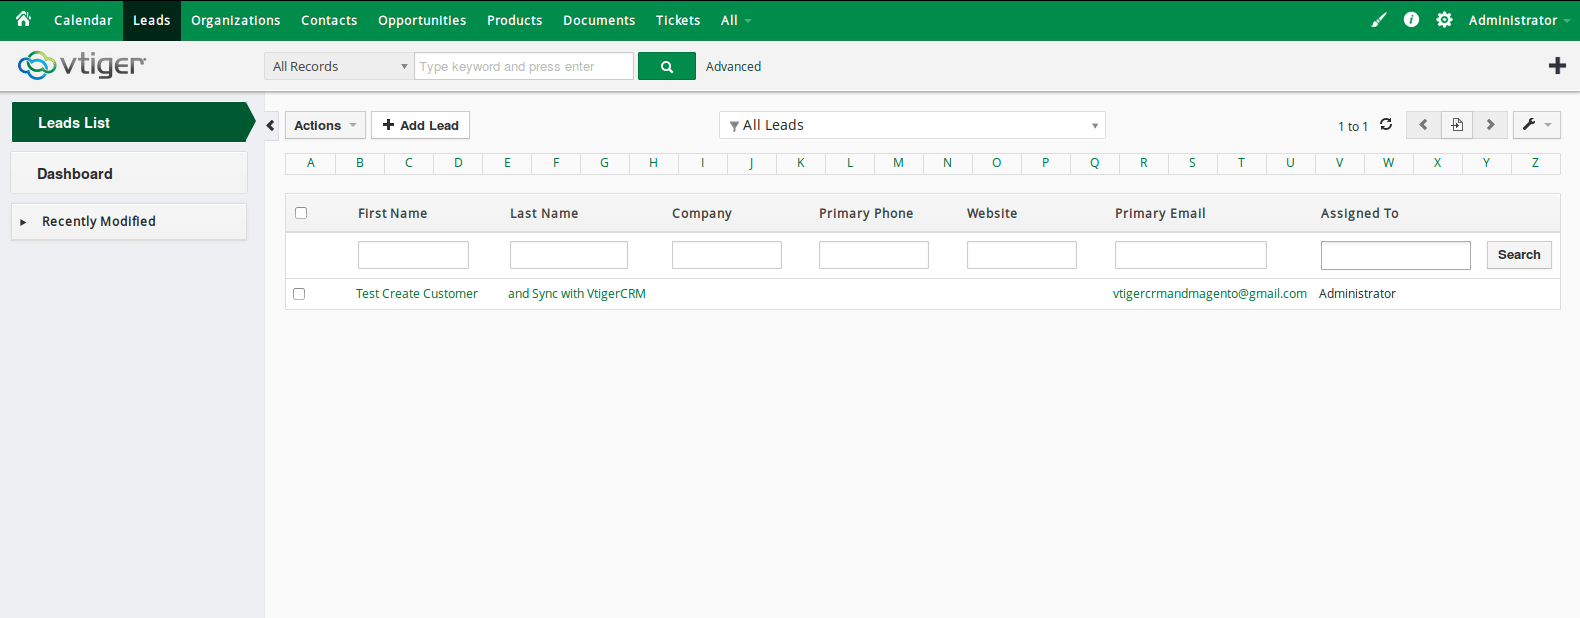
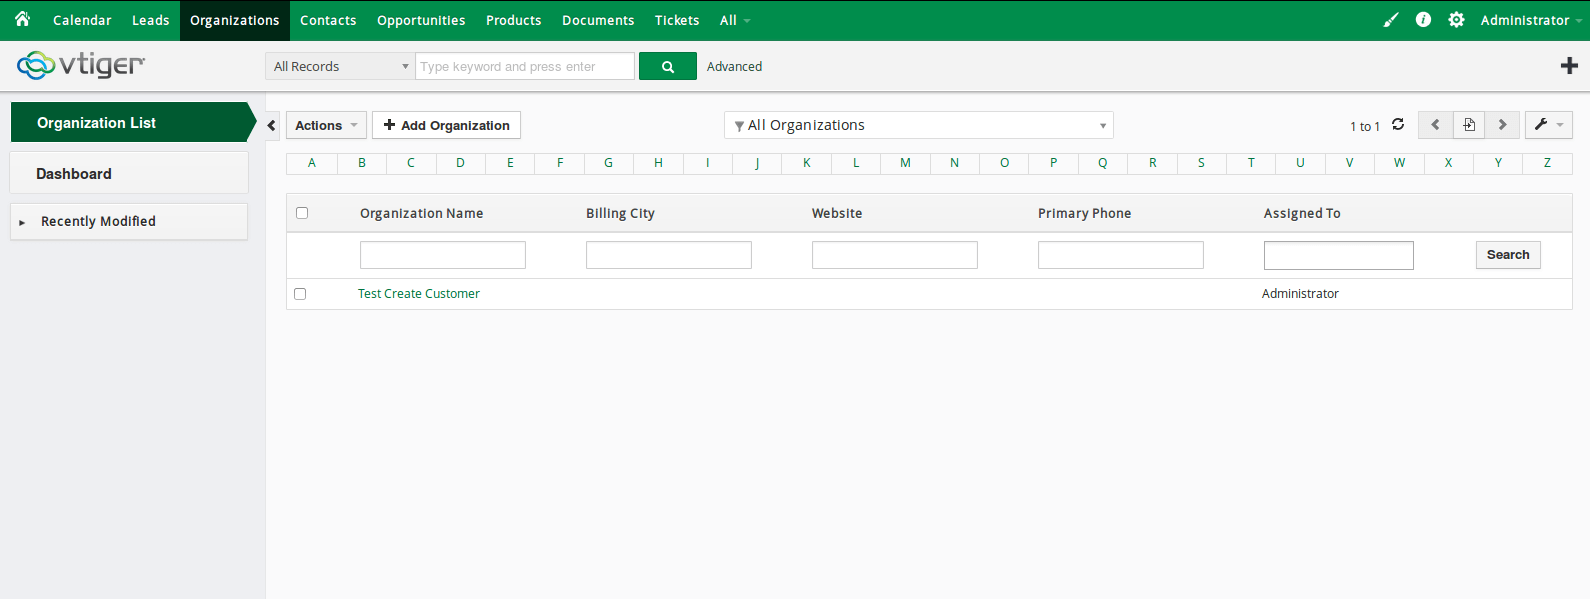
When a new account is registered in Magento 2, Vtiger will automatically add a new record of this account in Leads, Organizations, Contacts.
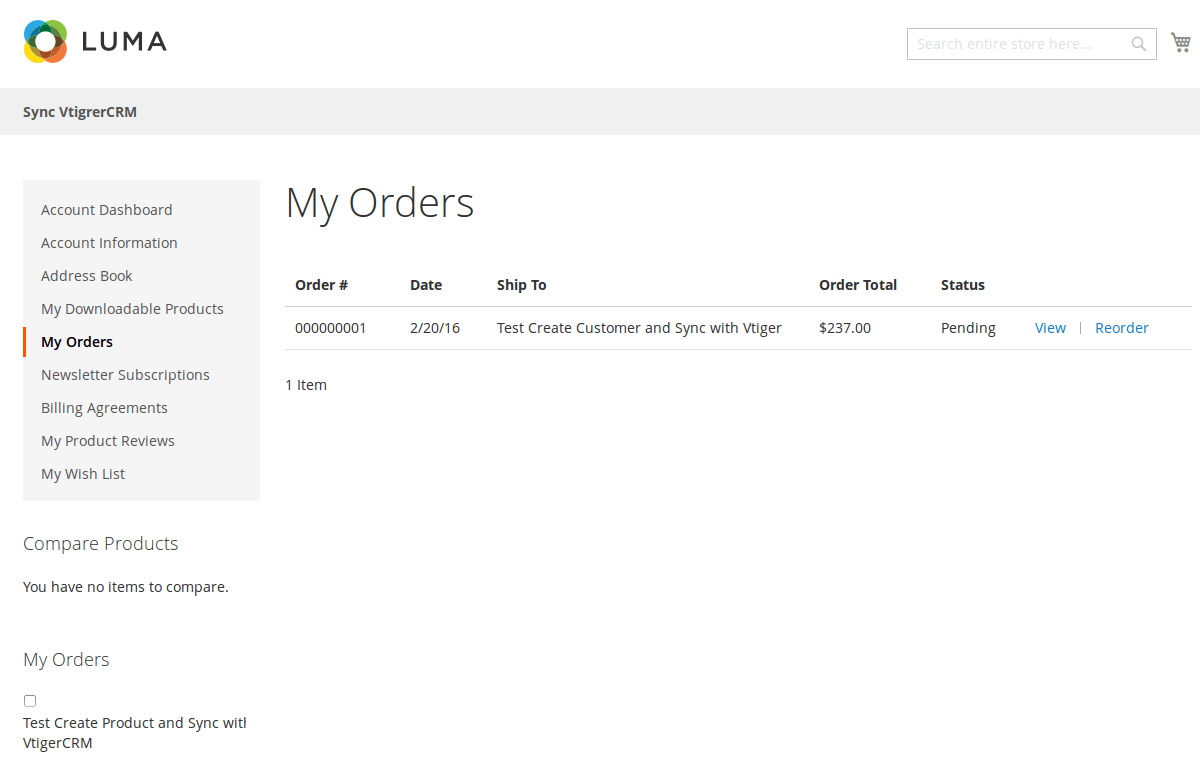
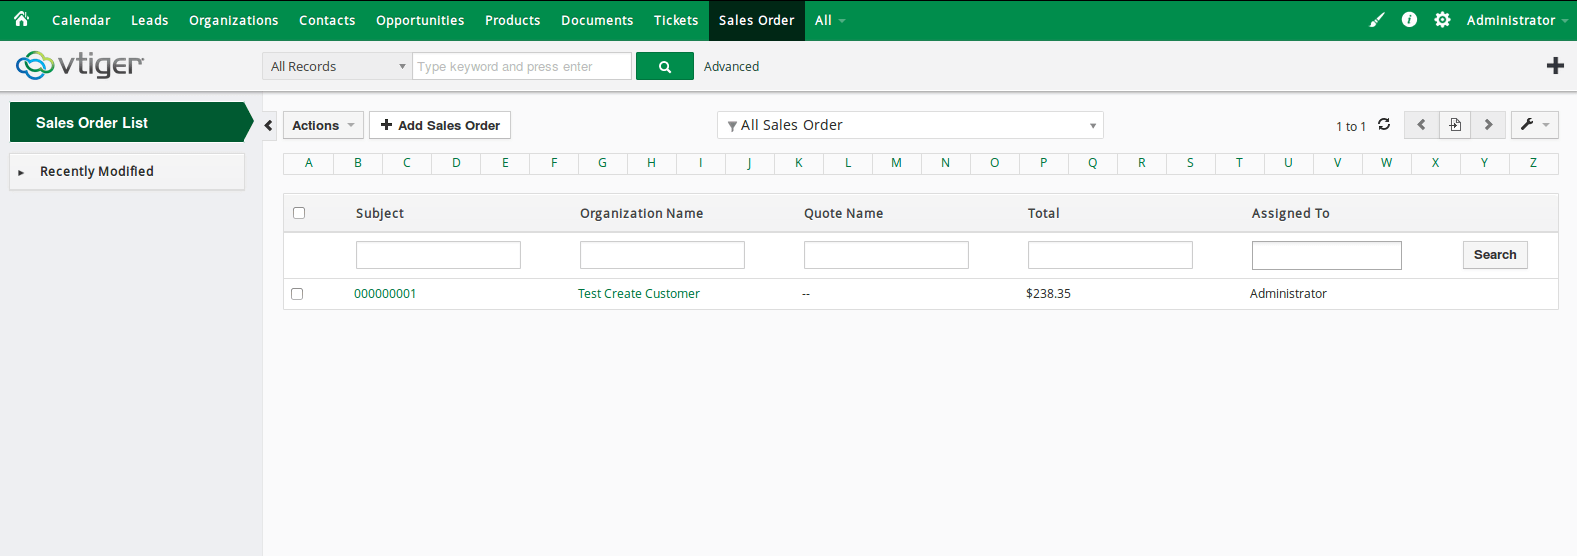
When a customer adds items to cart then check out, Sales Orders in Vtiger will be auto synced.
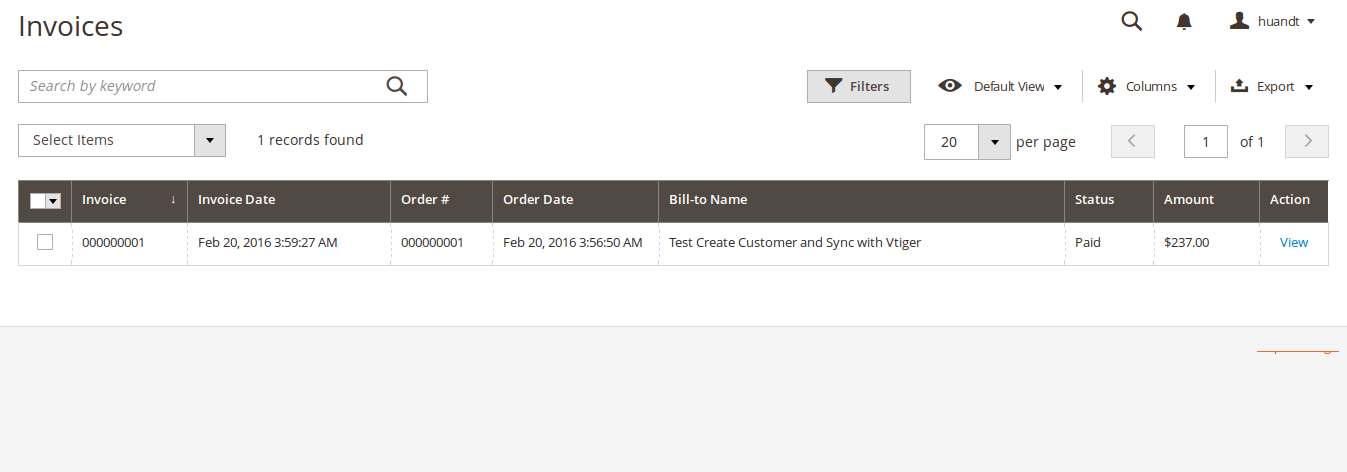
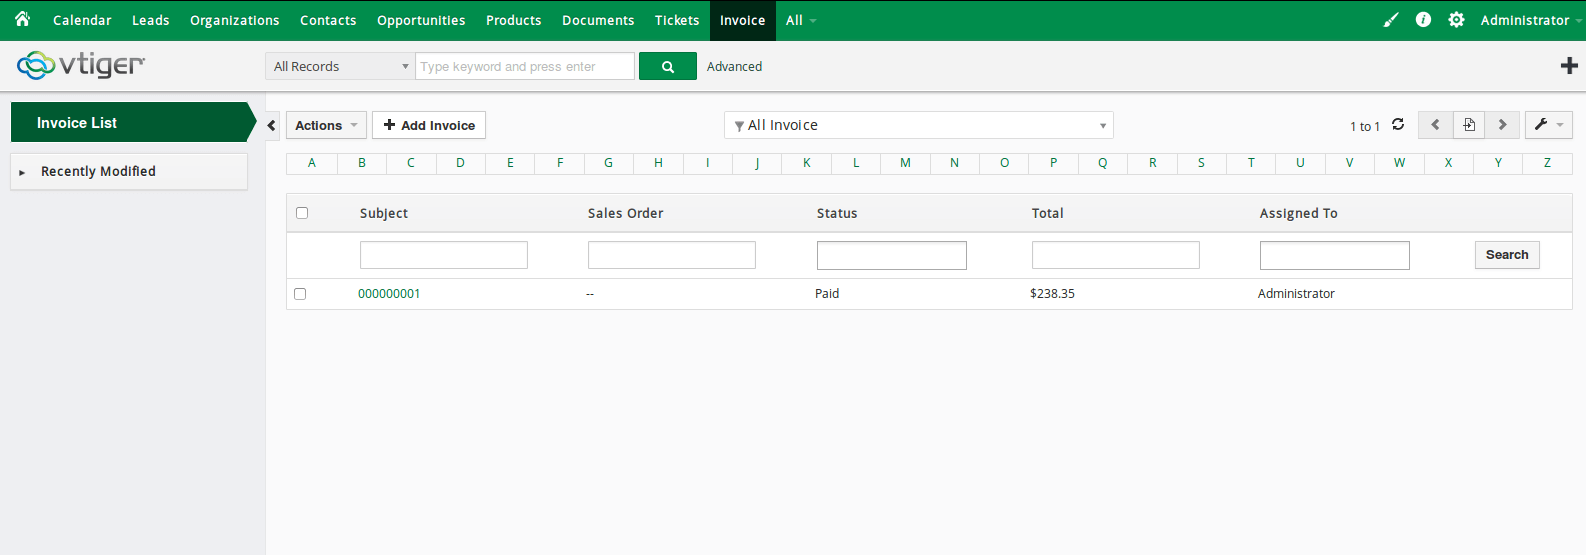
When an invoice is made by admin in Magento 2, Invoice in Vtiger will be synced.
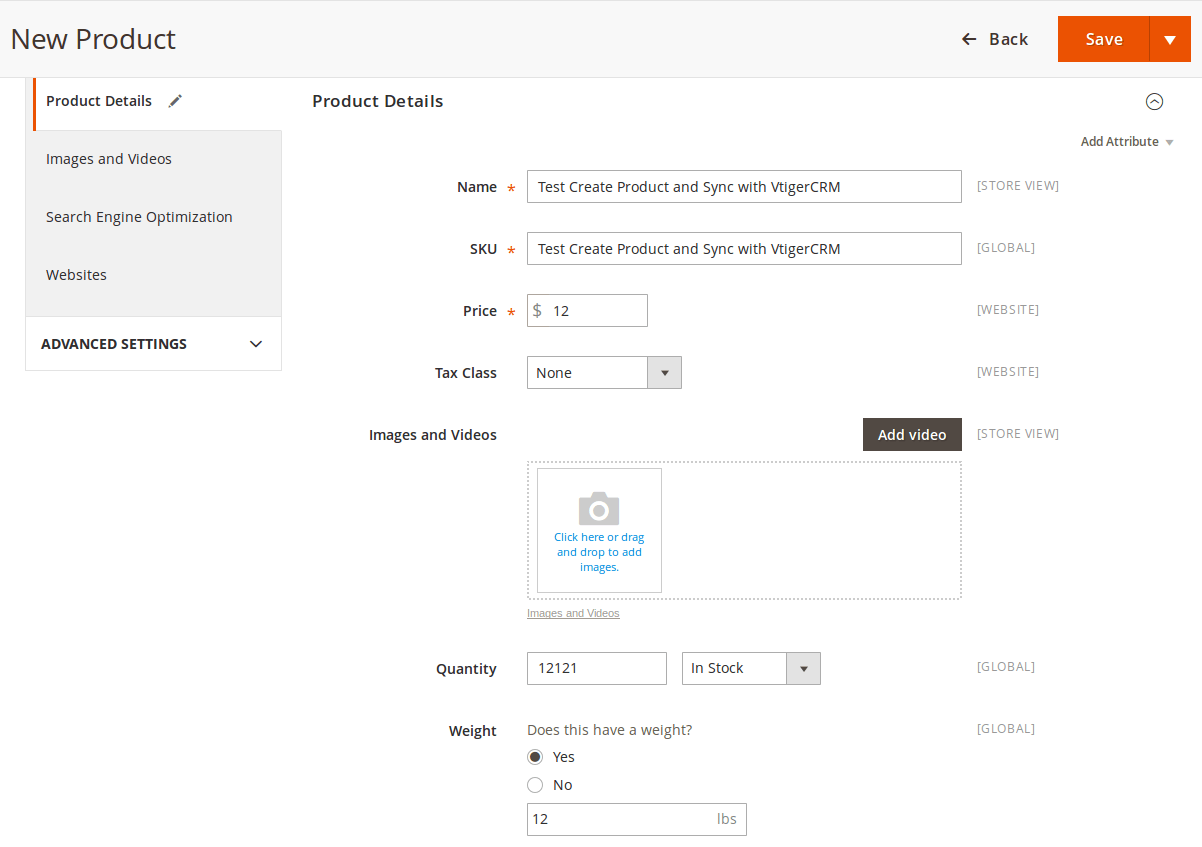
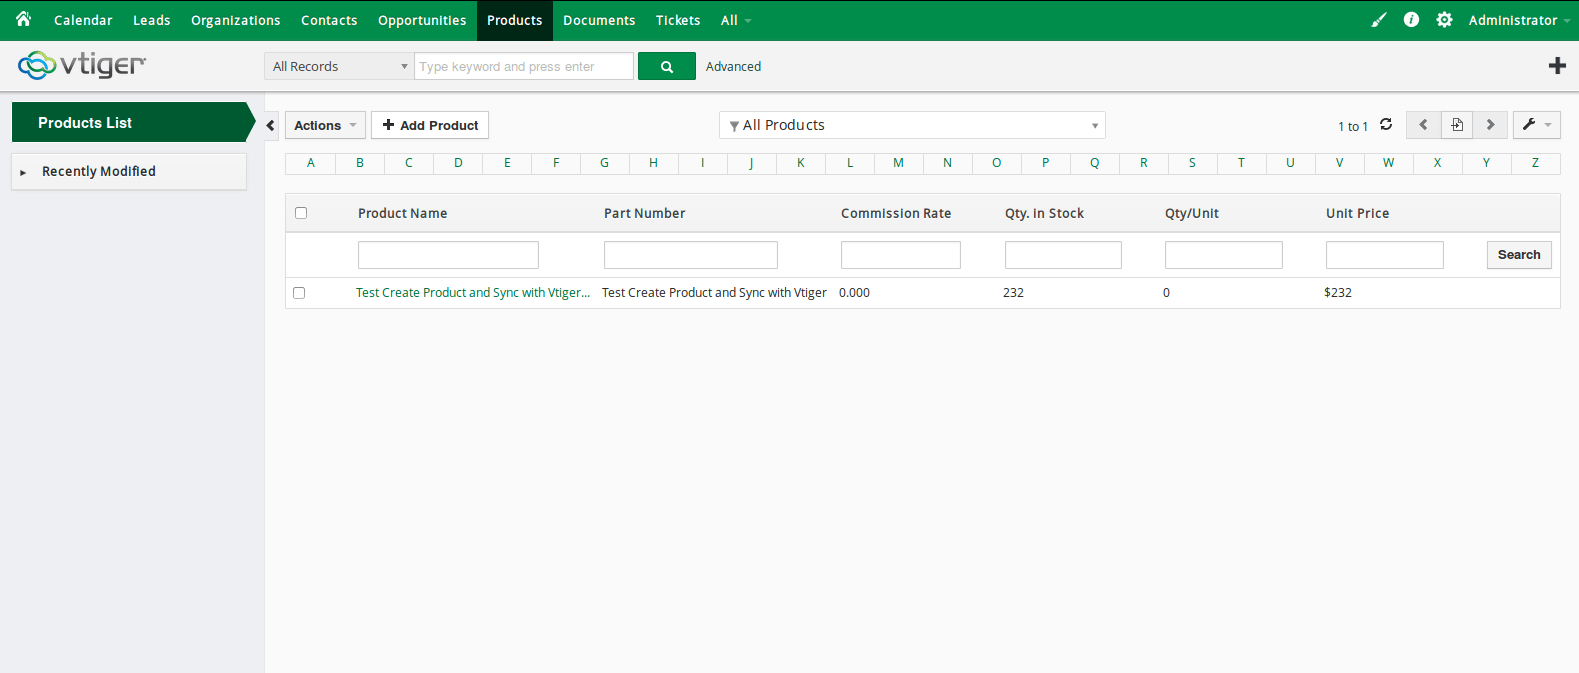
When admin add a new product in Magento 2, Vtiger will auto sync data about that product.
When admin edits a customer account/product in Magento 2, that customer/product will also be changed from Leads, Organizations and Contacts, products in Vtiger.
...

