...
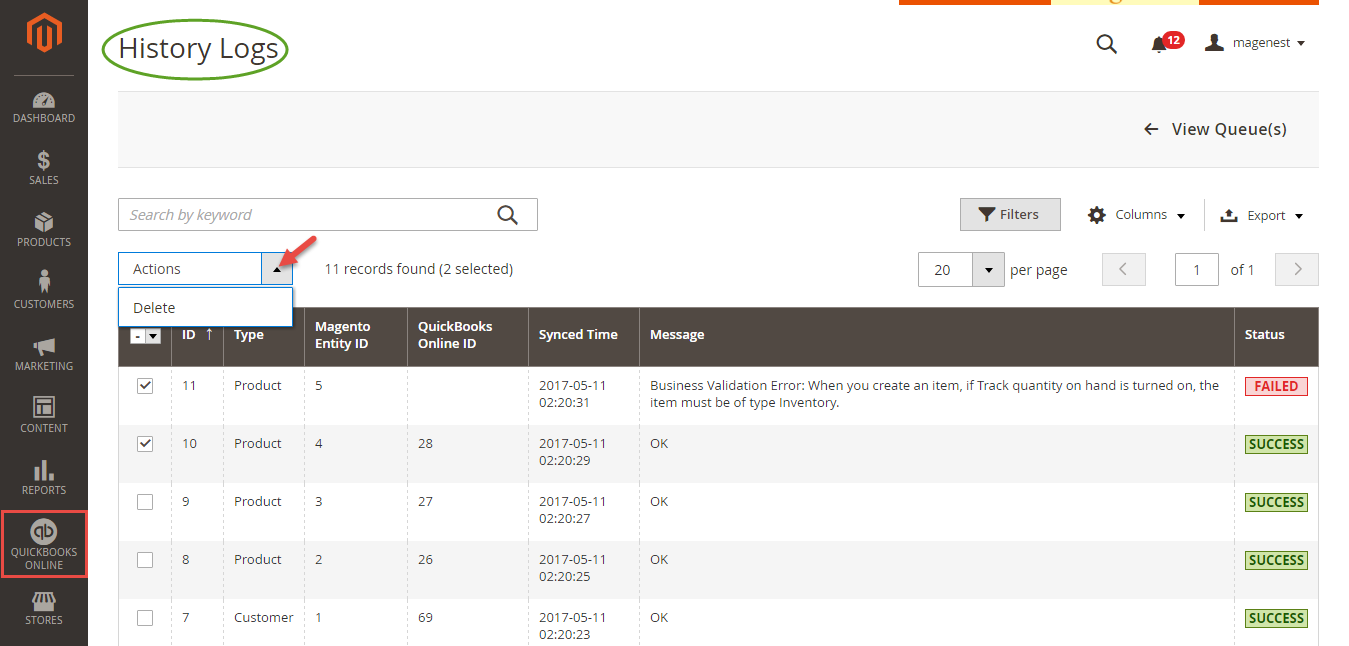
- If the data is synchronized right, the Status will be SUCCESS and the Message will be "OK"
- If there's a problem during process synchronization, the status will be FAILED and the message tab will show the error message like the record below.
...
How to synchronize data from QuickBooks Online to Magento 2 store
Update the existing database
Synchronizing items from QuickBooks Online account to Magento 2 store can help admins update the existing database. This feature is apply for data connected from Magento 2 store and QuickBooks Online before.
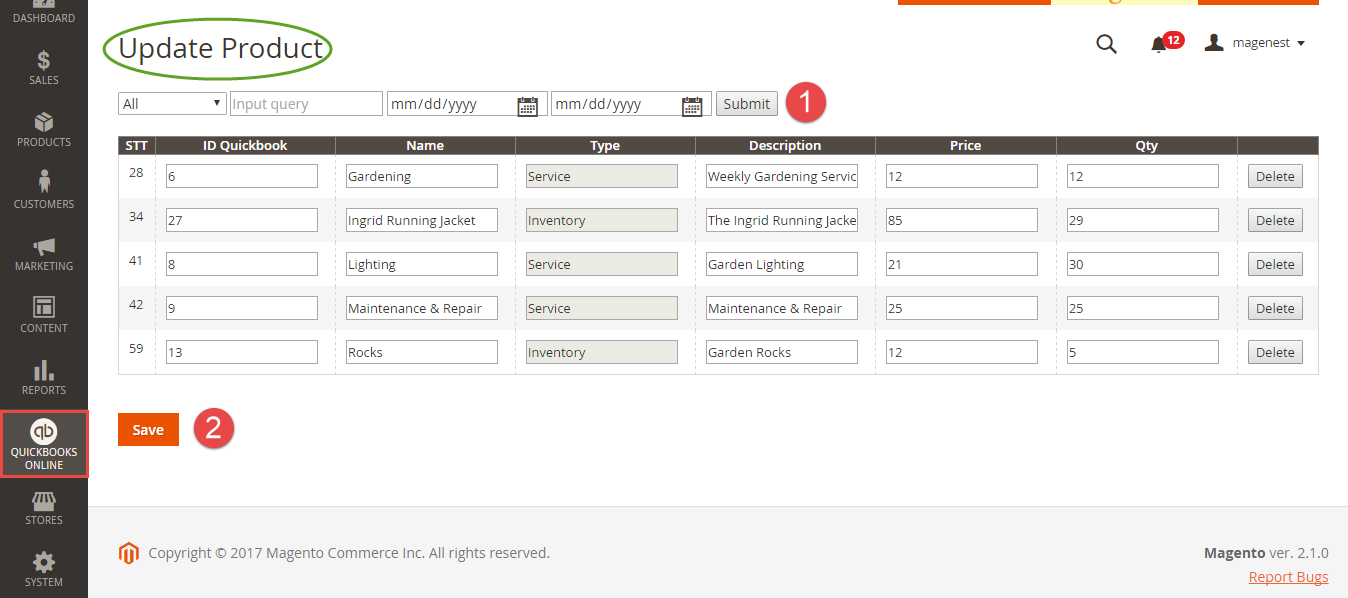
- Products: Please follow these steps below:
Please go to QuickBooks Online Integration > Product ( Update) and follow these steps below:
(1) Click on Submit button to update data from QuickBooks Online account into Update Product page.
(2) Click on Save button to finish updating.
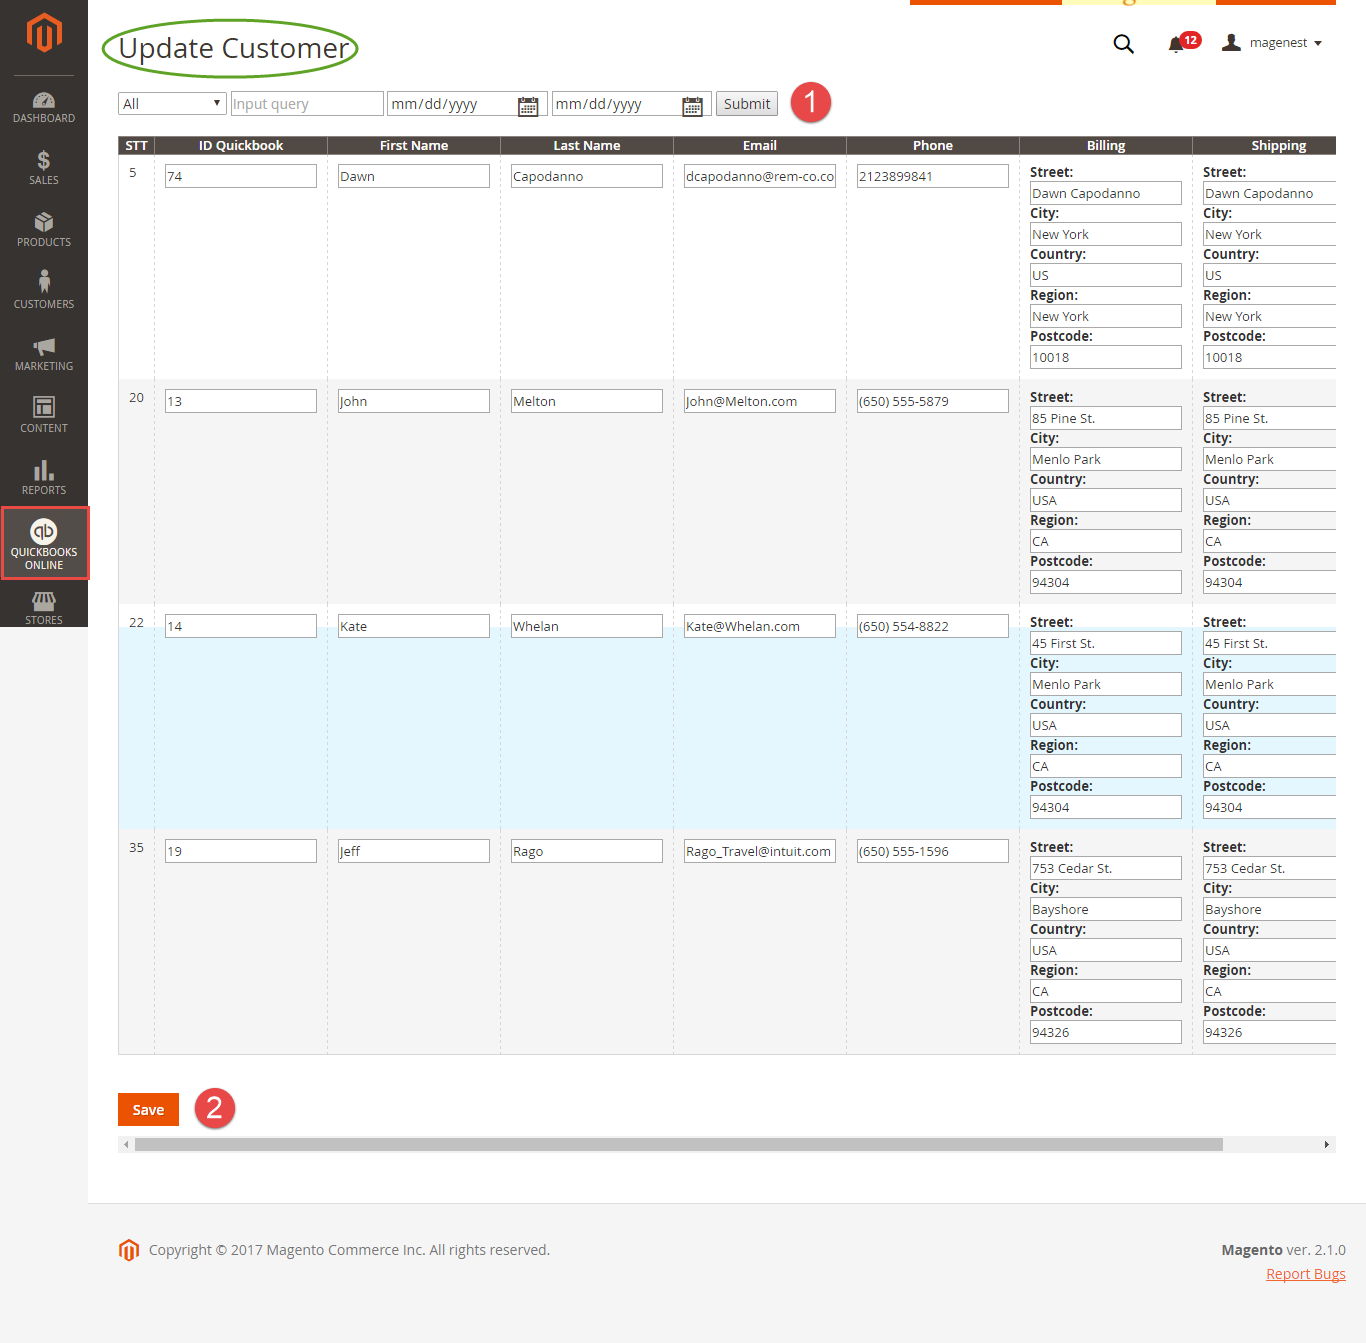
- Customers:
It is the same with updating products.
(1) First, you need to click on Submit button to pick customers from QuickBooks Online account for Update Customer page of Magento 2 site.
(2) Then click on Save button to finish updating.
Create a new database
Not only allow updating data, but our QuickBooks Online Integration extension also helps you to create a new product, customer, and order on Magento 2 store getting data from QuickBooks Online account.
- Products:
 Allow admins to sync customer data which only has in QuickBooks Online to Magento 2.
Go to QuickBooks Online Integration > Product ( Create New) and go on with these steps:
(1) Click on Add All New Products button to add products from your QuickBooks Online account to List Product page.
(2) Click on Create Products button to finish creating.
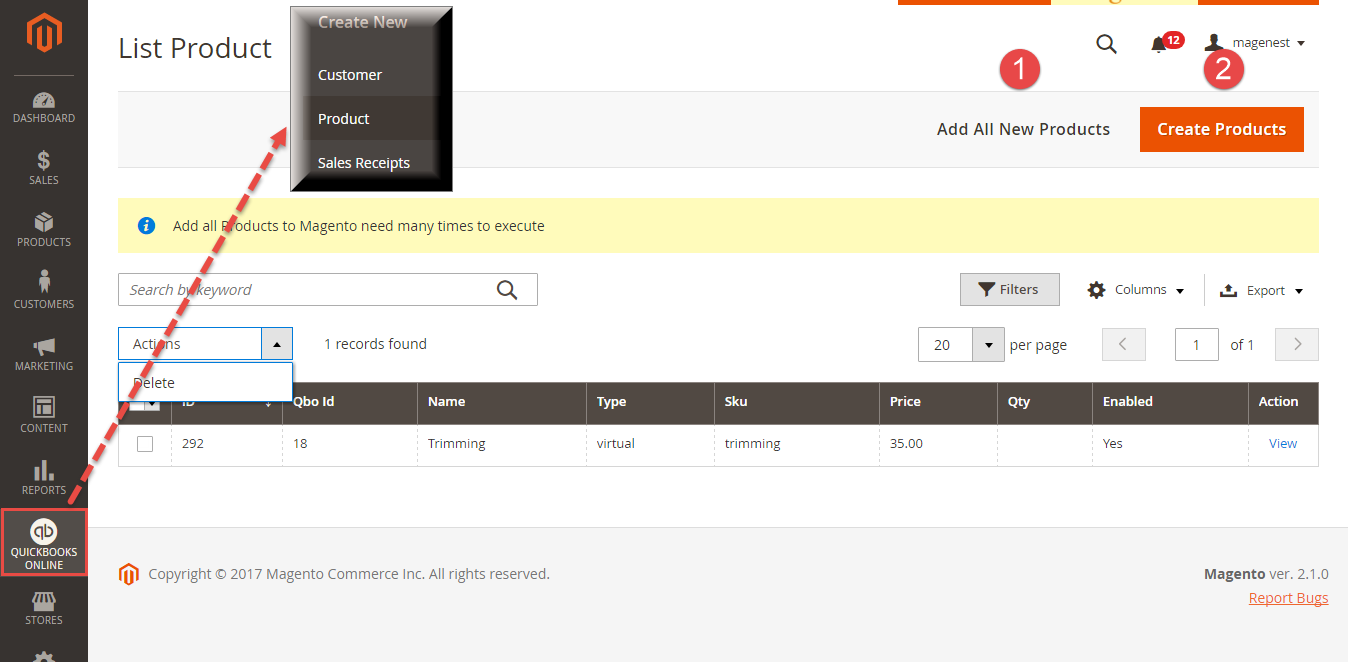
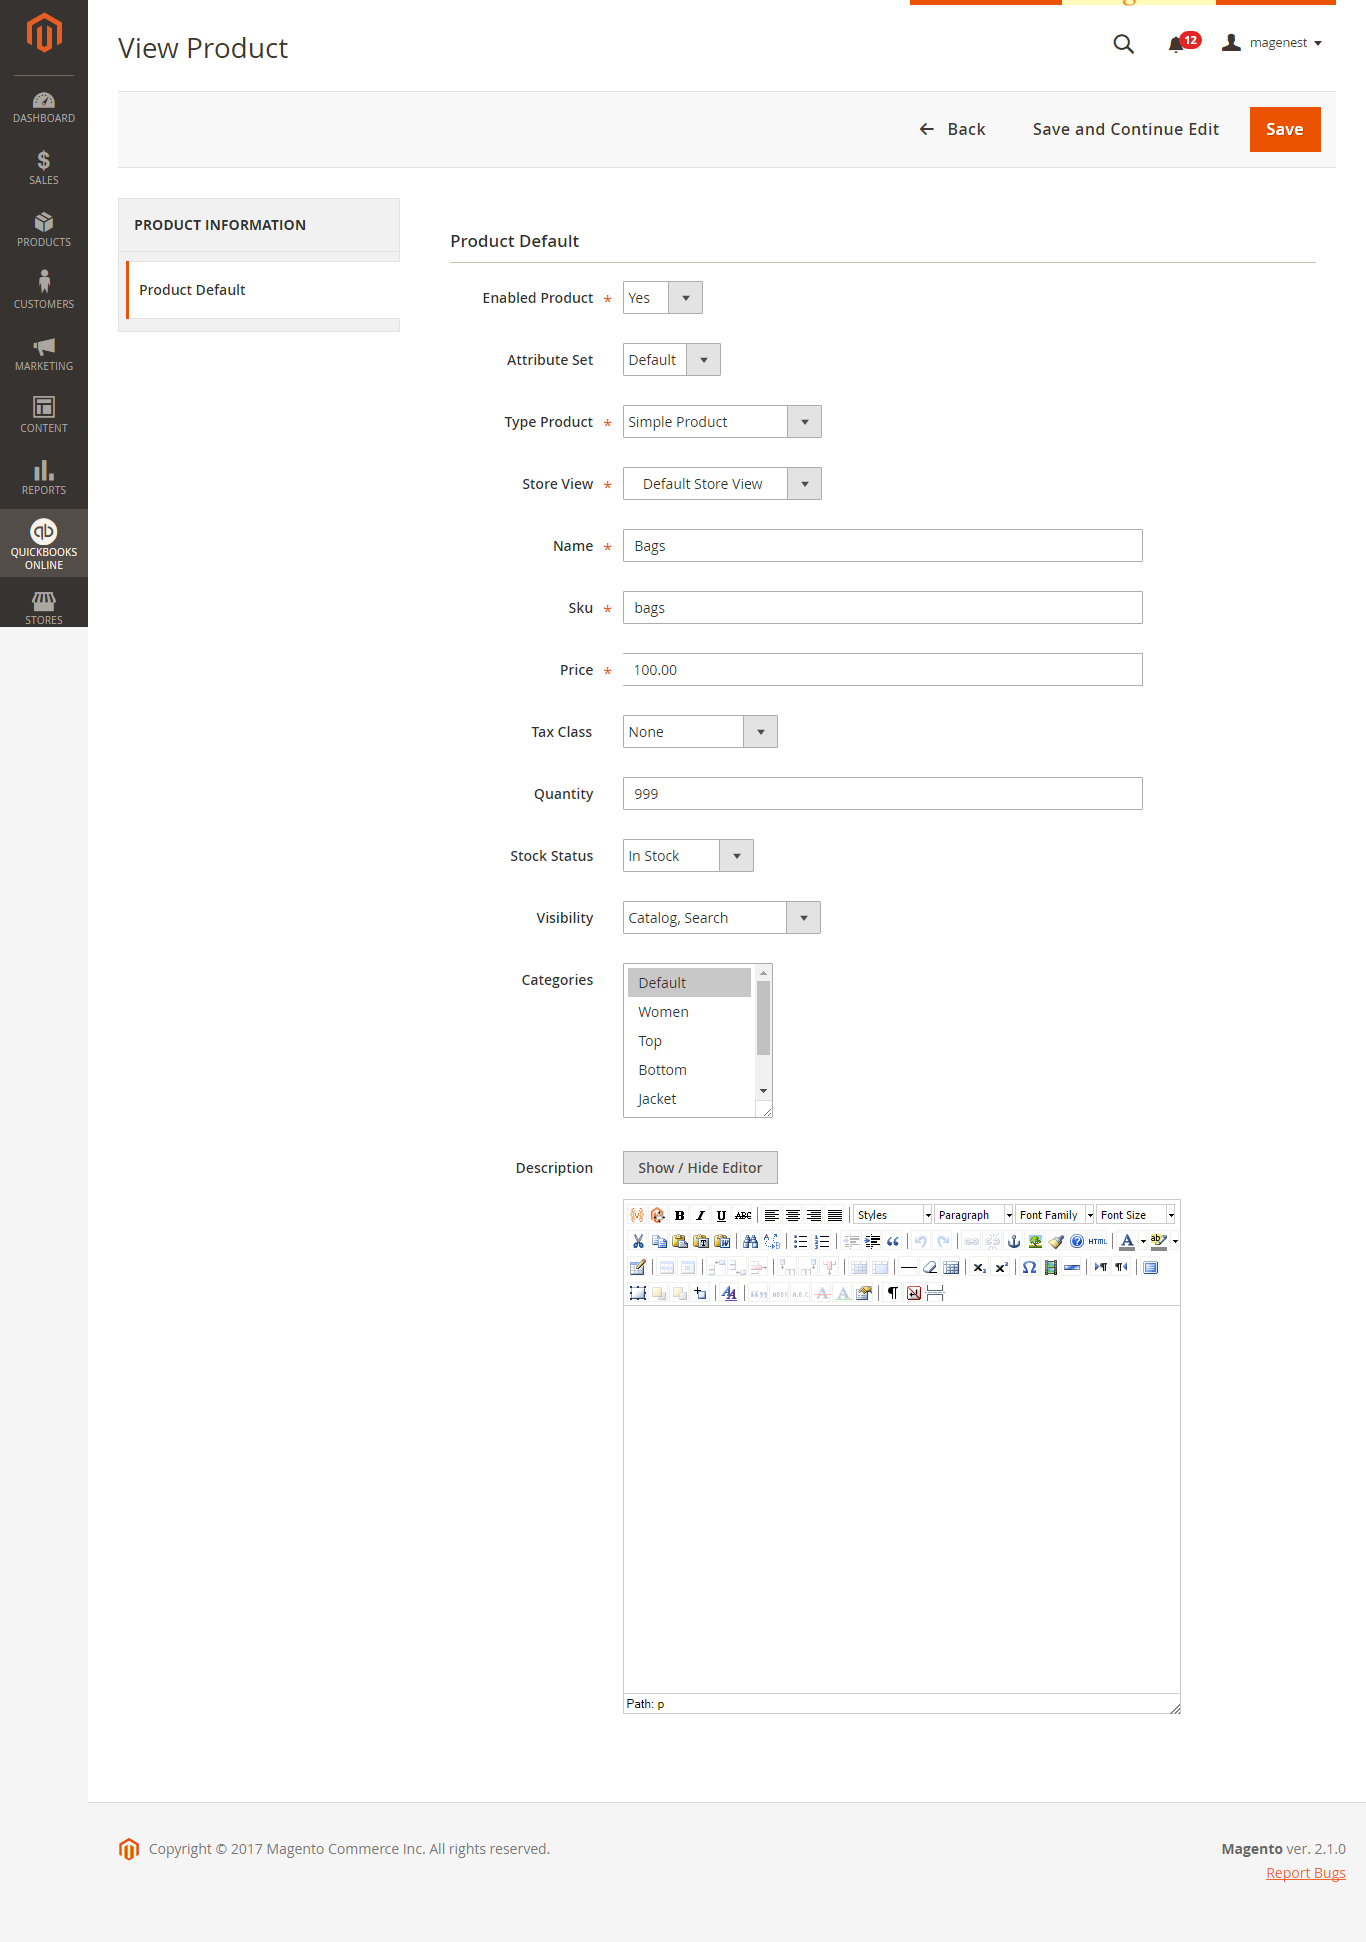
Admins can view and edit products with basic fields as Name, Type Product, Store View, SKU, Price, Quantity, etc... before creating a new one on Magento 2 store:
...
It is very similar to create customers:
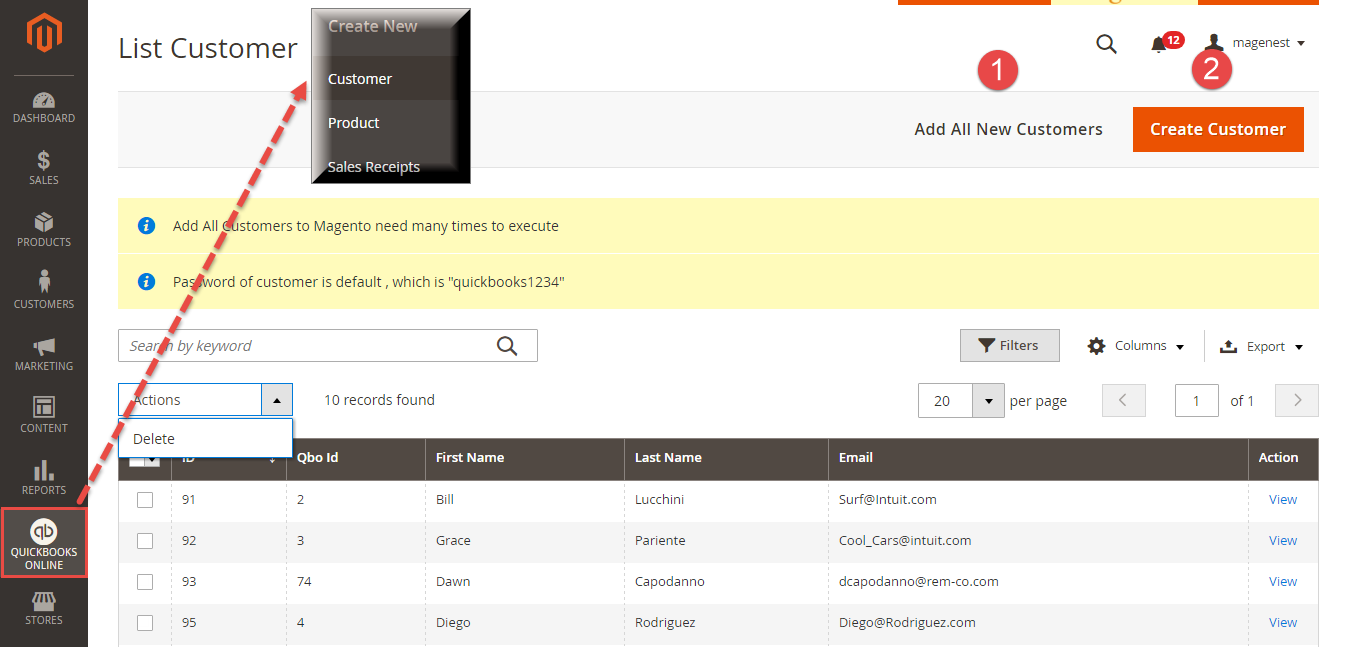
![]() First, please click on Add All New Customers button to add all customers to List Customer page.
First, please click on Add All New Customers button to add all customers to List Customer page.
...
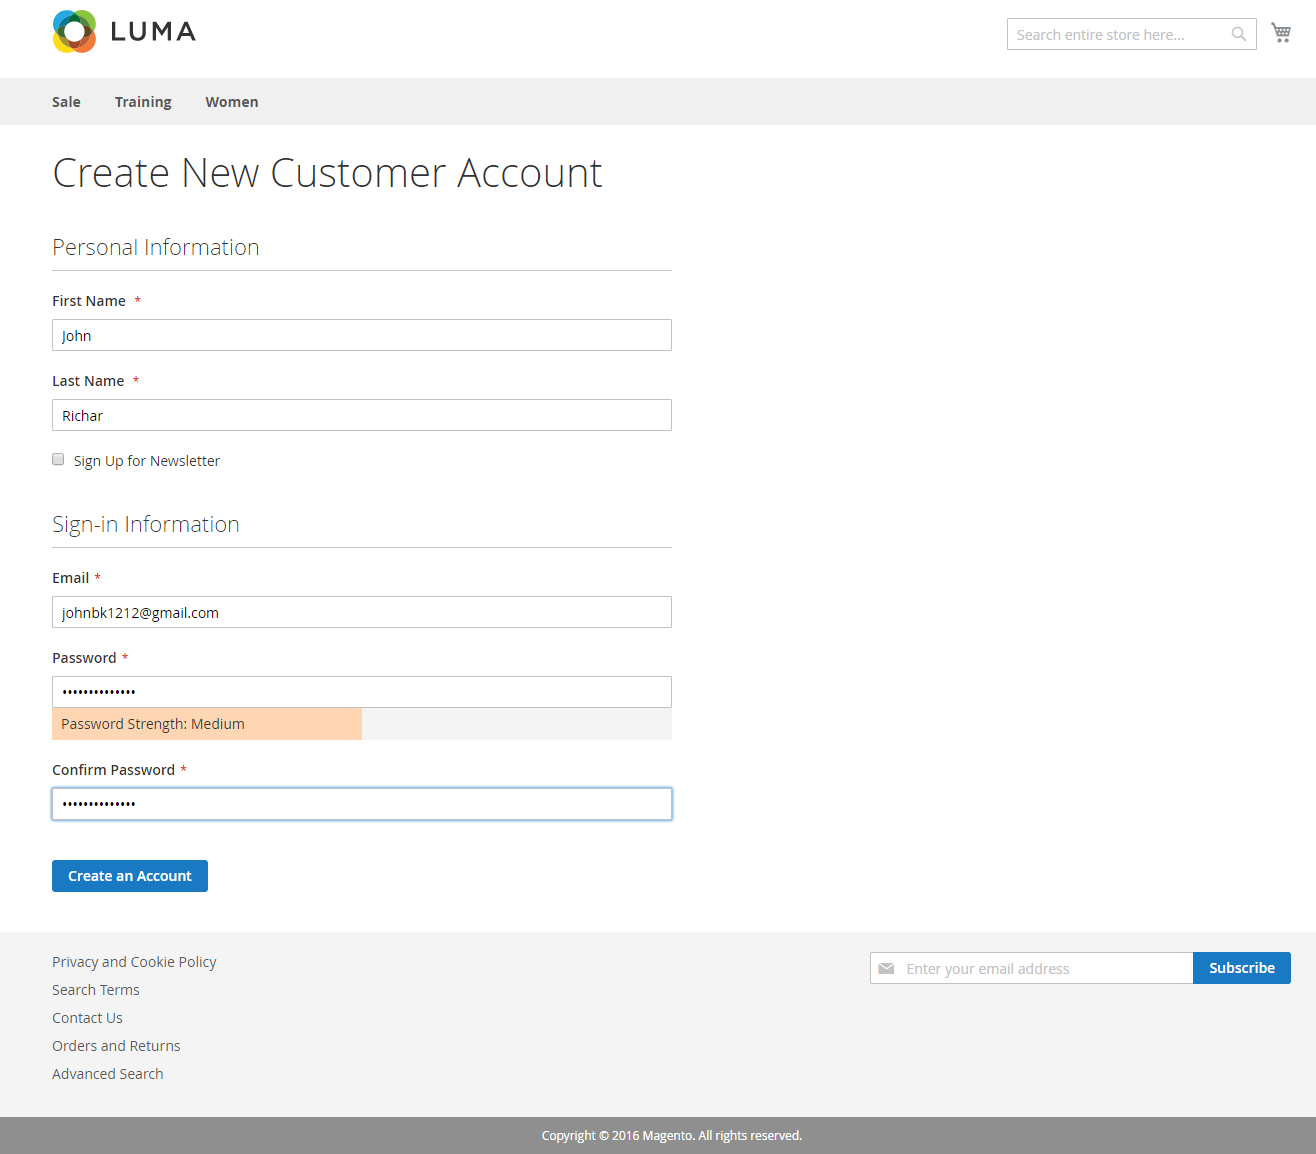
In order to be able to sync customer data from QuickBooks Online to Magento 2, each customer is required to have three following fields, include:
![]() First Name
First Name
![]() Last Name
Last Name
...
| Note |
|---|
After the data of new customers on QuickBooks Online is displayed at the List Customer page, the extension will allow admins to make any changes before they are really synced to Magento 2.
|
![]() Then click on Create Customer button to finish creating.
Then click on Create Customer button to finish creating.
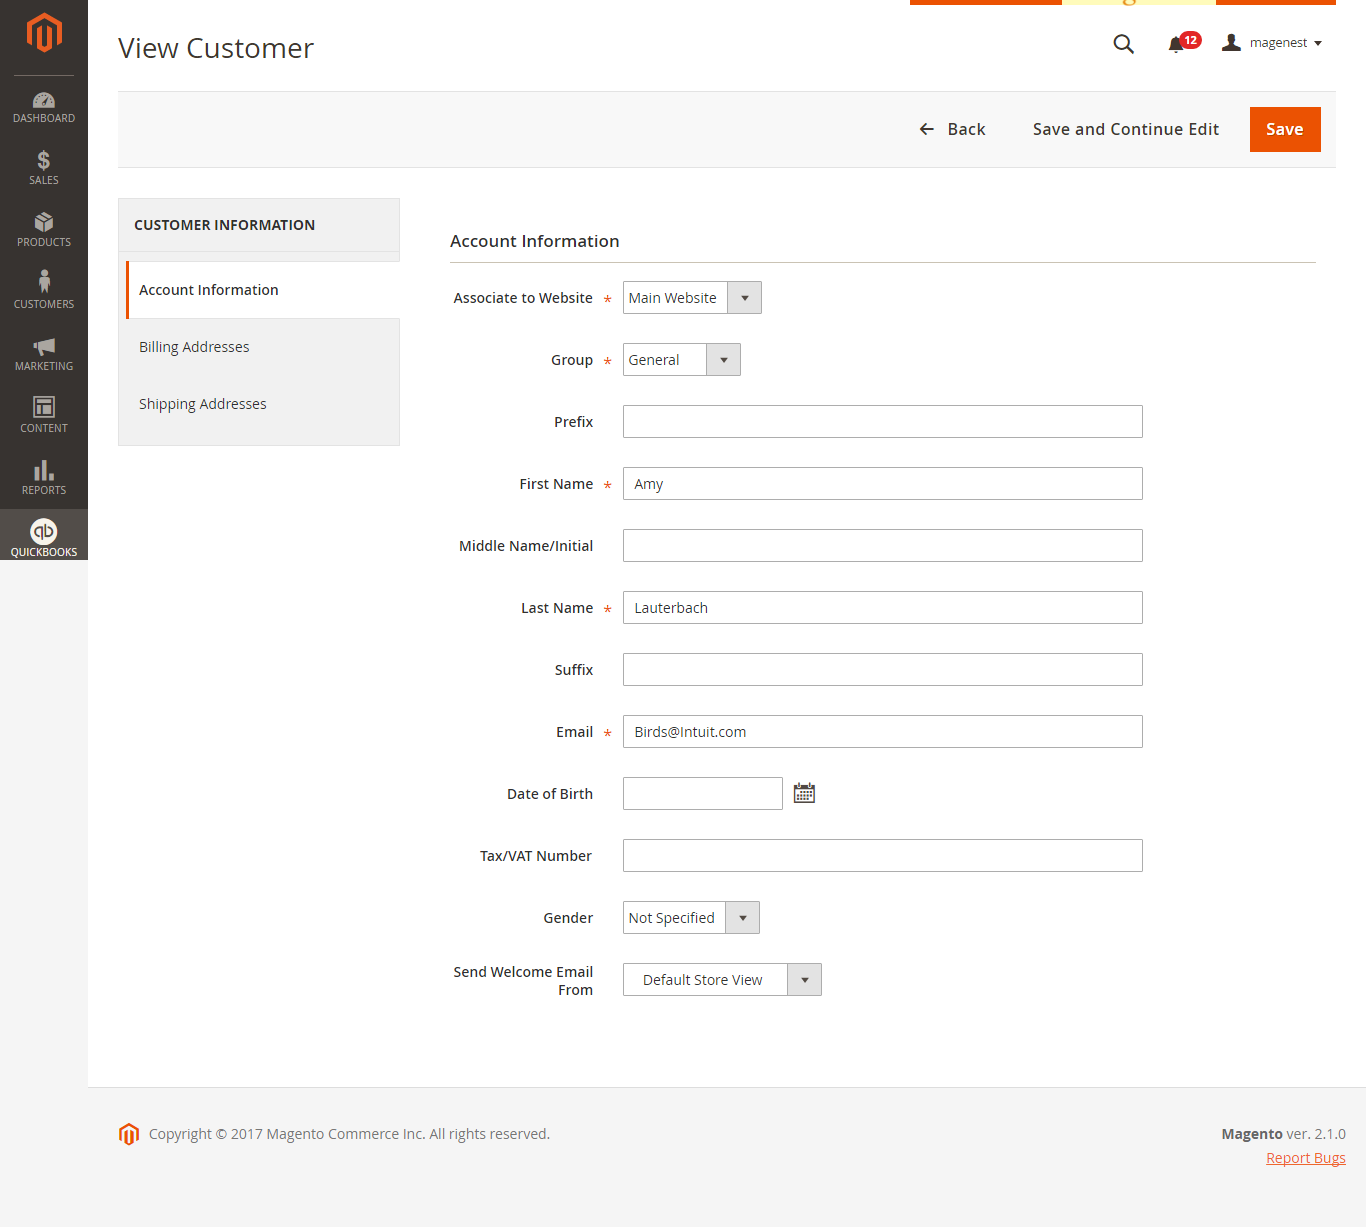
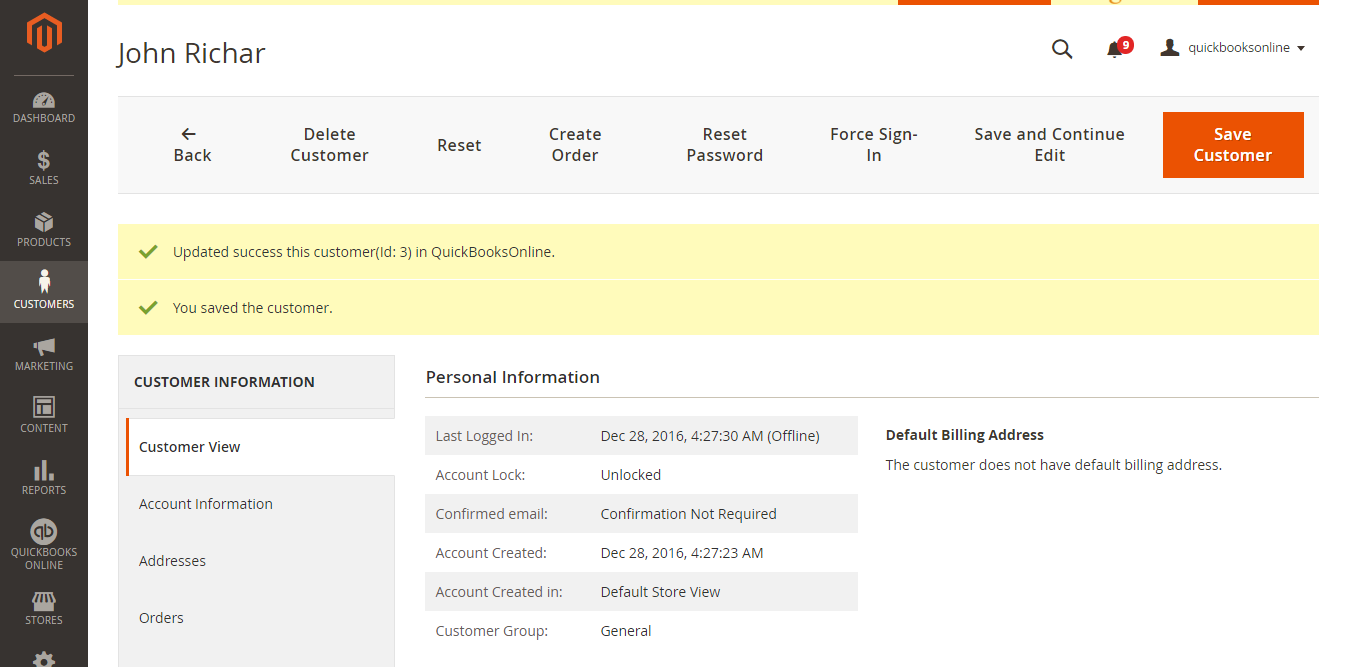
Before creating any customers, admins can view and edit their information in three tabs: Account Information, Billing Addresses, and Shipping Address:
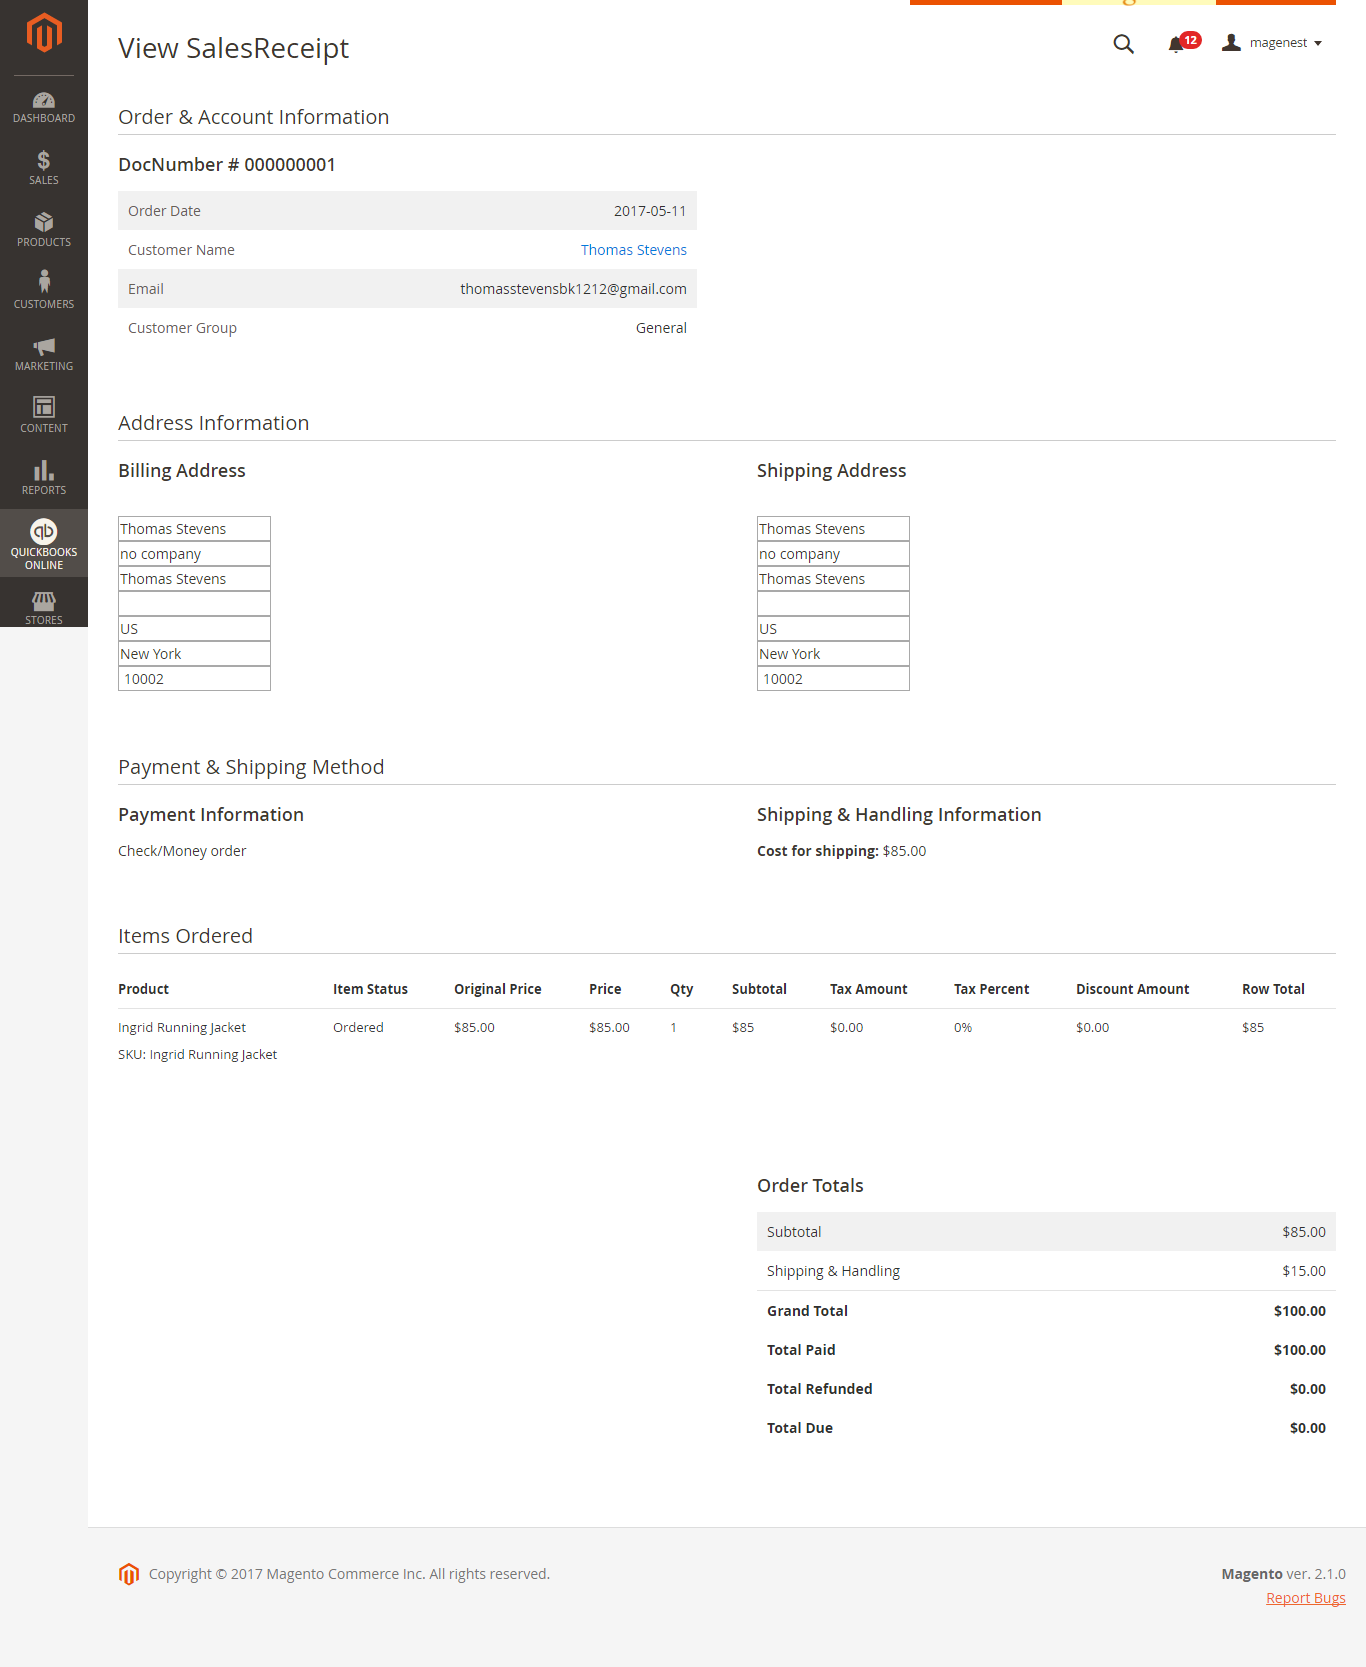
- Sales Receipt:
Follow the two steps below to create a new sale receipt:
(1) Click on Sync All New SalesReceipts button to synchronize sales receipts from your QuickBooks Online account to List Sales Receipt page
(2) Click on Create SalesReceipt button to finish creating.
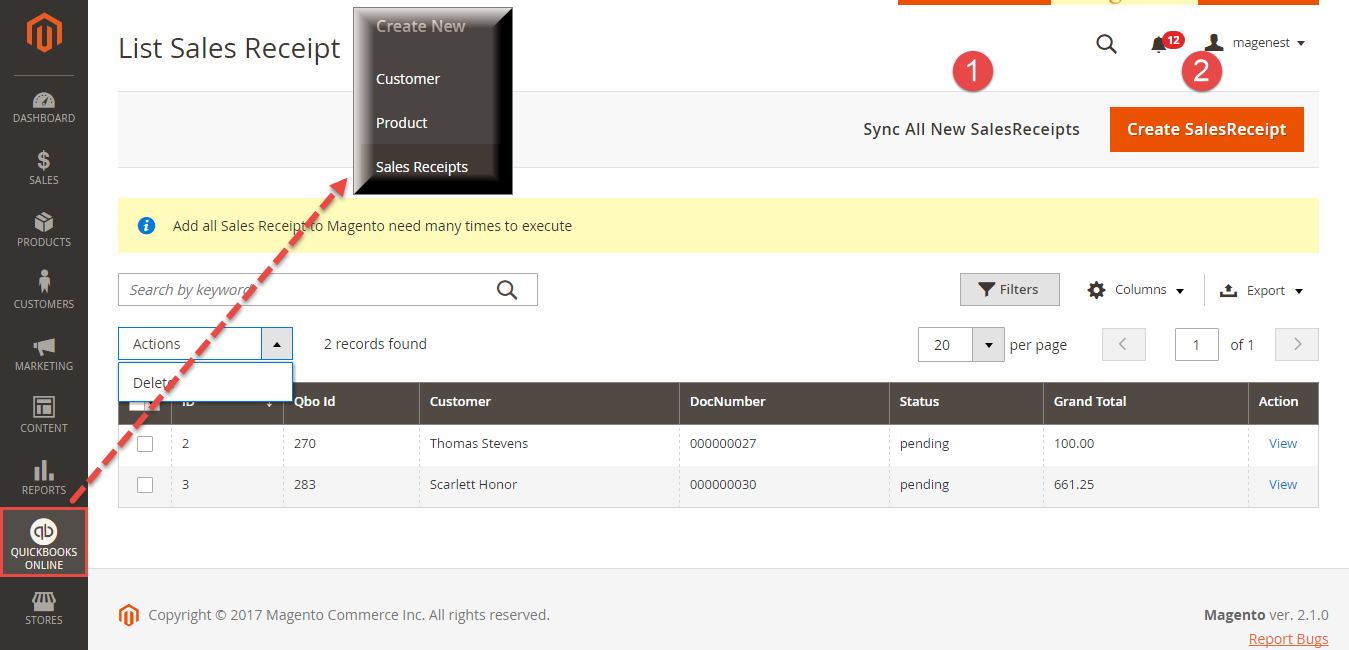
For SalesReceipt, admins can only view it before click on Create Sales Receipt button.
Main Functions
- When a new account is registered in front-end of Magento 2 or an existed customer is updated, QuickBooks Online Integration extension will allow synchronizing this record automatically to
QuickBooks Online and vice versa.
...