...
First of all, you need to integrate Magento 2 store with your QuickBooks Online account.
At backend of Quickbooks Online Integration extension, click on Stores QuickBooks Online Integration > ConnectionConfiguration. The page will appear as follow:
...
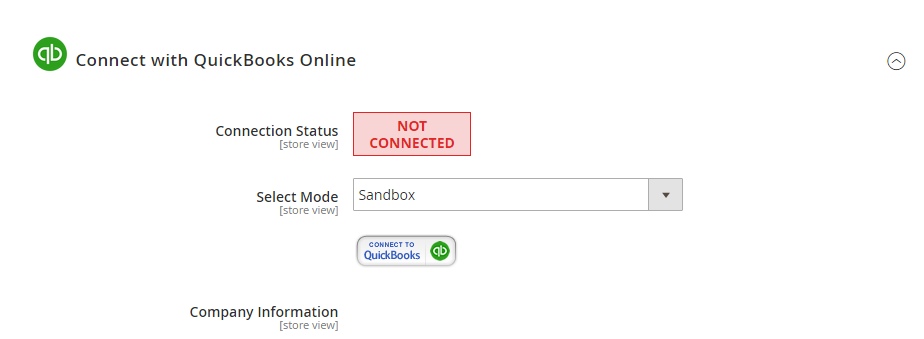
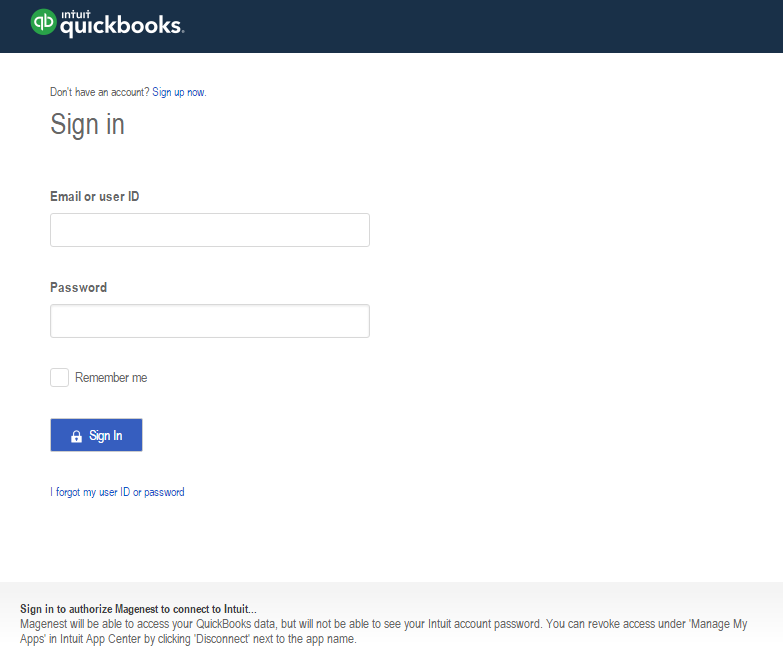
Click on Connect to QuickBooks button. A new page is open. Log in if you already have an account to authenticate users before you can exchange data with it.
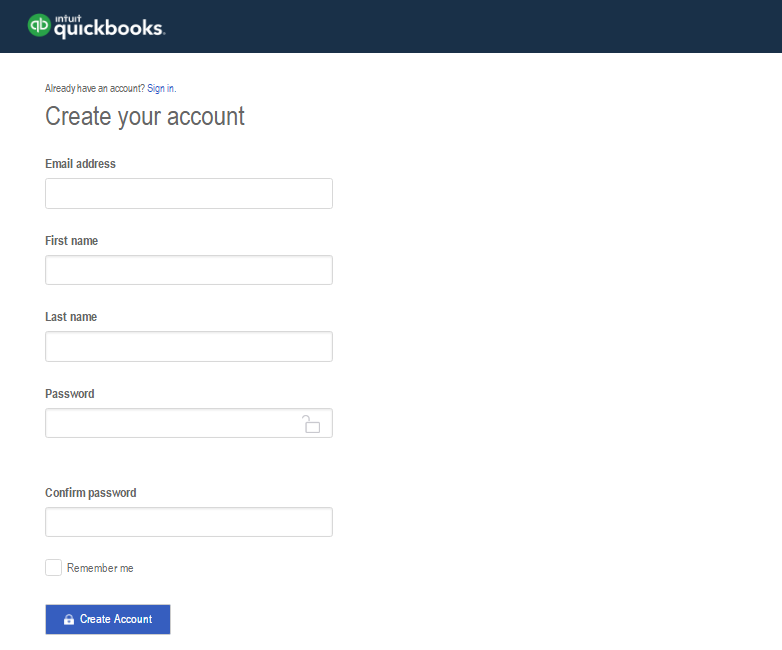
Or sign up to create a new one:
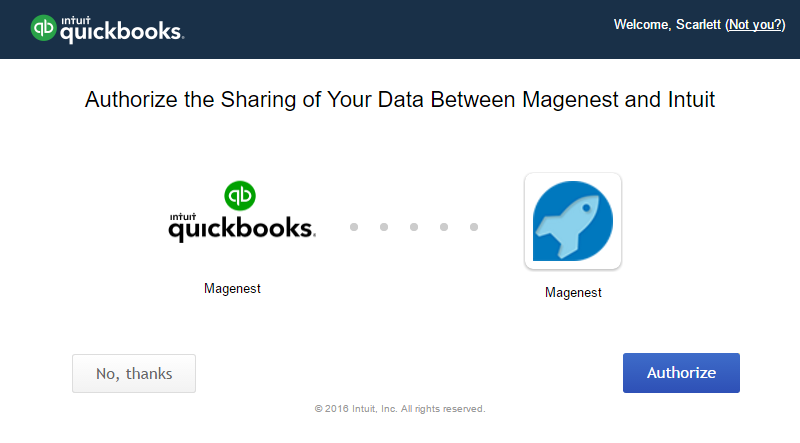
After login QuickBooks Online account successfully, click on Authorize button to finish connection process.
When connecting successfully, the backend page will be displayed as below. Click on Save Config button before continuing, this will help you avoid making the error.

How to synchronize
...
data from Magento 2 store to QuickBooks Online
Synchronization Settings
Admins are able to decide whether to synchronize data in Synchronization Settings tab: Customers, Products(Items in QuickBooks Online), Sale Receipt, Invoices, and Credit Memos. In addition, admins can choose the way to synchronize data either Immediately mode or Cron Job mode.
...
How to synchronizing data from QuickBooks Online to Magento 2 store
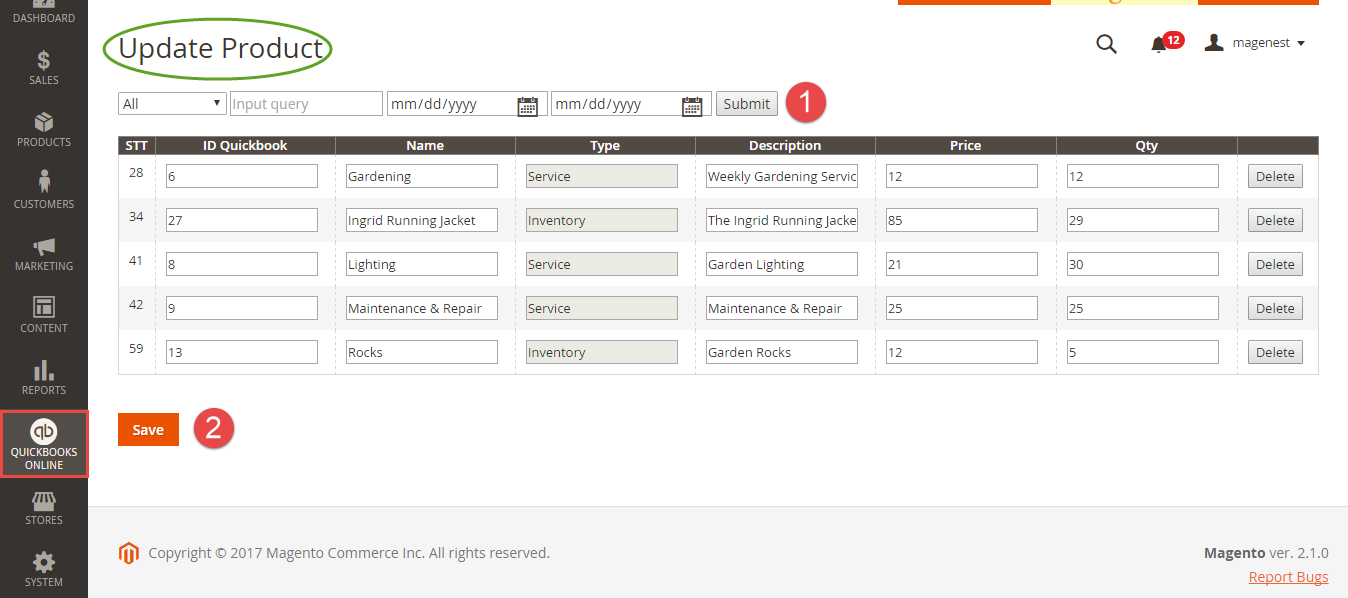
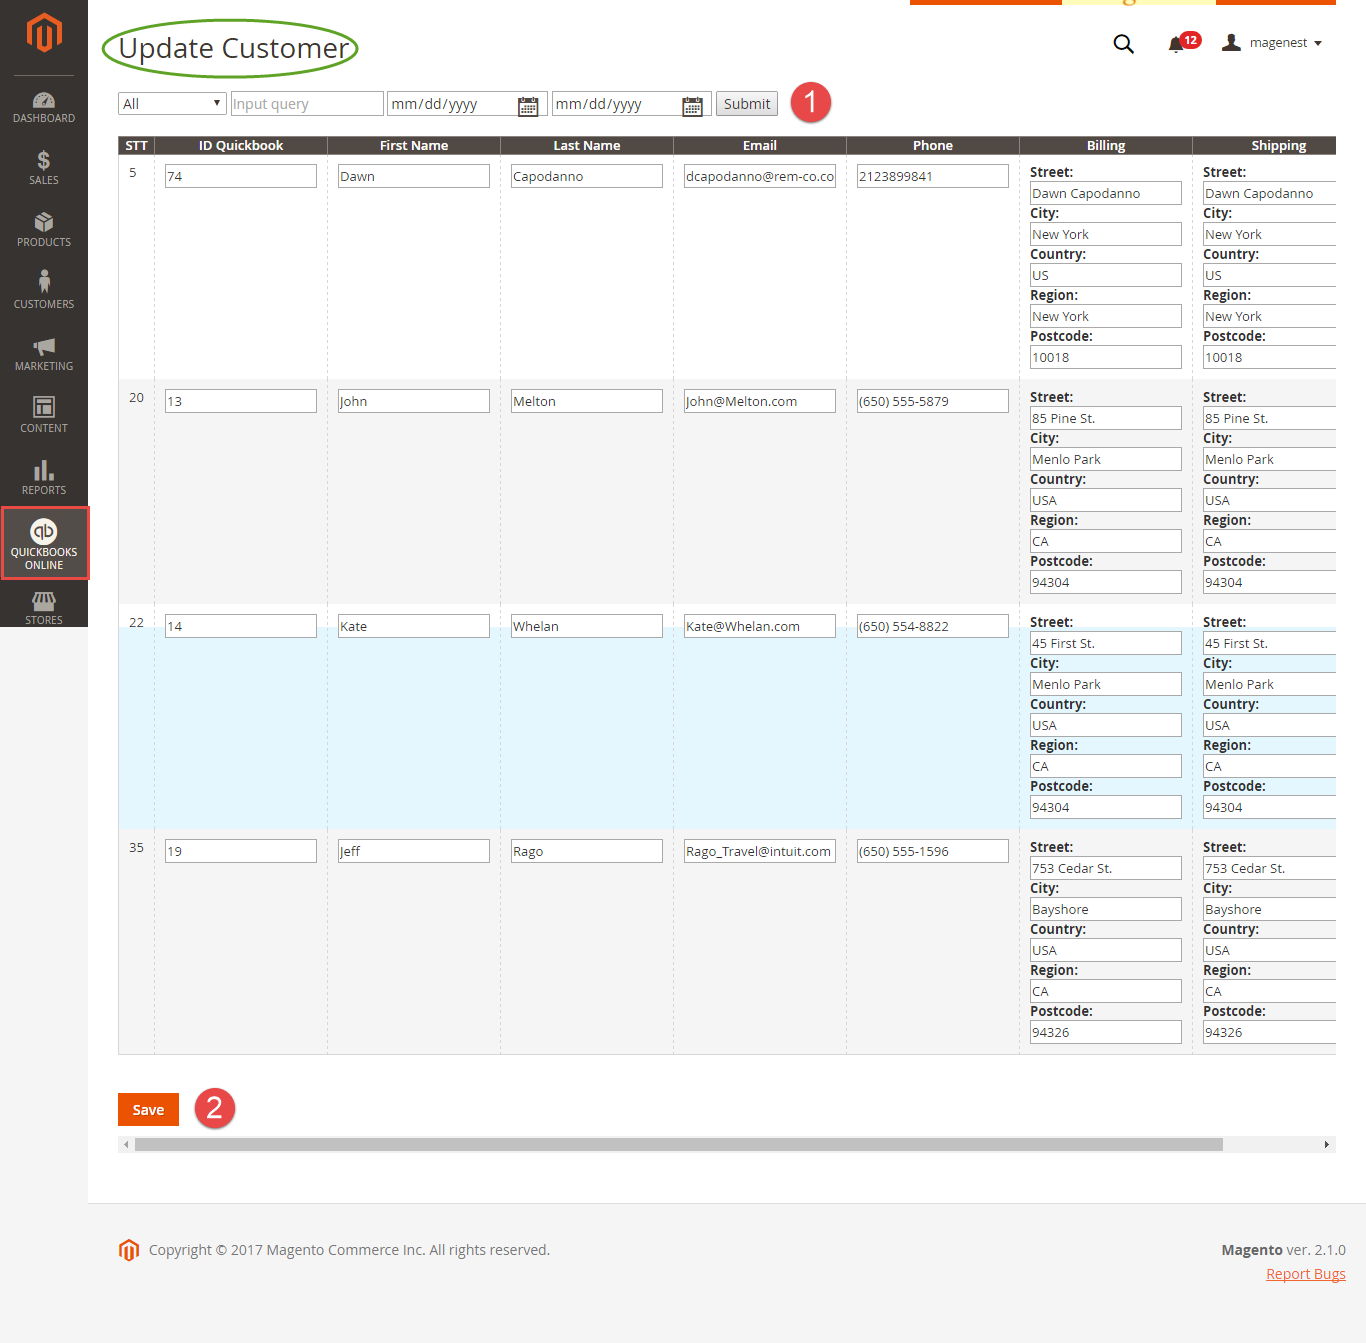
Update
...
the existing database:
- Products:
- Customers:
Create a new
...
database:
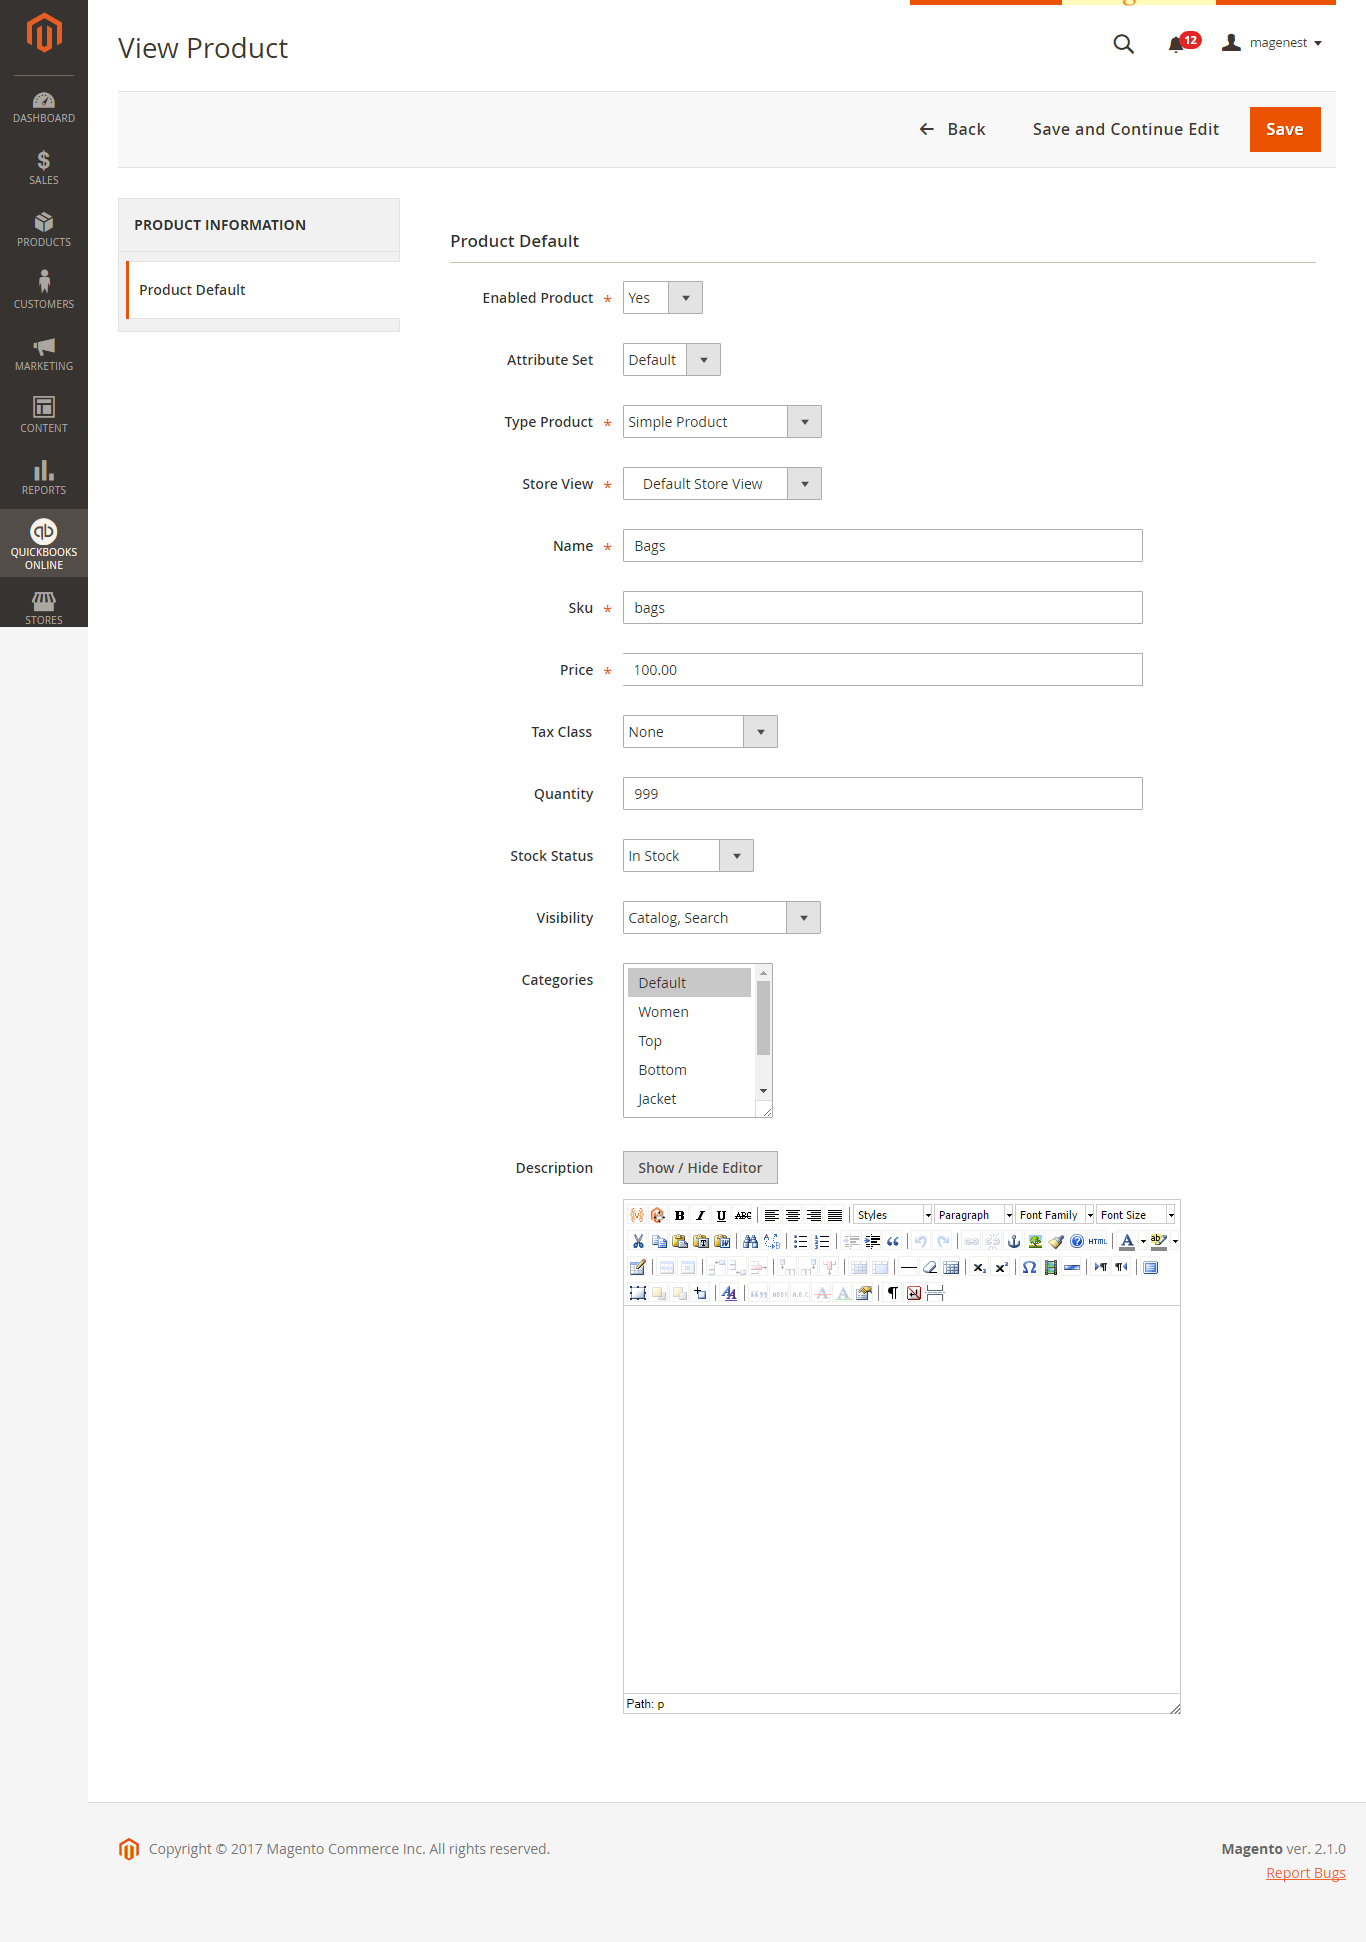
- Products:
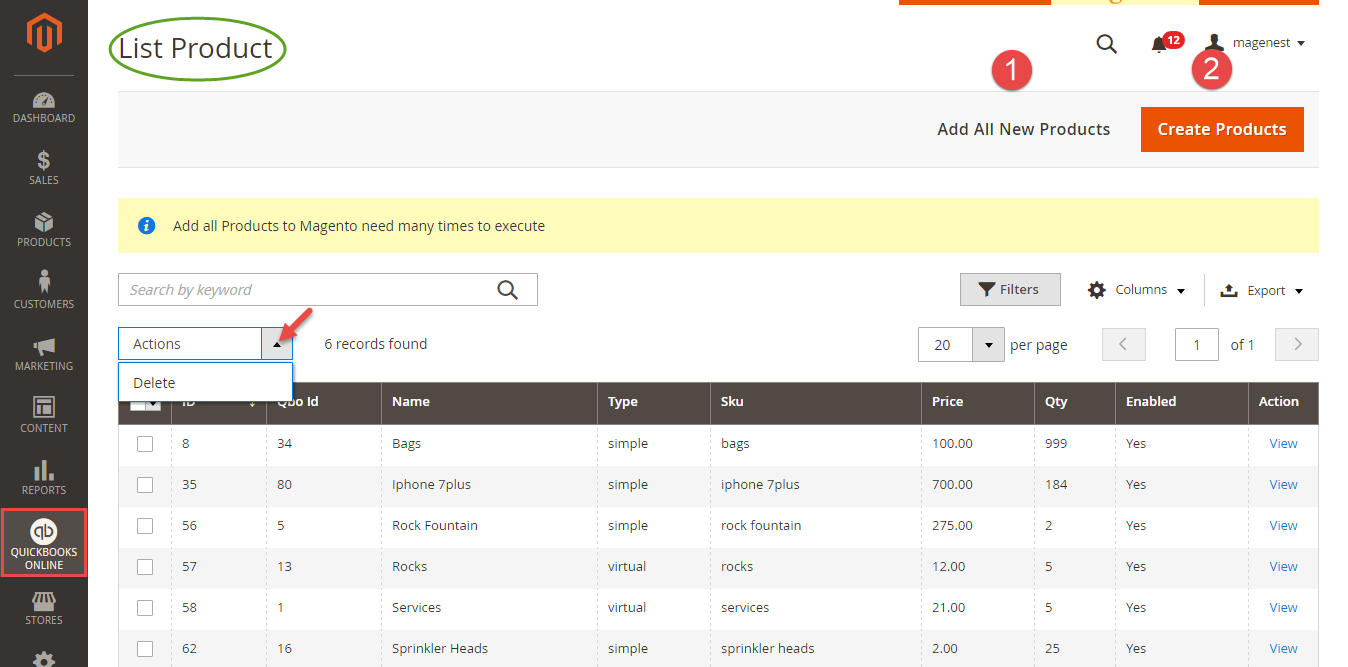
Admins can view and edit products before create a new one on Magento 2 store by synchronizing data from QuickBooks Online:
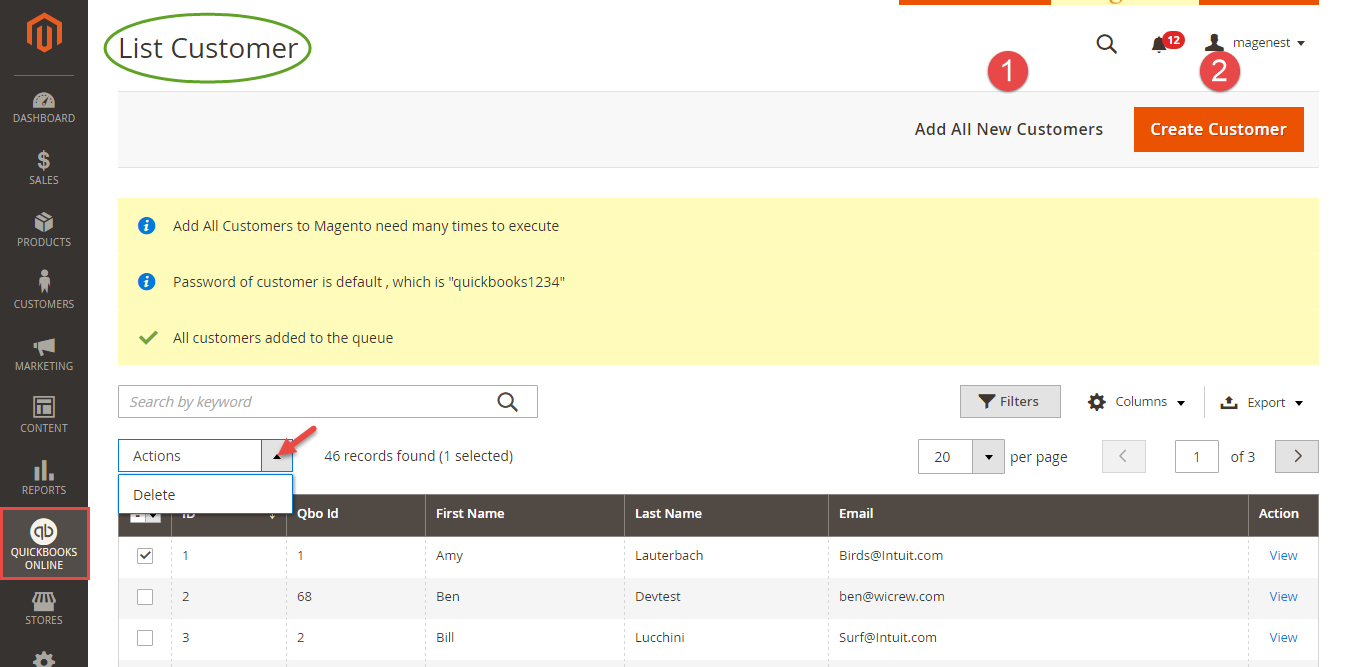
- Customers:
Admins can view and edit a customer before create a new one on Magento 2 store by synchronizing data from QuickBooks Online:
...
Main Functions
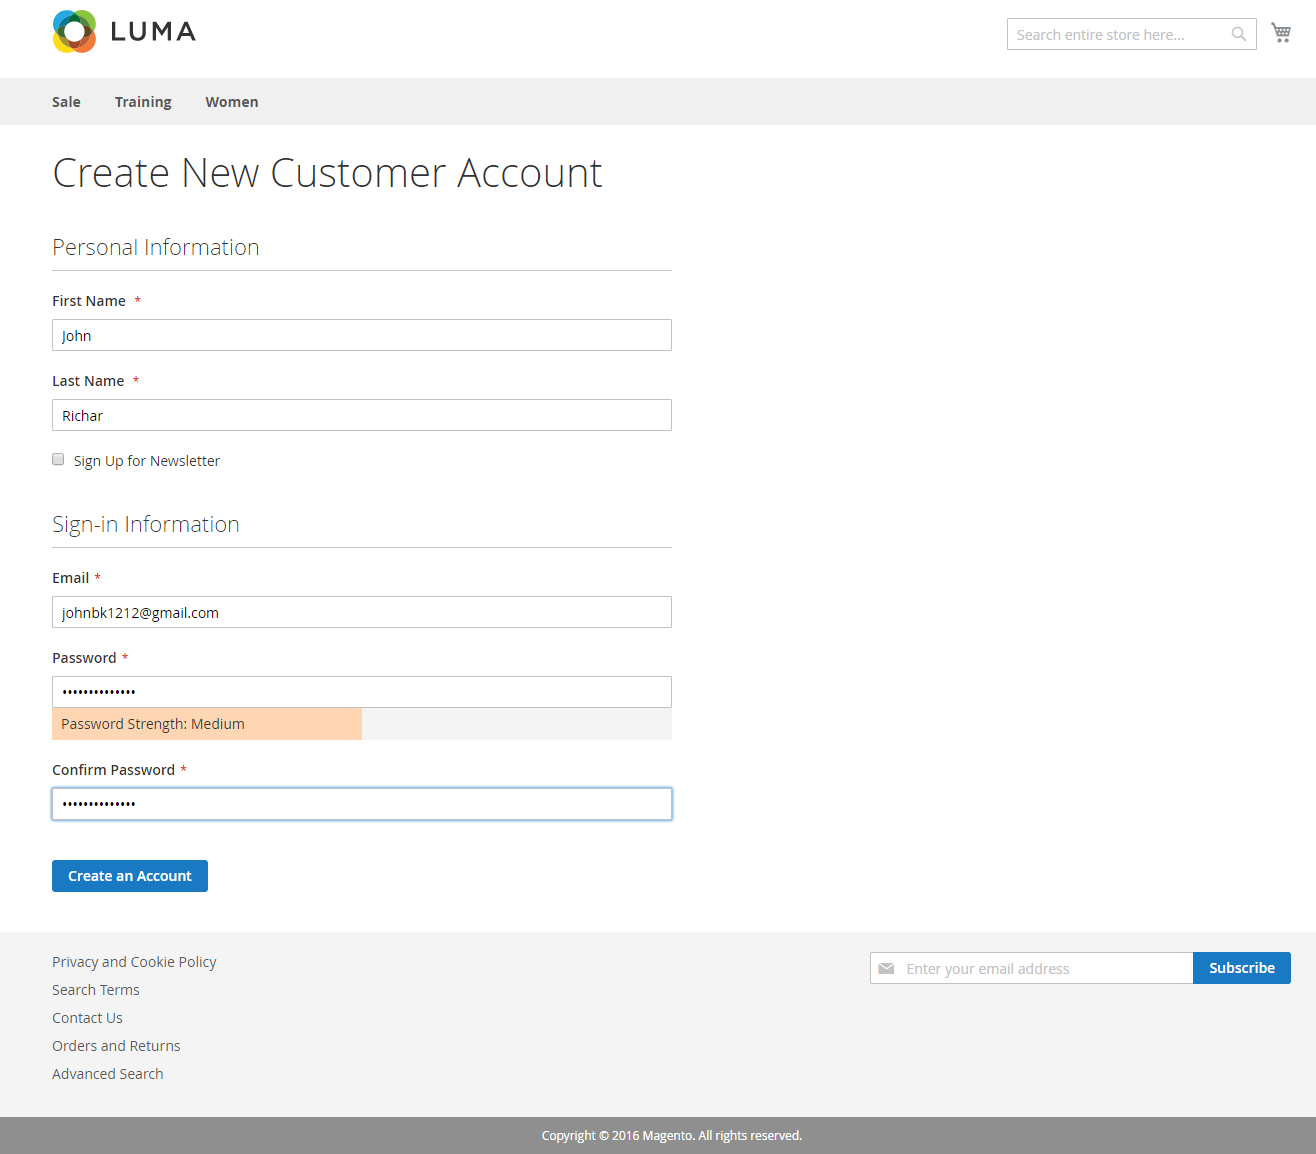
- When a new account is registered in frontend of Magento 2:
Or an existed customer is updated:
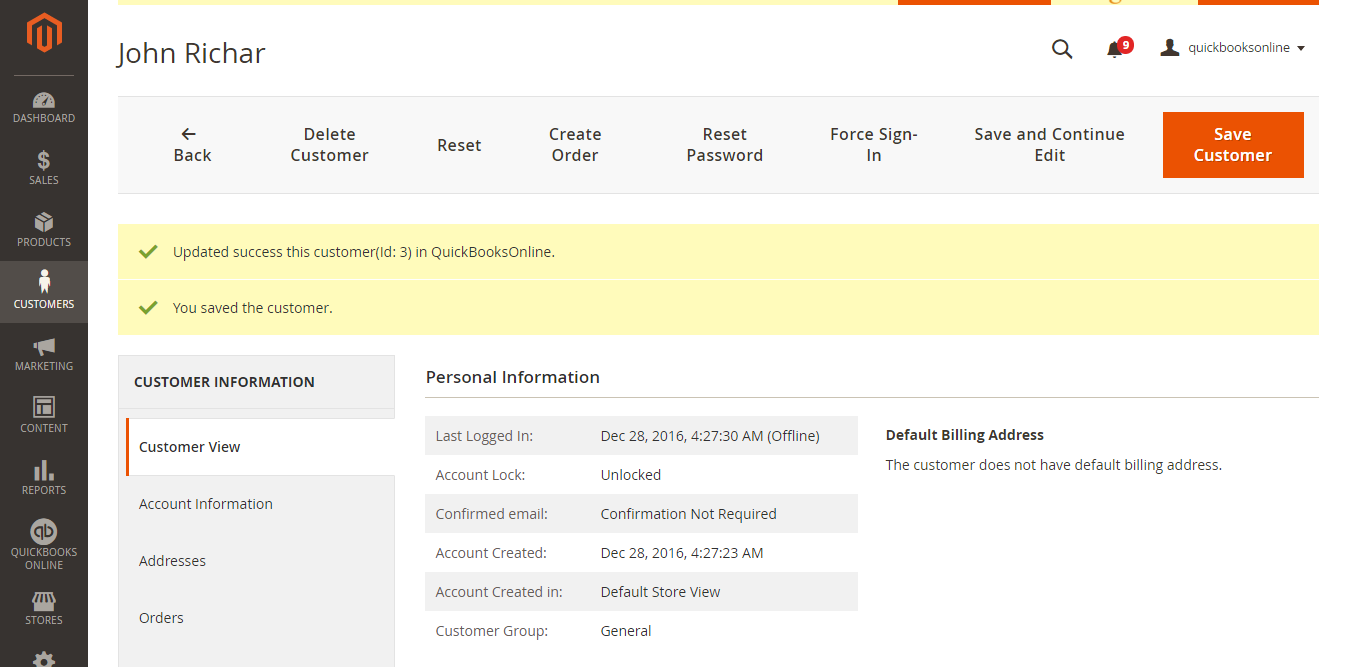
Quickbooks Online Integration extension will allow synchronizing this record automatically to QuickBooks Online.
...