Thank you for purchasing our extension. If you have any questions that are beyond the scope of this document, do not hesitate to leave us an email via our email address below.
Created: 08/02/2017 | By: Magenest | Support Portal: http://servicedesk.izysync.com/servicedesk/customer/portal/63
Introduction
Moneris Payment Gateway extension for Magento 2 by Magenest offers payment services for multiple fields, with industry-specific knowledge that its focus. Moreover, this extension support for various types of payment cards especially with customers in USA and Canada. Each year, Moneris processes over 3 million transactions for more than 350,000 diferrent stores. It proves that Moneris's service quality is very wonderful. You should install it now to use the best features like.
Extension's page: Moneris Payment Gateway
Features For Admins
A lot of features is included in the extension that you can tweak to make it best suit your business, including:
Support credit card payment in USA and Canada.
Enter Store id and API Token
Allowed credit card types.
Choose between Authorize Only or Authorize and Capture.
View order status transaction.
Allowed country.
Order total threshold.
Enable CVC verification.
Features For Customers
The primary aim of the extension is to deliver the most fluent and effortless payment experience to the customers:
Easily checkout using credit card.
- Easy access to online transaction reporting
System Requirements
Your store should be running on Magento 2 Community Edition version 2.1.x.
Configuration
Set up Moneris
![]() If you use a test account
If you use a test account
For the demo, you can create a test account in this sandbox test link.
Next, enter your personal information and set up your online login details. The system will also request you to enter an email address to receive direct notification but don't log in regularly.
Confirm your account by agreeing to Moneris online Terms & Conditions and click on Sign up button.
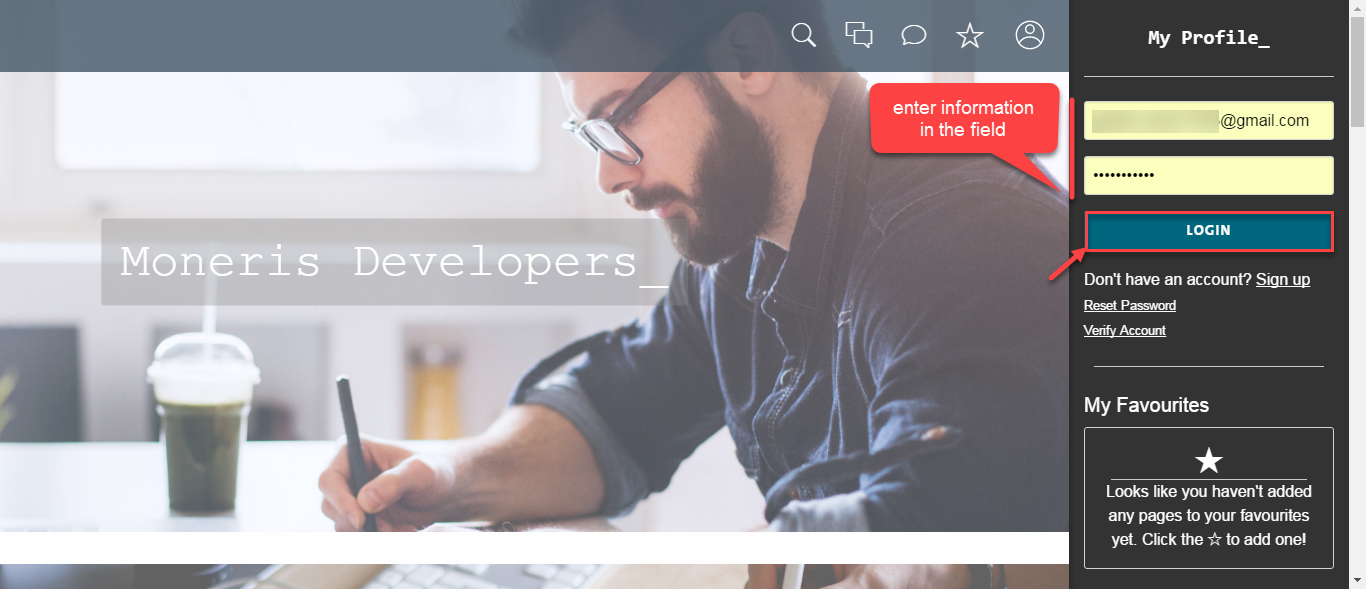
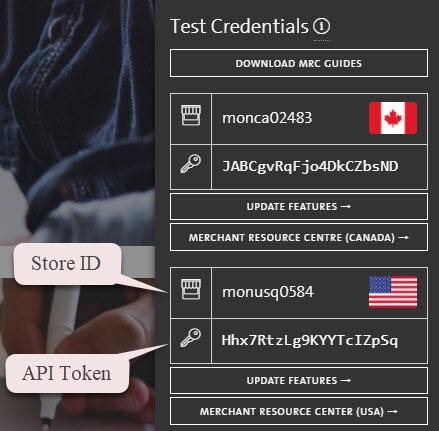
When you log in your Moneris account, request for test credentials (in the US or Canada)
Set Configuration
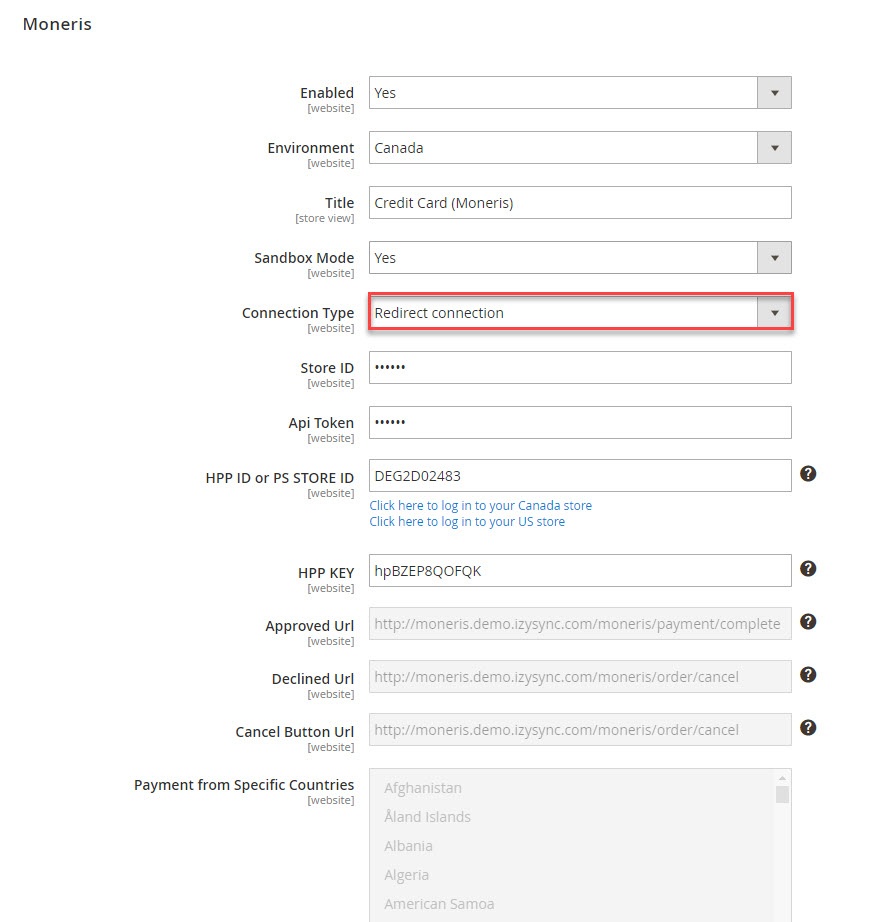
![]() Set up with Redirect Connection:
Set up with Redirect Connection:
![]() In United States Store:
In United States Store:
Log in by Moneris account and click Admin >Hosted Paypage Configuration. There are two elements that you need in order to configure in Magento 2: hpp_id, hpp_key
Or click Generate a New Configuration to create a new key.

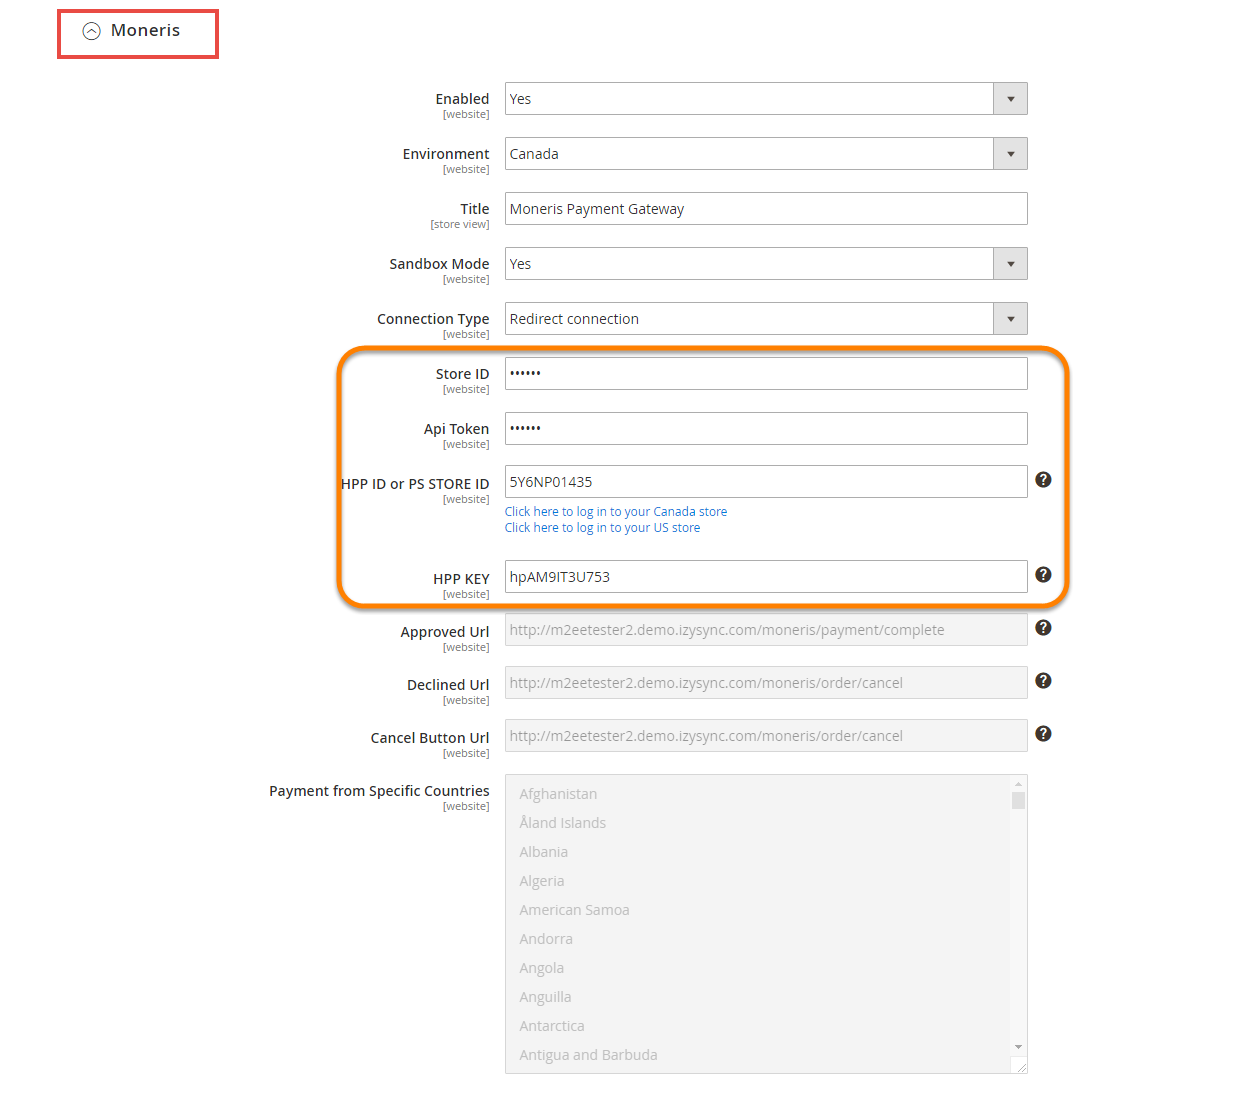
Now you have enough info to configure Moneris in your Magento. In the admin panel of Magento 2, go to Moneris Configuration via Stores > Configuration > Sales > Payment Methods > Moneris
- Enabled: Choose Yes to enable Moneris Payment
- Environment: Choose the United States
- Title: The name of the payment method that will be displayed on the checkout page
- Sandbox Mode: Turn this on if you use the test credentials
- Connection Type: Redirect Connection
- Store ID: Your store ID or test Store ID
- API Token: the API Token you got from Moneris
- HPP ID or PS STORE ID: The hpp_id in the Hosted Paypage Configuration.
- HPP KEY: The hpp_key in the Hosted Paypage Configuration
- Approved URL: Use this URL when you configure your Moneris hosted paypage
- Declined URL: Use this URL when you configure your Moneris hosted paypage
- Cancel Button URL: Use this URL when you configure your Moneris hosted paypage
- Payment from Specific Countries: Select the countries you allow to make payments.
![]() In Canada Store:
In Canada Store:
Log in by Moneris account and click Admin >Hosted Paypage Configuration. There are two elements that you need in order to configure in Magento 2: hpp_id, hpp_key
Or click Generate a New Configuration to create a new key.
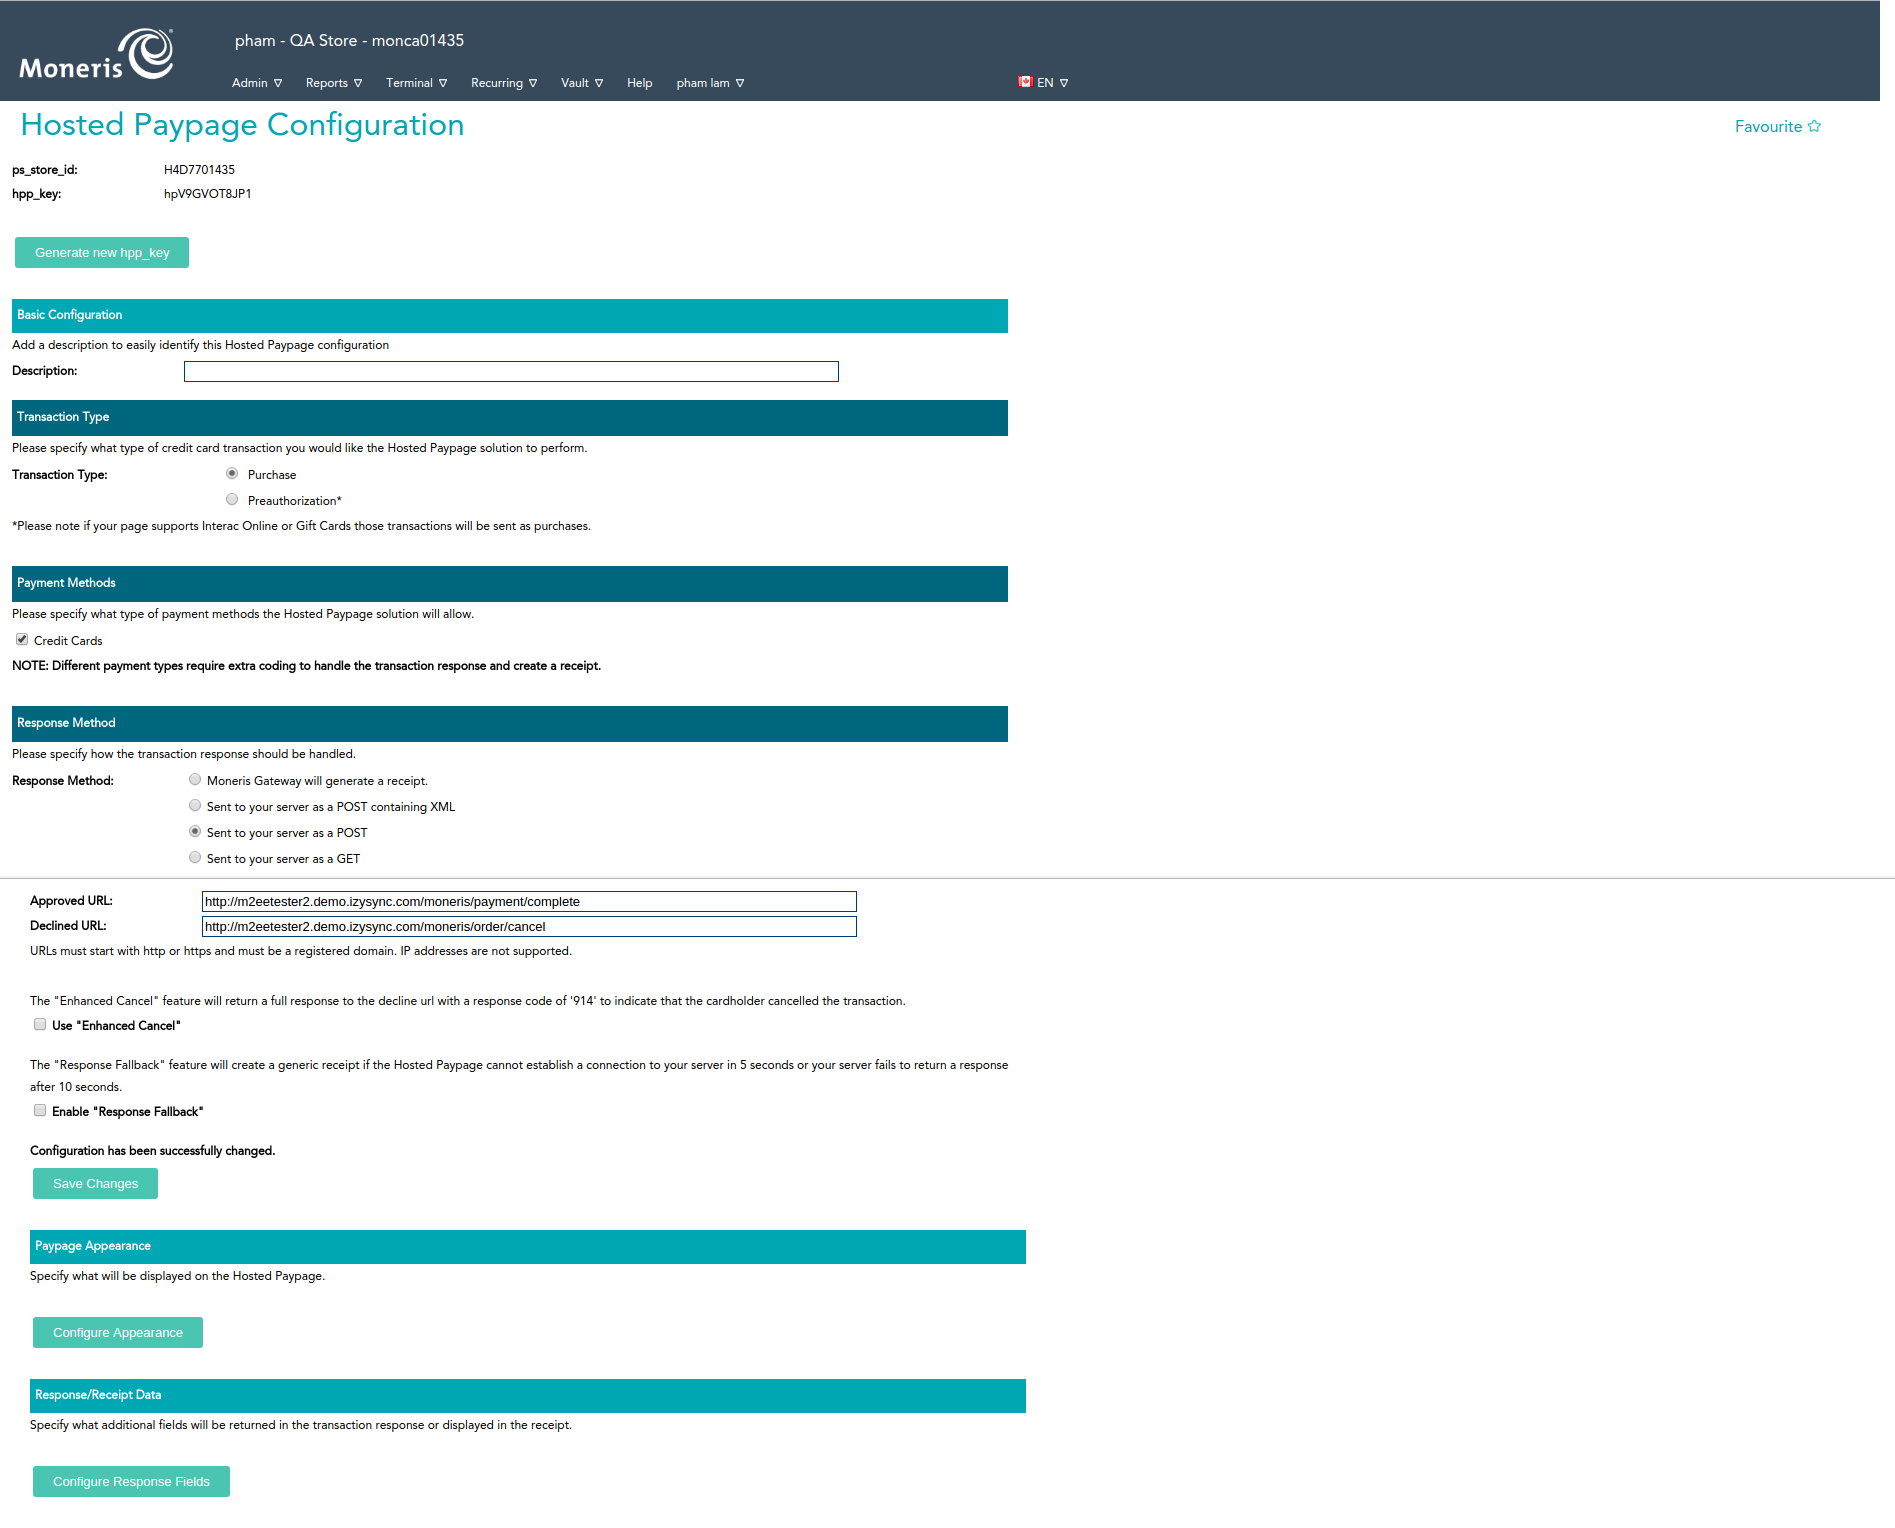

Now you have enough info to configure Moneris in your Magento. In the admin panel of Magento 2, go to Moneris Configuration via Stores > Configuration > Sales > Payment Methods > Moneris
- Enabled: Choose Yes to enable Moneris Payment
- Environment: Choose Canada
- Title: The name of the payment method that will be displayed on the checkout page
- Sandbox Mode: Turn this on if you use the test credentials
- Connection Type: Redirect Connection
- Store ID: Your store ID or test Store ID
- API Token: the API Token you got from Moneris
- HPP ID or PS STORE ID: The hpp_id in the Hosted Paypage Configuration.
- HPP KEY: The hpp_key in the Hosted Paypage Configuration
- Approved URL: Use this URL when you configure your Moneris hosted paypage
- Declined URL: Use this URL when you configure your Moneris hosted paypage
- Cancel Button URL: Use this URL when you configure your Moneris hosted paypage
- Payment from Specific Countries: Select the countries you allow to make payments.
![]() Set up with Direct Connection:
Set up with Direct Connection:
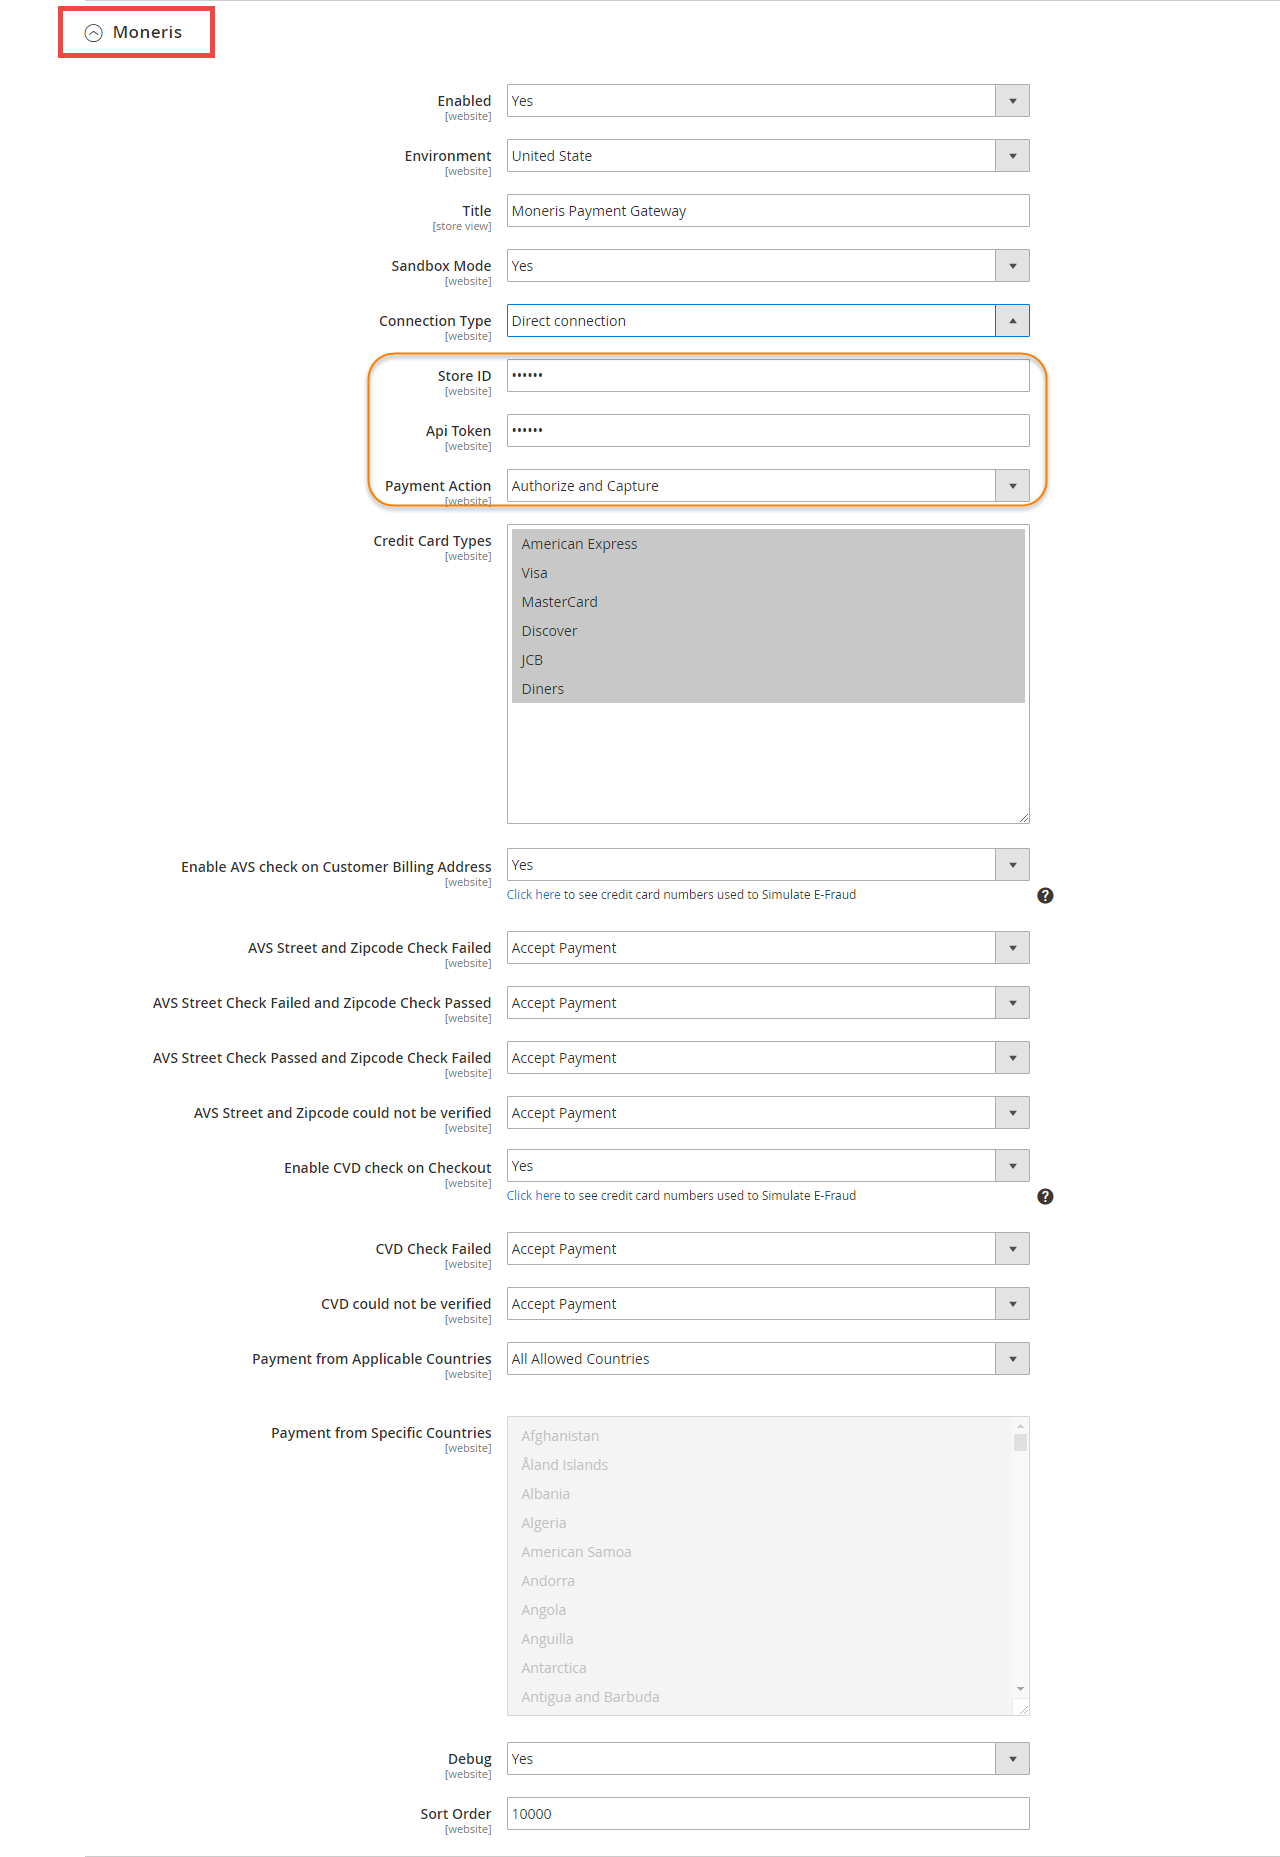
In addition, admin can set information for Title, Sandbox Mode, Store Id, API Token, Environment, Payment Action, Payment from Applicable countries, Sort order. Then, click on Save button.
| Note: |
|---|
| To enter the store id and API token, you get the My Testing Credentials in the exact country you want to install |
Distinguishing between two payment actions Authorize Only and Authorize Capture:
- Authorize only will check the card for validity but not charge the account until the order is approved and invoiced.
- Authorize and capture will charge the debit/credit card at the time of the order submission.
Main Functions
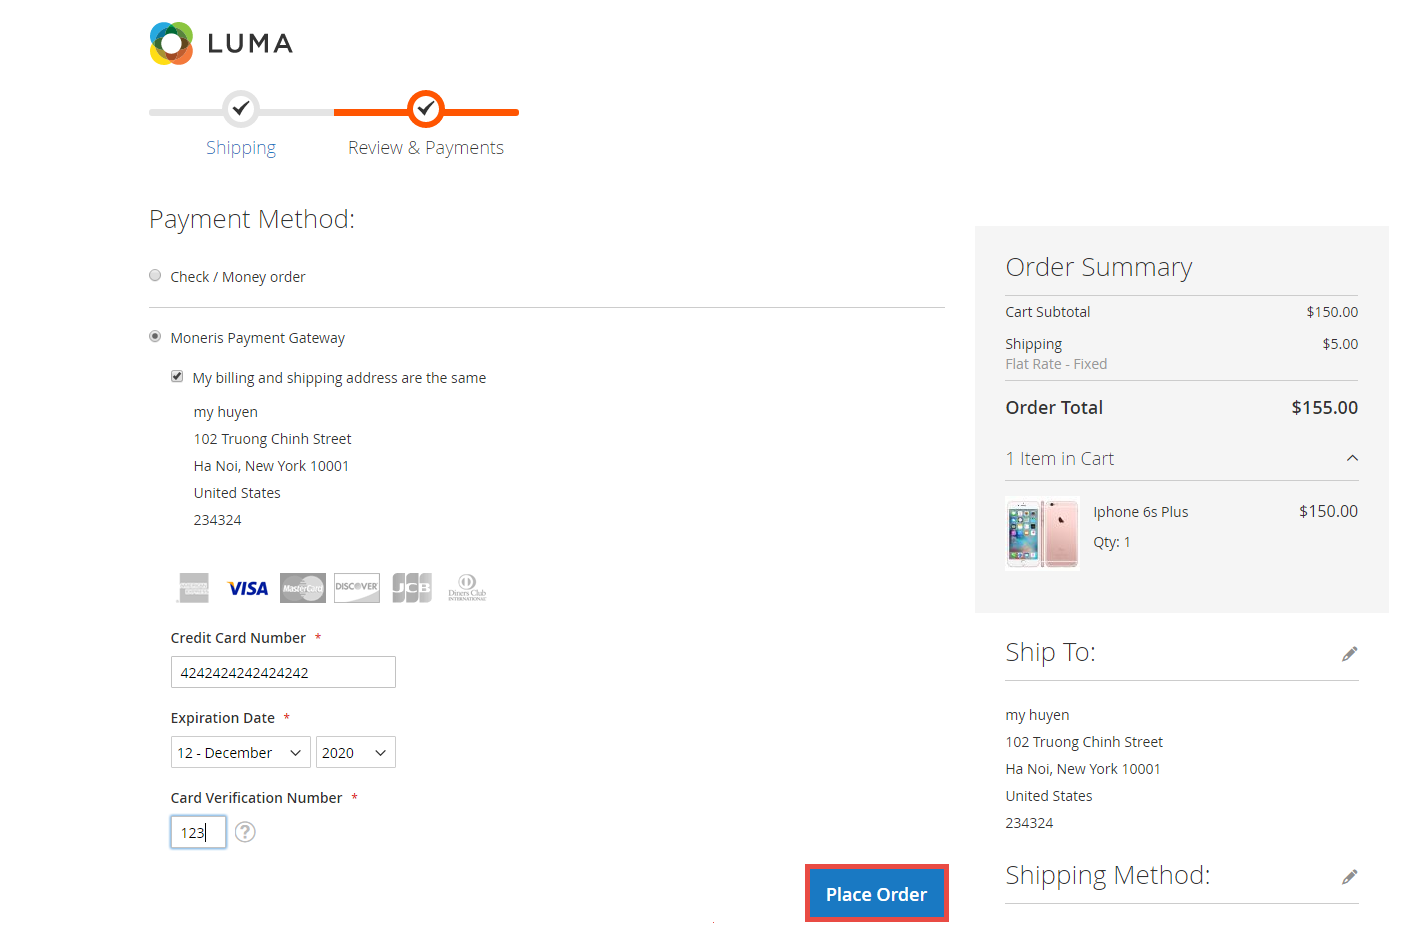
- Easily Checkout Using Credit Card
At the front-end, customer will need to choose an item and click on Add to Cart button.
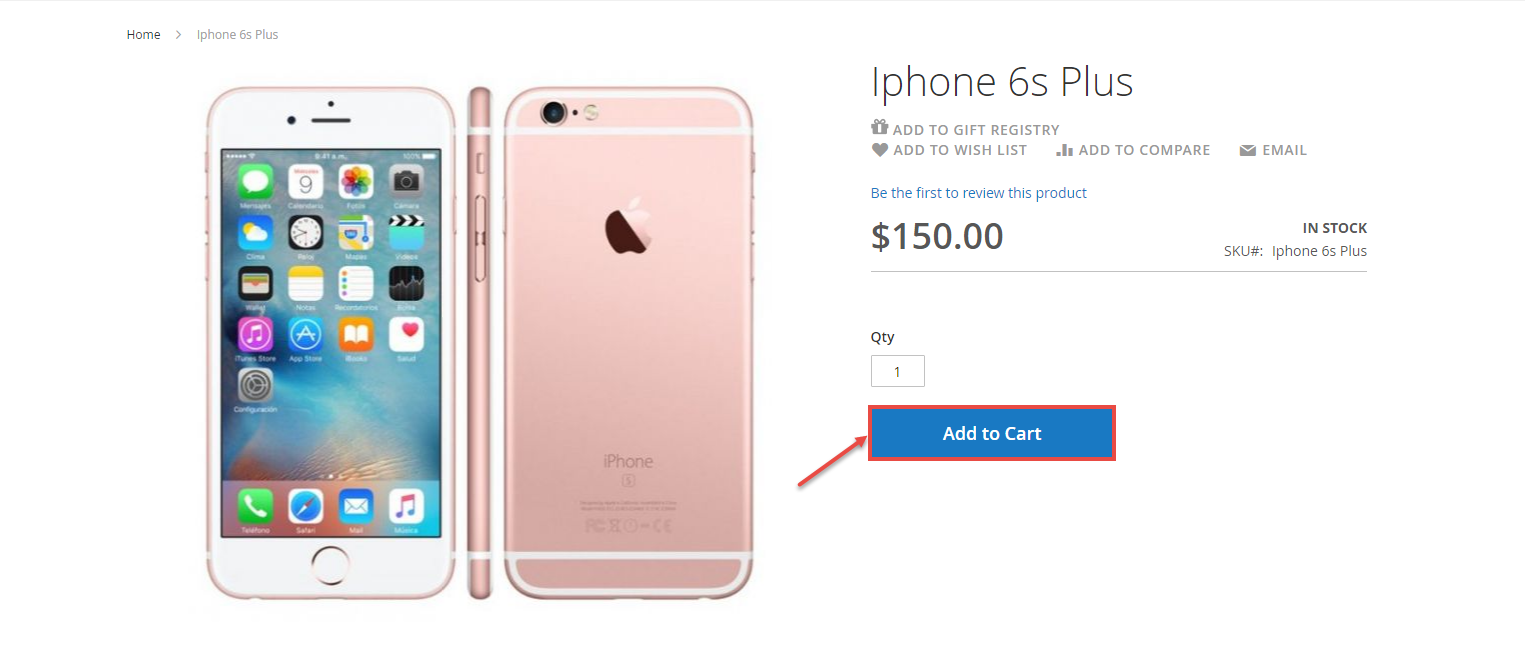
Then, go to checkout and selec Moneris Payment Gateway instead of Check/Money order.
![]() Checkout Direct Connection Method:
Checkout Direct Connection Method:
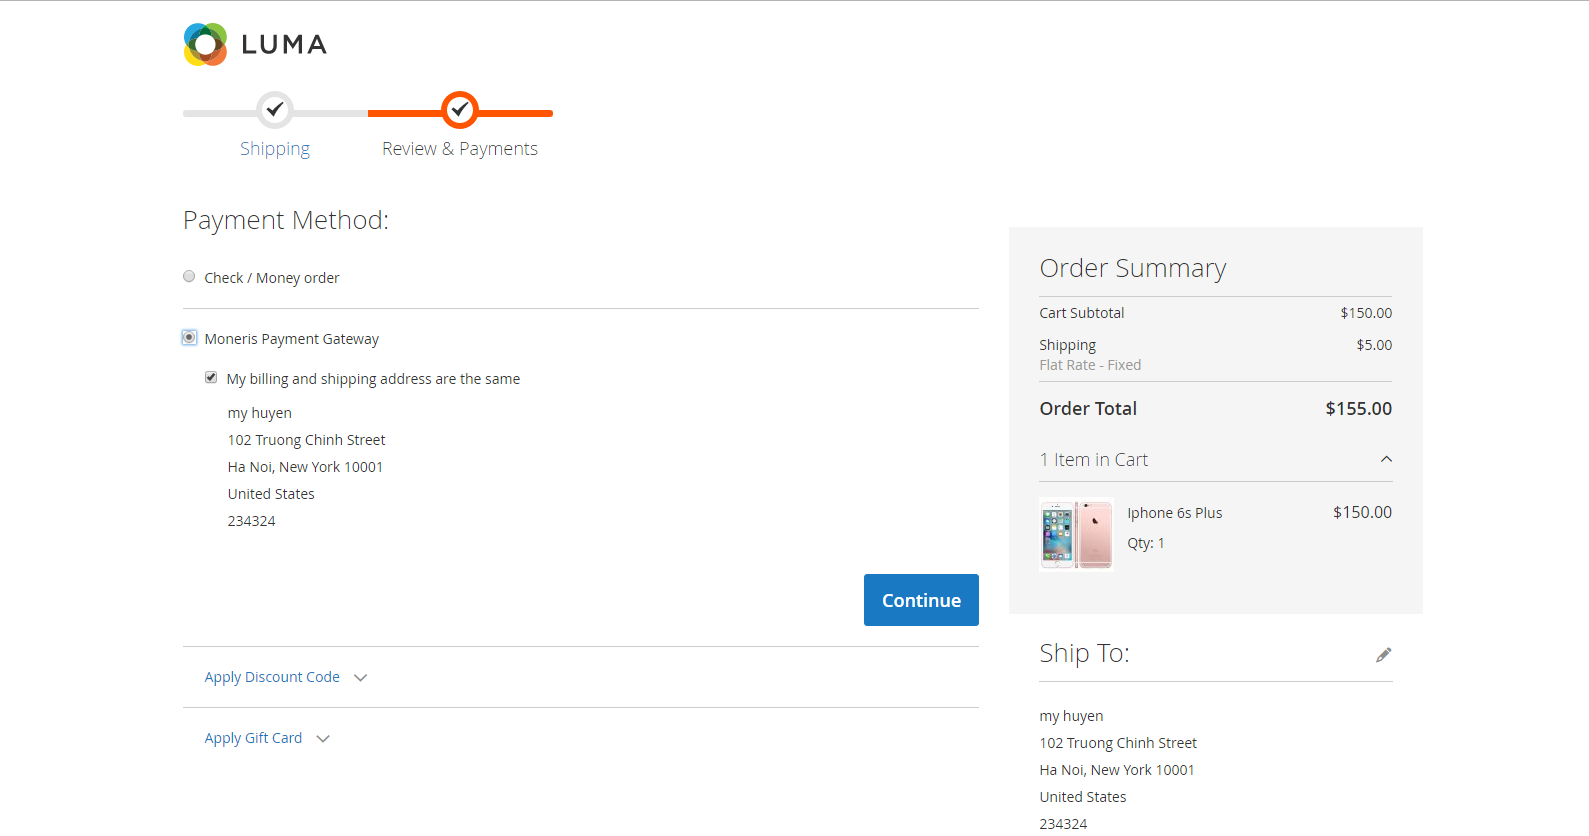
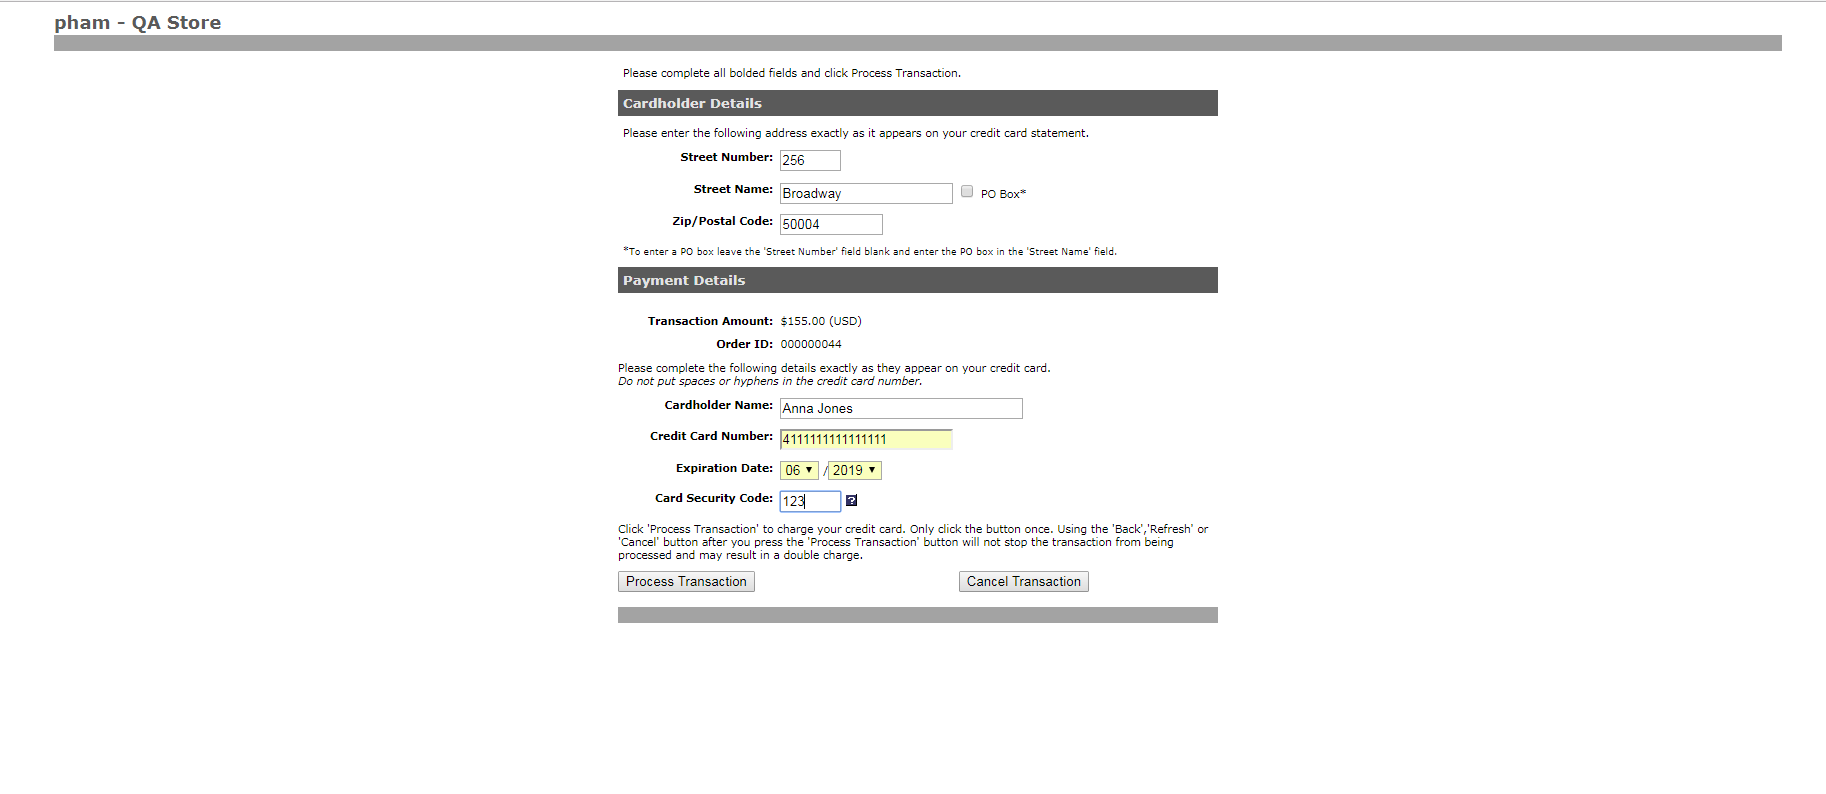
![]() Checkout Redirect Connection Method:
Checkout Redirect Connection Method:
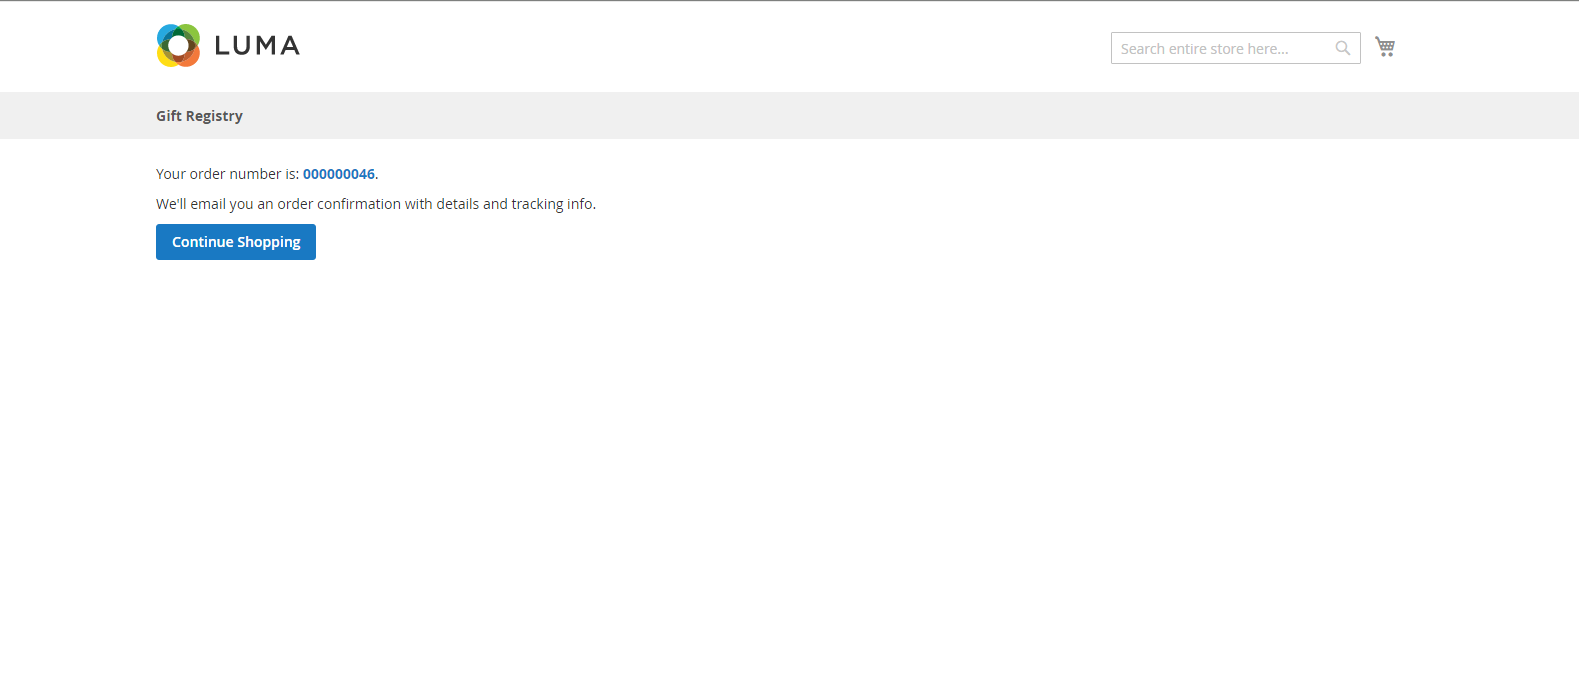
After clicking Place Order, you buy products successfully.Then, you easily access to Transaction Reporting online.
![]()
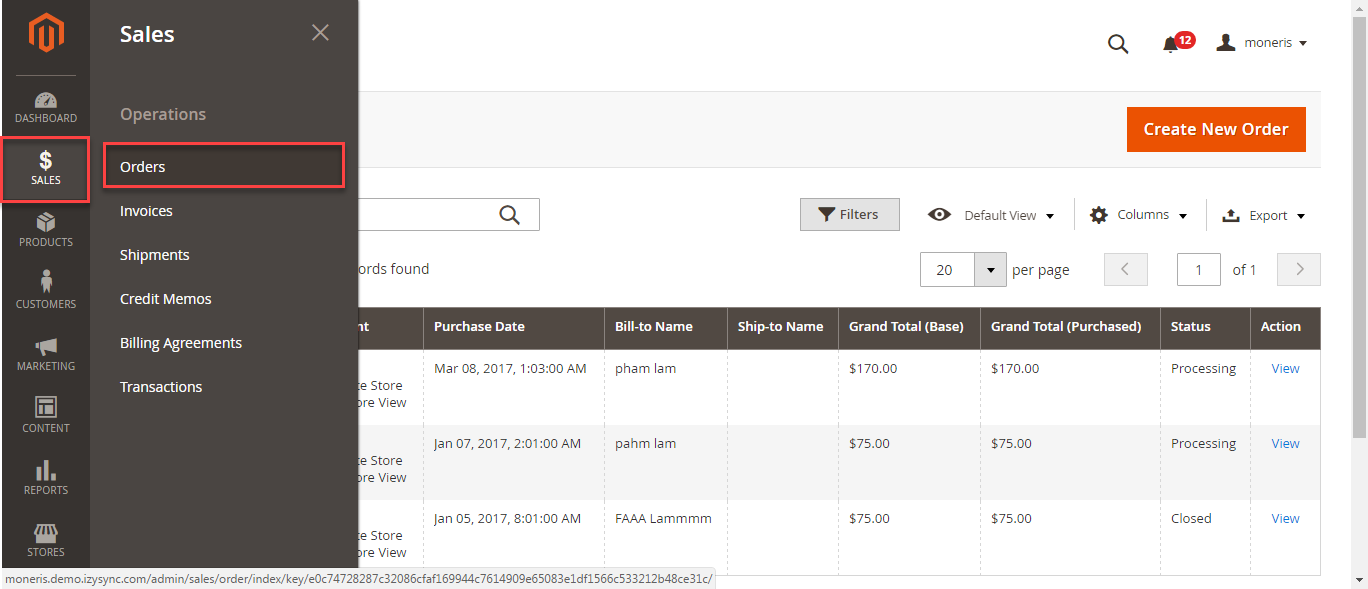
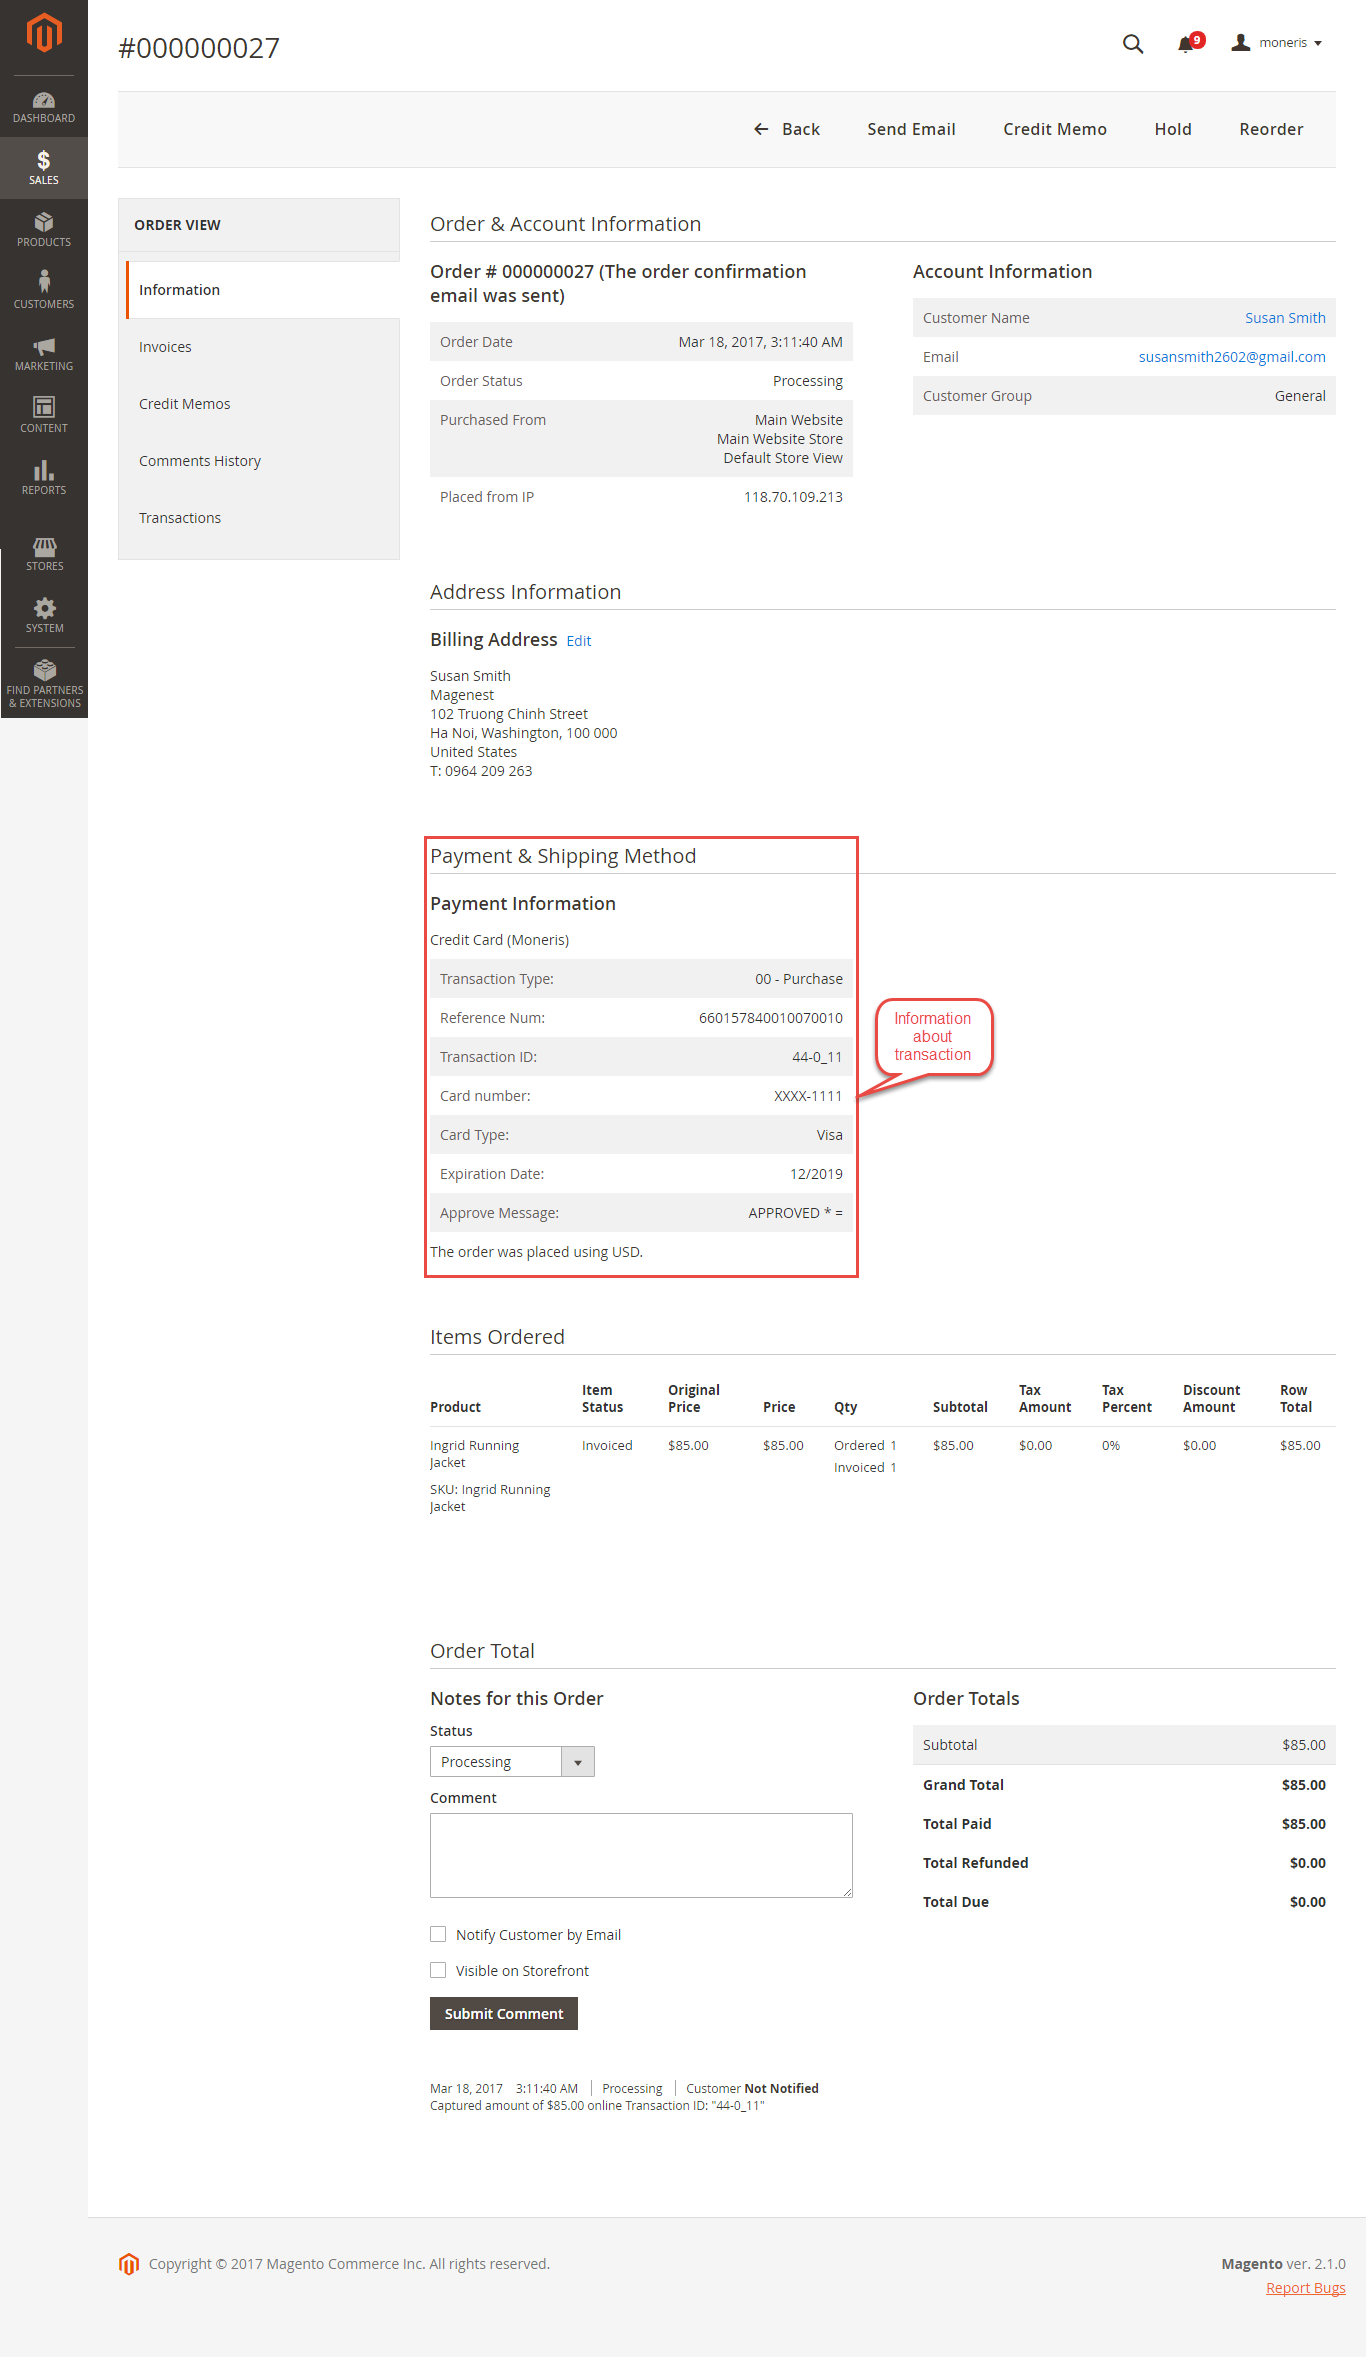
Or go to Backend->Sales->Orders then choose View to view information about an order.
In case, you want to refund your product. You can choose Invoices-> Credit Memo:
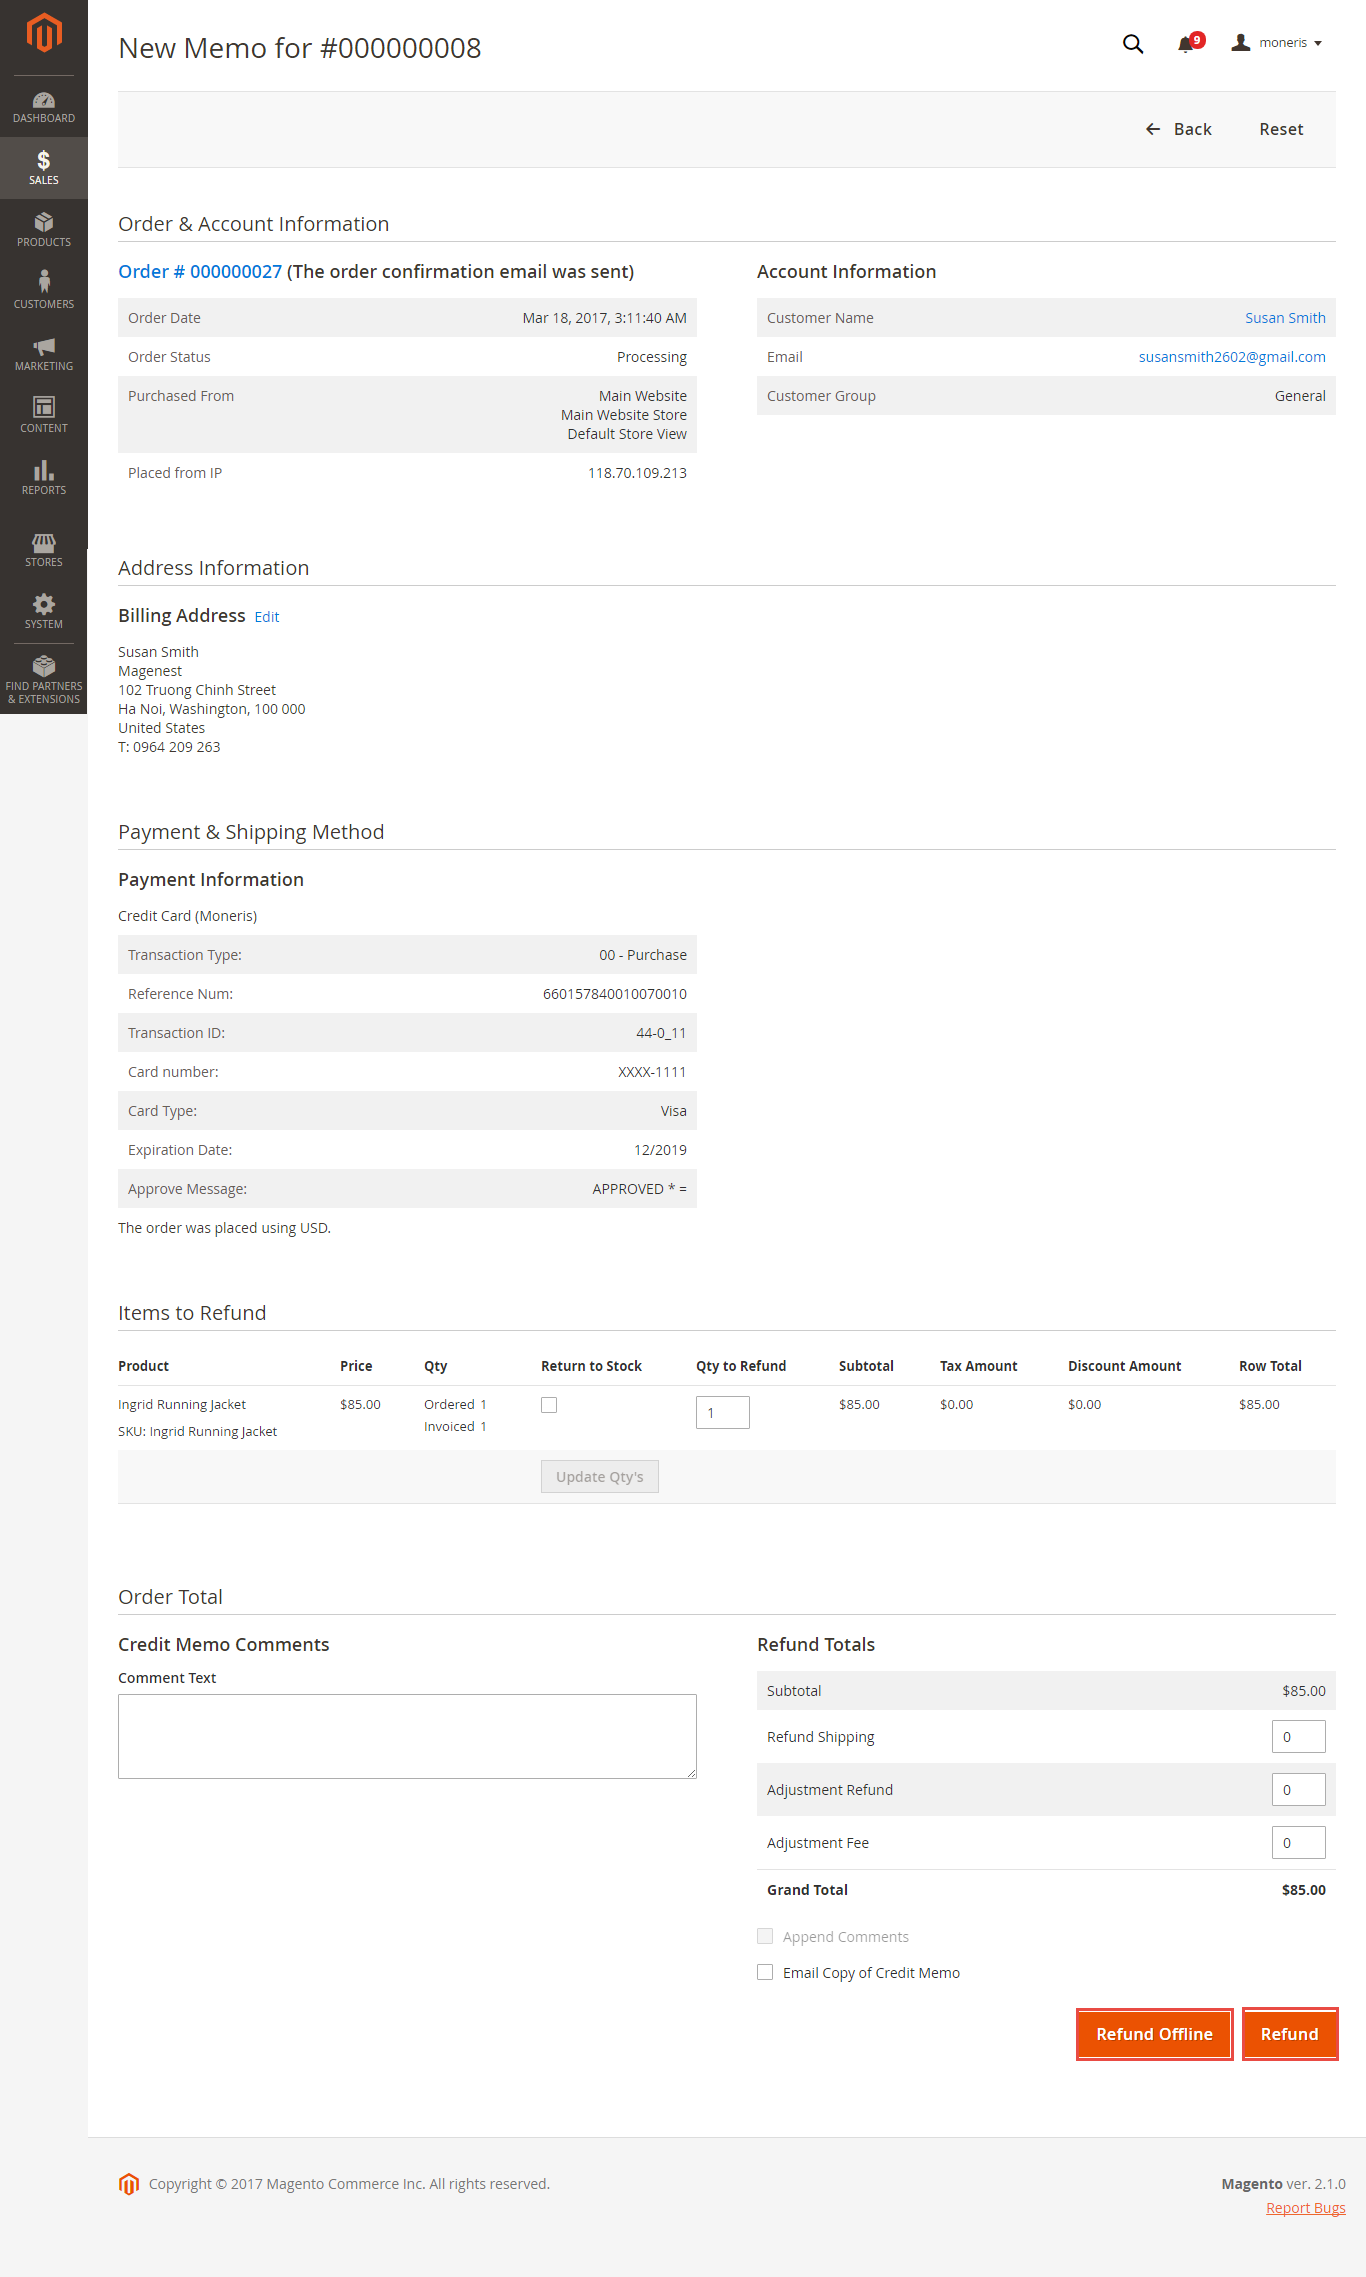
Customers can choose Refund dependent on their request. Click Refund, refund successfully!
Update
- When a new update is available, we will provide you with a new package containing our updated extension.
- You will have to delete the module directory and repeat the installing steps above.
- Flush the config cache. Your store and newly installed module should be working as expected.
Support
- We will reply to support requests within 2 business days.
- We will offer lifetime free update and 6 months free support for all of our paid products. Support includes answering questions related to our products, bug/error fixing to make sure our products fit well in your site exactly like our demo.
- Support DOES NOT include other series such as customizing our products, installation and uninstallation service.
Once again, thank you for purchasing our extension. If you have any questions relating to this extension, please do not hesitate to contact us for support.